I know most of you are just dying to see pictures of the finished kitchen — but unfortunately we’re still waiting for the butcher block island counter to be installed, as well as a few other odds and ends.
And since I really don’t want to show “after” pictures until the kitchen is totally finished, I’m just going to continue sharing bits and pieces of our newly renovated kitchen… sorry.
In case you missed it, I shared the details of our new kitchen appliances last week, and I let you look through all our kitchen drawers two weeks ago.
This week, I’m giving you a tour of our kitchen cabinets!
But first, I want to quickly share my friend Katie’s newly organized kitchen with you. She blogs over at Kitchen Stewardship and during the month of October, she’s running a series call “Organizing in October“.
Last week, Nora and I went to visit Katie and her kiddos and I gave her a few tips and pointers. Then she got to work and did some crazy kitchen organizing. If you want to be inspired by another real-life kitchen… go check our her blog!
OK, back to our kitchen…
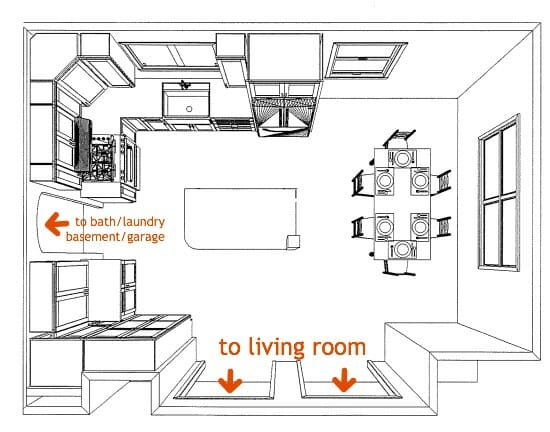
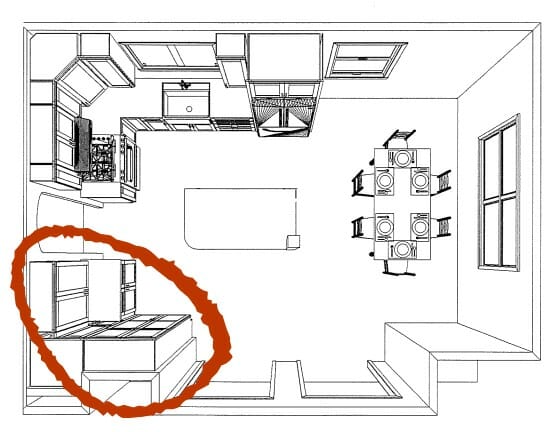
To put things in perspective, here is an aerial view of our kitchen so you can see how things fit together.
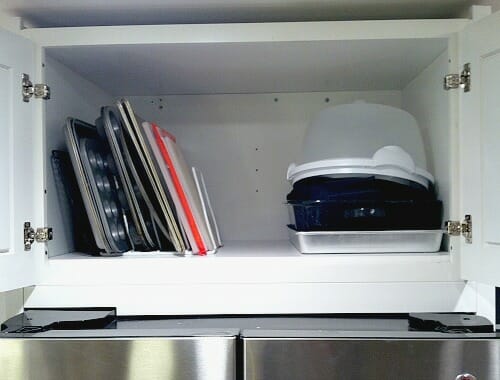
I’ll start with the cabinets above the refrigerator.
These cabinets are 24″ deep so they almost come to the front of the refrigerator. They definitely are not the most easily accessible cabinets in our kitchen, so I’m using the right side of this cabinet for items I don’t use everyday {travel cake carrier, travel 9″x13″ carrier, etc.} Then I’m using the left side to vertically stack cookie sheets, muffin tins, cutting boards, and pizza pans.
I do keep the cutting board I use all the time out on the counter, but the rest of the items are easy enough for me to reach when needed.
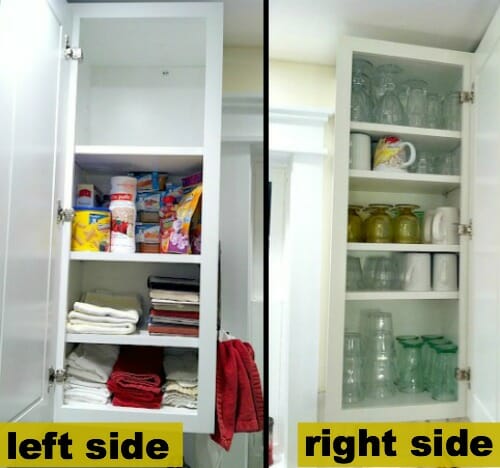
The upper cabinets on each side of the sink.
The cabinet to the right of the sink has ALL our glasses and mugs 🙂
The cabinet to the left of the sink has kitchen towels and washcloths on the bottom 2 shelves, food for Nora on the next shelf, and the top shelf is empty.
I’m thinking the top shelf will eventually be used for baby bottles whenever we have our next baby (no rush though… I like having empty shelves!)
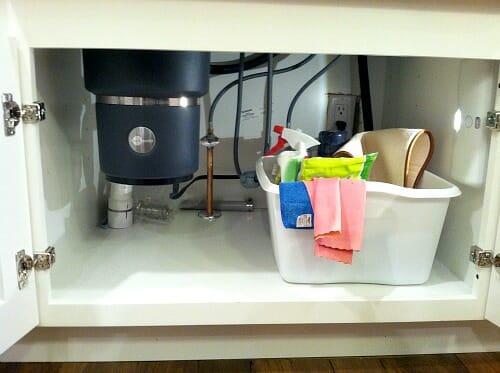
Cabinets below the sink.
This is a pretty boring cabinet as we don’t have a lot of extra space under there. With our extra deep sink, plumbing pipes, and garbage disposal, we basically only have room for our plastic dishpan which contains our kitchen cleaning supplies.
Oh, and notice how nicely lit this cabinet is — thanks to my in-cabinet lights 🙂
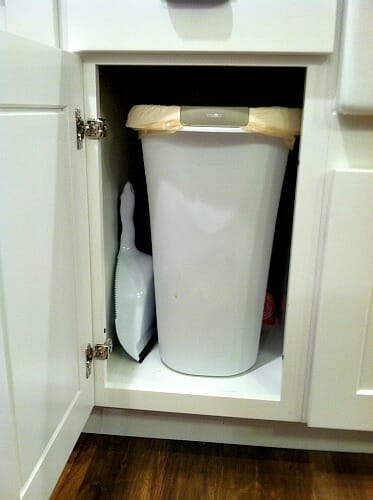
Lower cabinet to the left of the sink.
This cabinet is equally boring because it just holds our garbage can, extra trash bags, a dust pan, and hand broom.
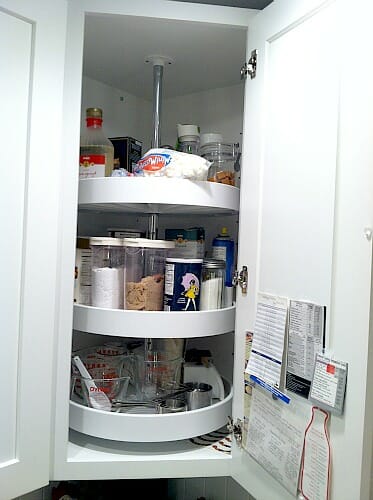
Upper corner cabinet.
I’m so excited about this cabinet — because it has 3 built-in Lazy-Susans so I can easily reach everything — even the stuff on the top “shelf”.
To be perfectly honest, the Lazy-Susans actually end up wasting quite a bit of space since there’s a big pole running through the middle, and the back corners are empty. However, the space I do have is SO much easier to access, thanks to the spinning shelves.
I keep many of my baking supplies in this cabinet, and just love how easy it is to find whatever I need without having to dig to the very back of a super deep cabinet. Oh, and if you’re wondering what those papers are on the door — they are different baking “cheat sheets” — like how to substitute ingredients, measurement conversions, etc. I refer to them ALL the time.
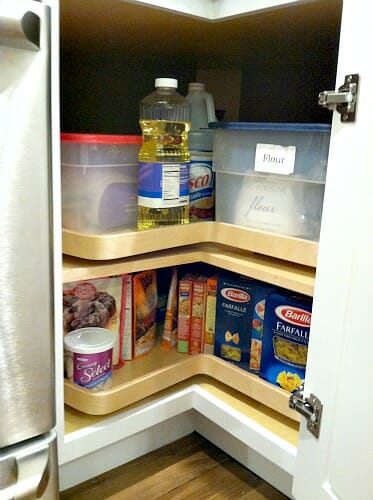
Lower corner cabinet.
Since we have a Lazy-Susan in the corner of our upper cabinets, it only makes sense to have one for our lower cabinets as well. Our Lazy-Susan is only about 1/2 full right now and mostly just contains food — flour, sugar, bulk baking supplies, oils, vinegar, pasta, rice, etc.
There’s a chance I might change this… but for now it’s working just fine.
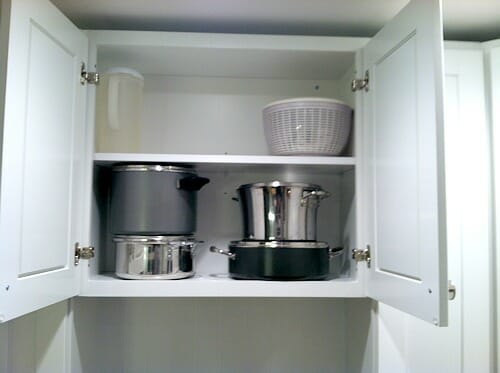
Cabinets above the stove.
Often times, a microwave would go above the stove — but for some reason, I really don’t like the microwave above the stove (and thankfully, Dave doesn’t care where it goes!)
Because we don’t have our microwave above the stove, we have room for taller cabinets — as well as a lot more space for cooking.
I’m taking advantage of the extra space up there and storing some of our larger stock pots, our salad spinner (which I don’t use that often) and tall juice pitchers.
Upper cabinets on each side of the stove.
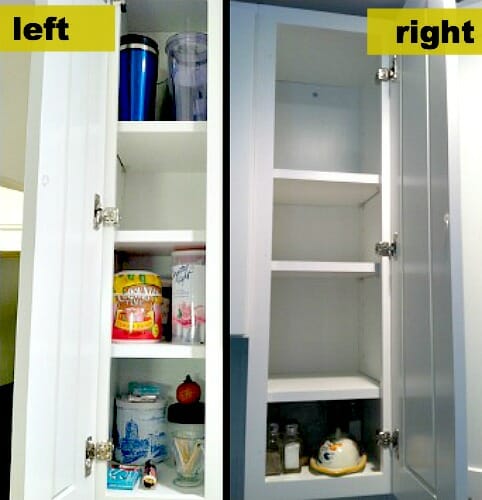
These cabinet are quite narrow — but due to the layout of our kitchen, we really didn’t have any way around that. Plus, as you can see by the pictures below, we really don’t NEED this space!
The cabinet to the right of the stove has salt, pepper, and butter on the bottom… and the rest of the cabinet is completely empty. I’m sure I’ll fill it with something at some point.
The cabinet to the left of the stove has gum and candy on the bottom shelf, drink mixes (Crystal Light, Country Time, Hot Chocolate, etc) on the next shelf and then a few extra water bottles on the top shelf.
Lower cabinet to the left of the stove.
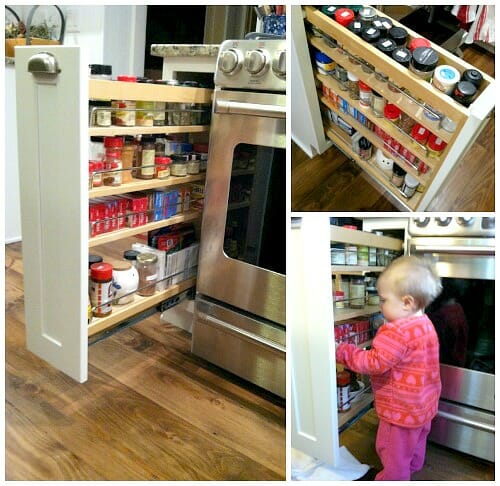
This is another custom cabinet that I’m pretty excited about. It’s a pull-out cabinet that works perfectly for storing small jars of spices, herbs, seasonings, Jello, pudding, salt, pepper, etc.
And yes, Nora loves playing in this cabinet 🙂
OK, so that’s basically the “kitchen” side of things. But we still have a lot more cabinets left to look through!
If you look at the birds-eye image again, you’ll see that we have a large “pantry/storage” area that’s almost all floor-to-ceiling cabinets.
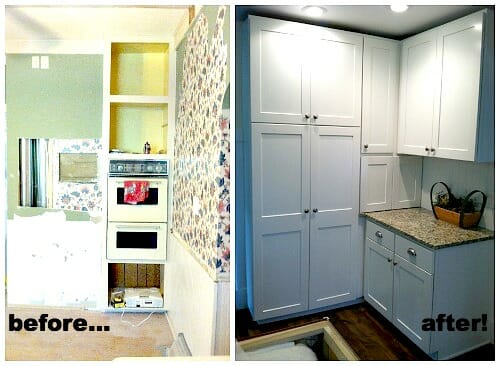
Before we renovated our kitchen, there was absolutely NOTHING in this corner except our built-in oven. Talk about wasted space!!
Because of some heating ducts and our chimney, the walls are a little weird in that corner, but thankfully, we were able to work around the walls and create a huge amount of storage extra space in our our new kitchen.
Here’s a front “before & after” view of that same corner so you can see what I’m talking about 🙂
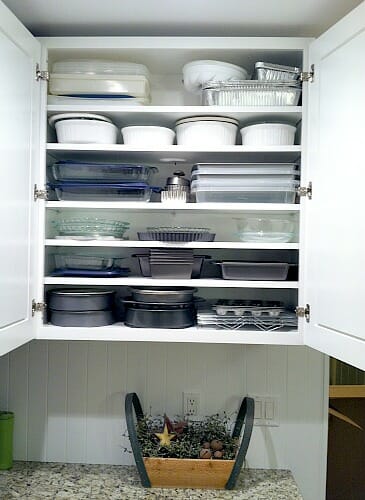
I’ll start with the upper cabinets above the counter.
Due to a mess-up with our pantry cabinet shelves, we ended up with a couple extra shelves for this cabinet — and I’m putting them ALL to good use!
I’m using this cabinet to store all my cake/brownie pans, bread pans, casserole dishes, pie plates, and other bakeware.
In our old kitchen, I had everything stacked or “nested” so it was really difficult to access. But by putting these shelves really close together, I’m able to easily accomodate all my pans without having to stack them.
And if you’re wondering how I access the pans at the top — we have a small step stool 🙂
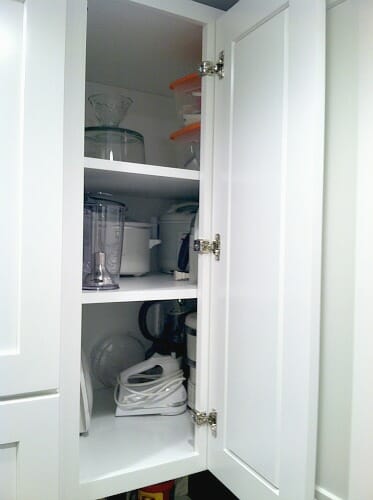
Upper “corner” cabinet.
Due to the crazy walls that I was telling you about earlier, this corner cabinet is less than ideal — but it’s significantly better than what was there, so I’m not complaining.
We use this cabinet to store most of our small appliances {immersion blender, waffle maker, George Foreman, food processor, steamer, coffee grinder, etc.) I also put some of my serving platters on the top shelf (which was completely empty)
We still have tons of extra space in this cabinet, but since it’s not the most convenient storage, I figured empty space is OK.
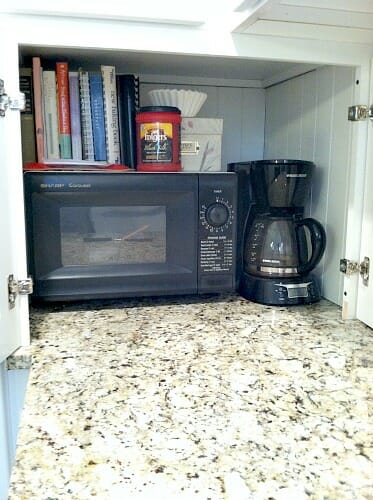
Appliance garage.
Well, it’s not a true appliance garage, but that’s because I wanted it to look exactly the same as our other cabinet doors. And instead of small appliances, we’re storing our microwave and coffe maker behind those doors.
Remember, I said that I didn’t like microwaves above the stove? Well, this is where our microwave is — hidden behind closed doors until we need to use it.
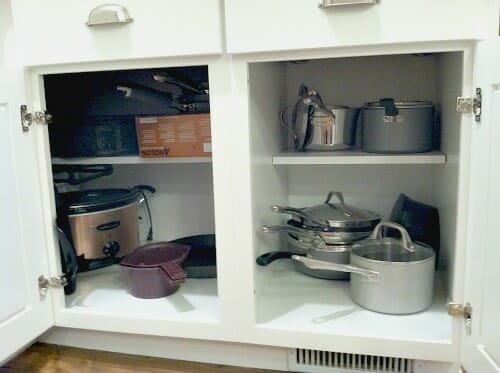
Lower cabinets.
These lower cabinets are perfect for all my pots and pans — especially since I did such a good job of paring them down to just the basics that I use every week.
The cabinet on the left has a “blind corner” (because of those crazy walls again) so I’m storing my Christmas dishes, slow cookers, and roasting pans back there. They are still readily available and easily accessible whenever I need them, but not “wasting” prime cabinet space.
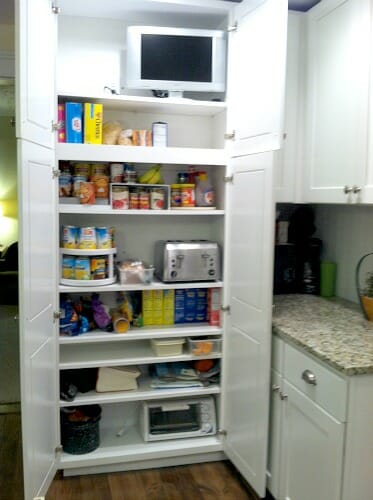
Pantry cabinet.
This is the last cabinet — I promise!
Obviously this floor-to-ceiling pantry cabinet offers a HUGE amount of storage — for food, small appliances, lunch boxes, coolers… and even a TV (we installed a couple electrical outlets and a cable outlet.)
We don’t even come close to using all the space (and I’m not convinced the TV will stay either); however, I’m thrilled to have these massive cabinets for storing snacks, baked goods, bread, and other lunch-packing supplies in close proximity to our kitchen island.
OK, so that’s it… the full tour of all our kitchen cabinets.
And I promise I did not do anything special to prepare for these photos. I didn’t pull things out or spend hours rearranging everything so it looked perfect — although I did spend hours planning out the kitchen cabinet design (earlier this summer) so it would accomodate all my kitchen stuff!
I’m a huge believer that an organized and well-planned kitchen saves TONS of time — and these days, I’m all about saving time in the kitchen 🙂
Hopefully my organized cabinets (and drawers) will help to maximize my time in the kitchen for many years to come!



Pat says
Thank you!
Cristy says
Where do you store your dishes? You’ve inspired me to clear out the RIDICULOUS clutter in my shelves. Wait. Nah. How about you come over here and help me do it??? Mine could never look as good as yours….could they??? 🙂
Andrea says
Hey Cristy,
We keep our dishes in a drawer — you can see all our kitchen drawers here. And honestly, don’t worry about getting your kitchen “as organized as mine”. I love organizing, it’s my favorite hobby, and I do it for a living — so don’t feel bad if you’re not as weird as I am 🙂
Just focus on getting your cabinets MORE organized so you can more easily access the items you use in the kitchen and thus make the time you spend in the kitchen more efficient and more productive. Organize your kitchen so it fits YOUR life and YOUR cooking needs!
CRISTY says
I see them now! Amazing. I’m so inspired!! Thank you!! 🙂 🙂
Jessica @ Budget For Health says
What an awesome idea with that spice drawer by the stove, I love it!
Megan Camp says
I love your kitchen cabinets!! Great job getting them all set up. I especially LOVE the cabinet with all of the bakeware. I’d much rather have lots of shelves so I don’t have to stack. Makes it so much easier! Enjoy that fabulous kitchen!
Stel says
Hate comments like mine now – but be careful of the spice rack & Nora – I just immediately think of the day I walked into my friend’s house as she was picking up her 15 month old girl , who played with the spice bottles, dropped one and sliced open her wrist. A&E saved the day, but it was a horrible experience and her spiced only went back there after almost ten years.
Otherwise – lovely cabinets!
LoriB says
Love your new kitchen….it’s nice and real not a magazine kitchen.
Debra says
It’s perfect !
kathy w says
I Love your cabinets! You did a great job picking them and organizing your things. And I even like your boring ones especially for the trash can. I am so happy for you.
Becky says
Where did you find your sink? I’ve only seen one like it before. I love it!!!
Guise de Cuevas says
Hi! LOVE your kitchen! But I have a question… Where do you store your Tupperware or any kind of containers?
Carolyn says
I love the idea of a hidden spice rack, but was wondering if you think the heat from the oven will affect the quality of the spices? Or is the cabinet wall insulated?
Chris says
Sorry, Now I remember they were in a previous post (drawers) 🙂
Chris says
Where are your plates and bowls?
Vickie S. says
Great job designing your kitchen! I love everything about it! Especially the microwave being hidden. It looks wonderful.
Christine says
Wow! Love all of your empty space 🙂 And I’m a touch jealous of your cabinet with all of the casserole dished and cake pans! That’s awesome. I love looking at how other people organize things. There are some things I wouldn’t like and some great ideas you’ve given me – love seeing how things work for others. I’m so glad you got to have things just how you like them! Enjoy!!!
Andrea says
Thanks Christine,
I don’t think two people would ever organize a kitchen in the exact same way — and that’s OK… In fact, I’m sure I’ll be tweaking things a bit over the next few months as I “relearn” how to best utilize our kitchen again!
Frank says
Just in case somebody wants the white shaker cabinets as shown in the picture you can buy them at a very reasonable price at http://www.AllWoodCabinets.com
Amy says
Is that where you got your cabinets Andrea? They are lovely and I love the clean lines. The granite color goes perfectly with them!
Andrea says
Thank Amy, and no, this is not were we purchased our cabinets from. I am planning a blog post about where we purchased everything from though — so stay tuned 🙂
We are also very happy with our cabinets and how they look with the granite counters/wood floors/etc. It’s so fun to see everything come together (finally!)
Ann says
When I saw your drinking glasses, I realized that you must not hold family dinners for more than 20 people ever! I “need” way more than you have! (And I have more than I need!)
Andrea says
Actually Ann, we have had more than 20 people over — and I just mix and match 🙂 It’s fun to use all my glasses… and that way I don’t need 20 of the same glass filling up our cabinets.
Of course, if we have much more than 20, I’ll probably just break out disposable cups!
Erin says
Andrea, I LOVE your kitchen organization! I love how you planned it out and have changed the cabinets in order to fit your things, instead of the other way around. I’ve been a Pampered Chef consultant for years, along with a love of baking and cooking, and can’t wait to have a nice organized kitchen like yours!! (I spotted two Micro-Cookers in your pots and pans – aren’t those the greatest??!) 🙂
Linda Bolt says
Wow, nice! I have two favorites: 1) The cupboard with so many shelves that holds your baking pans and casserole dishes. (Food for thought: Can I add shelves somewhere?)
and 2) The pull-out for spices and small boxes, etc.. Great use of space!
It’s plain to see that you spent time really thinking things through!
Jane says
Wonderful! I haven’t rearranged since remodeling 5 years ago and you’ve given me some ideas. One tip I might give you – but it may not be a problem for you – I put my oils on an old cool whip and margarine lids because I always feel there are residual oils on the bottle that drip down even though I give the bottle a quick wipe.