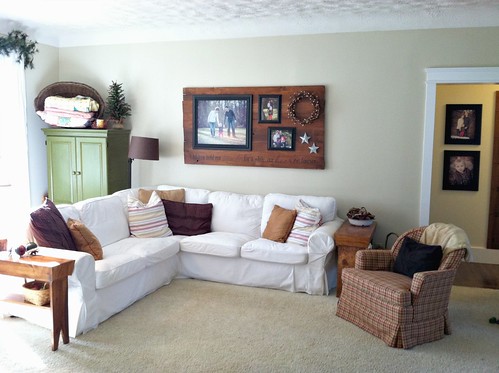
A few weeks ago, I posed the question, “How should I decorate my living room wall?”
I was honestly hoping for just a few pieces of advice and a few creative ideas — but over the course of that weekend, I received almost 100 comments and several more emails/facebook messages/etc. — all FULL of creative ideas!
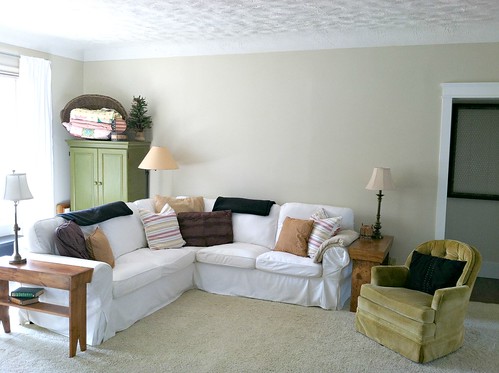
Here’s what the wall looked like before — so I obviously needed all the help I could get 🙂
I was super excited with all the feedback… the only problem was that since I thought most of the ideas were fabulous, I was once again left wondering what to do.
I knew I wanted to included at least one large family picture — and I knew I didn’t want a huge “cluttery” looking collage full of frames.
I liked the idea of hanging a large door or window horizontally — but I didn’t have a huge door or window… and I didn’t feel like looking for one!
So after thinking through all your amazingly creative ideas, I decided that instead of using an old door/window I could use several pieces of distressed wood (which we just so happened to have sitting around after our kitchen renovation!)
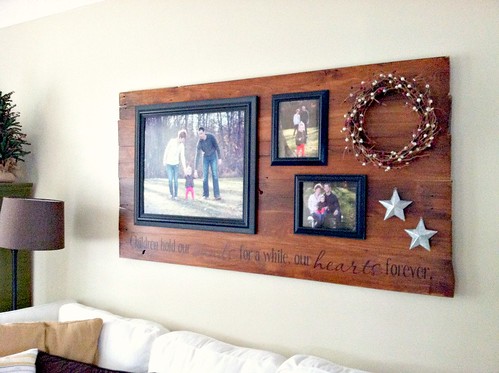
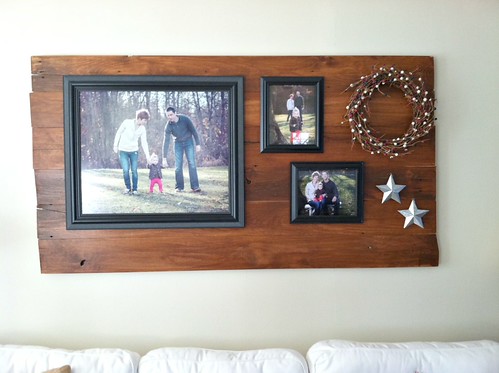
And it worked…
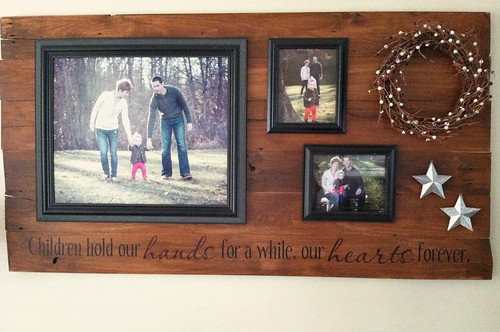
Here’s a closer view.
Dave and I are thrilled with how the project turned out!
I’m also thrilled that it will be really easy to change/rearrange items on this wooden board without putting a bunch of extra holes in the wall.
The whole project was SO simple — the most difficult part was actually hanging the finished product on the wall and making sure everything was level.
If you’re interested in creating something similar, here’s what I did:
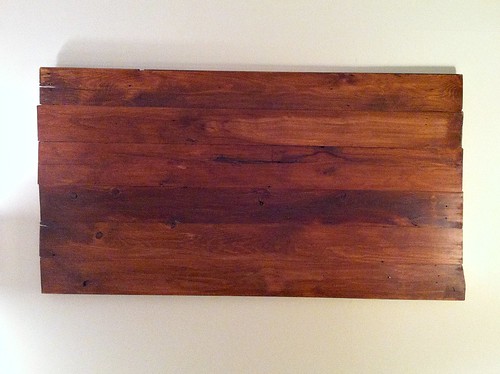
1. I cut several pieces of wood flooring to roughly 66″ in length.
The only reason I decided on 66″ is because it looked good over our couch and because it would easily accomodate at least one large family picture. The finished product is approximately 66″ wide x 36″ tall.
Also, I used a hand saw because I didn’t want the cuts to look perfect or the boards to be exactly the same length.
2. I stained and lacquered the board to match our wood flooring.
I used one (heavy) coat of stain and 3 thin coats of polyurethane (sanding in between each coat). The board honestly looks like we just cut a chunk right out of the middle of our kitchen floor!
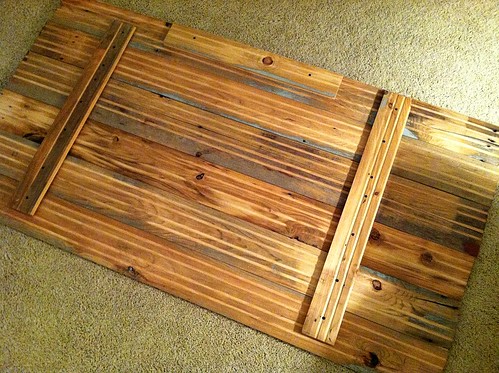
3. I attached the borads together from the back side.
I used 2 additional pieces of wood flooring to screw all the boards together. Then I attached another board to the top, which is how it hangs on the wall (see next step).
4. I hung the board on the wall.
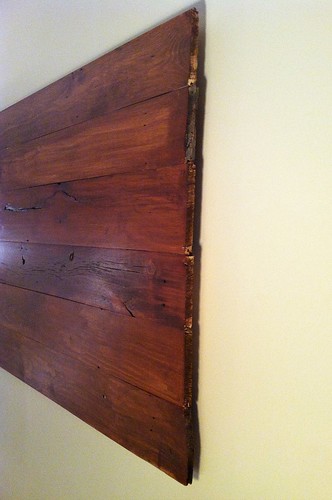
Since we used old tongue-and-groove flooring for this project, we simply screwed one piece of wood flooring on the back of our board with the “groove” side facing down (see picture above), and then screwed another piece of flooring to the wall with the “tongue” side up. Then, all we had to do was drop the groove into the tongue and our board was securely attached to the wall.
And since it’s not screwed directly to the wall, we can slide the entire wooded unit left and right to make sure it’s always centered on our couch.
5. I added pictures and decorations.
This was the fun part — especially since I don’t have to worry about patching nail holes in our old plaster walls if I change my mind!
I went with one large family picture (24″ x 20″), two smaller pictures (8″ x 10″), a small wreath, and two small metal stars.
Then I added vinyl wall words, “Children hold our hands for a while, our hearts forever.”
I thought that phrase was very fitting considering the family picture I used… and since it’s just vinyl letters, I can easily remove the whole thing whenever I change my mind!
So after almost two years staring at a huge blank wall, I FINALLY have something hung above our couch!
Thanks SOOOO much for all your ideas and inspiration. Not only did you inspire the project above our couch, I also “stole” a few ideas for other places around our house!
Also, thanks to Modern Photographics for the fabulous family pictures — and thanks to Dave for putting up with my crazy ideas (you should have seen his face when I asked what he thought about hanging wood flooring on the wall!)
It sure feels good to have this project crossed off my to-do list.
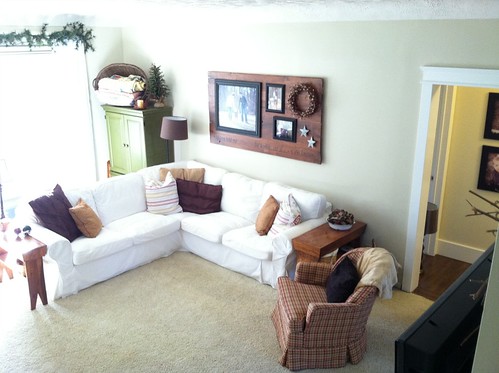
Here’s one more before and after look 🙂

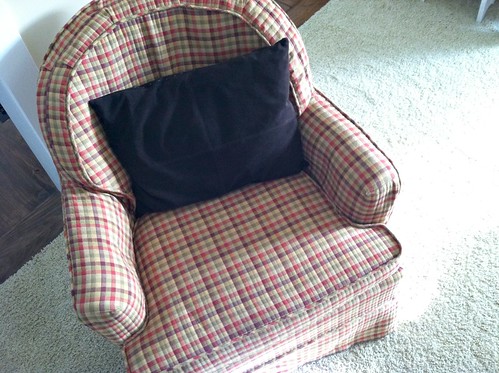
I’m in the (very long) process of shopping for new lamps and lamp shades… but did you notice that my ugly yellow chairs have new slip covers?
I LOVE how they turned out 🙂


dress if you have a round face says
Every new period of your duration delivers its confidential paramount|eminent|first-rate|prime|of the best quality|excellent} form. you need to be mindful of loads of near to the thermal styles to clinch within your confidential turn of expression predication using the upcoming prom period of your duration 2011. But most prom array stay in contrive for just about any extended duration, acquiring quite a few small alterations. karen millen dresses,we all dreaming!
dress if you have a round face http://www.js-pm.com/UserFiles/File/blog/post/dressifyouhavearoundface.html
Stacie Kaltz says
Hi Andrea,
I have been thinking of re upholstering one of our family room chairs. I love what a great job you did with those in your family room. You stated they were slip covers, where did you find one that fit so well? Or did you re upholster them yourself or have them done by someone else?
Love the new landscaping!!!! 🙂
Andrea says
Thanks Stacie! We totally love how our living room turned out — and we LOVE LOVE LOVE our slip covered Craigslist bargain chairs!
We did pay to have them professional slip covered by a local lady in town. If you live in West MI, I can give you her name and number. I thought about trying to do them myself, but upholstery fabric is pretty expensive and I knew I would kick myself if I wasted fabric because I messed up.
I’m so glad I had a professional do it — they look perfect and most people don’t even believe they are slip covered. We ended up doing 3 chairs total — all with the same fabric and I think the TOTAL cost was less than $500 (chairs, labor and fabric). So since there’s no way you can buy 3 brand new chairs for that price (and I love the small scale and older style) I feel pretty good about that choice.
Letitia says
Hi! I have enjoyed reading about your home! Everything is beautiful! What is the color on your living room walls? Do you have any suggestions for good, neutral paint colors? Thanks!
Andrea says
Thanks! Here’s a post where I talk all about our paint colors: https://andreadekker.com/our-favorite-farmhouse-paint-colors/
Madely says
Your living room looks inviting and quaint, I would say this is a spin on farmhouse modern, I absolutely love the idea, you have inspired me to do a version of it. Im so glad that Doitonadime spread the word about you….keep em coming!
Amanda says
Fantastic idea! I have the same problem so a similar idea might work for me too! Thanks for sharing x
Kalyn Brooke | Creative Savings says
This look fabulous, Andrea! It’s truly gorgeous and so reflects your style. I want to do my living room in a beach theme, and I’m thinking of using this idea with some driftwood, netting, and starfish. I can totally envision it.
Heart and Haven says
This turned out beautifully! I just LOVE the quote you found, fits perfectly with the pictures displayed.
Yarelis says
I love it, Andrea. It looks great!
Autumn Beach says
So fun to see what you decided! It looks awesome! Totally warms up the space – and so does your “new” chair! Love that, too! Just add decorator to your long list of many talents. 🙂
Martha Lawson says
Love, love it!! Been wanting something new over my couch – my have to “borrow” your idea!!
karen davis says
Love the Board/Picture above the couch, and thank u so much for the directions!! Karen
Dallas says
wow, that looks AMAZING!! so creative!
Michele says
I absolutely LOVE it!!!!! 🙂
Doreen@househoneys says
Awesome! I love the size, the color and the material you used. I also love the phrase! Just perfect.
Jenny C. says
Andrea, I totally LOVE it!!! It turned out so beautiful 🙂 You have such a knack for creating something out of nothing (you know what I mean!). Great job!
Andrea Urban says
I must say, the tongue and groove hanger idea is simply BRILLIANT!
Andrea says
Thanks Andrea — my dad was actually the person who thought of using the tongue and groove flooring to hang the unit on the wall — so I can’t take all the credit 🙂
This idea could also work well for hanging a large wooden headboard on the wall above a bed, or any other very heavy, but flat artwork!
Lisa says
Beautiful where is your tree would love to see pictures
Verity says
This is a great idea!! I’m going to remember it and maybe steal it for our next house!
I love how it creates a large picture and message out of several small ones!
Very well done!
Julie says
Love it! What a great idea!
Gina says
Love your picture!!! I want to make one…
susie says
I love the wood look! I will have to keep this in mind when i sell our piano.
Sue says
Absolutely perfect! Simply perfect! As with everything, well done.
Nuria says
What a beautiful phrase!!!!
Holly F. says
I absolutely love it! What a beautiful and creative solution. 🙂
Cammy@Serentipity says
What a brilliant (and beautiful) solution! And I just happen to have some old fence boards in my garage. 🙂
anastasia says
wow!!!!!! i love it!!!!!!|
how do you actually hang the frames on the wood? and the vinyl stickers do they peel off easily?
great job.
Andrea says
Thanks! The pictures are just hung with nails — just like you’d hang them on the wall; and the vinyl letters can be removed by using a blow dryer to warm them and then peel them off. However, once you peel them off, you can’t put them back on again.
anastasia says
thank you andrea!!!!!
Shelly says
Love the new sign, you can even change it out for the seasons or holidays with various wreaths or wording.
Beth says
Where did you get the slip covers! They don’t look like slip covers, they look like the chairs have been professionally upholstered. I love them and would like to see if I can get some similar for my chairs!
Andrea says
Thanks Beth — I’m afraid you won’t find these slip covers anywhere because I had them custom made specifically for my chairs by a woman who does this for a living (which is why they look like professional upholstery!)
I purchased the fabric from JoAnn’s to match our kitchen/living room.
It was quite expensive, but not nearly as expensive as buying new chairs, and considering we only paid $35 for the actual chairs, it was WELL worth the expense to have the slip covers professionally done!