Our nursery is so close to being finished, but I’m NOT going to give you the full tour just yet…
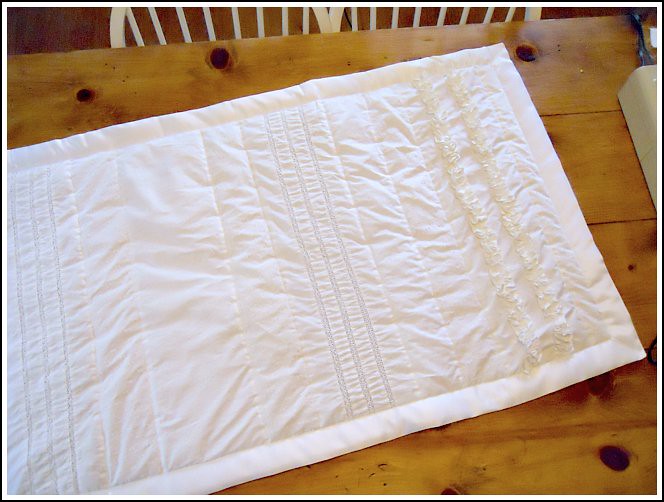
However, I WILL show you the super cute baby quilt that I made out of mostly scrap fabric {for a total of $8.00}!
So there’s the quilt — and I’m simply ecstatic with how well it turned out!
I used white fabric from old sheets, curtains, and a shower curtains to get all the different patterns and textures {which you can see better in some of the photos below}.
And even though the quilt looks fantastic, let me reassure you that is was really very easy to make {I did it on a Friday afternoon}
DIY Quilt Tutorial:
I didn’t use a pattern and I didn’t really have any instructions to follow, but it’s honestly so straight-forward that I know anyone with basic sewing skills and a sewing machine could do this!
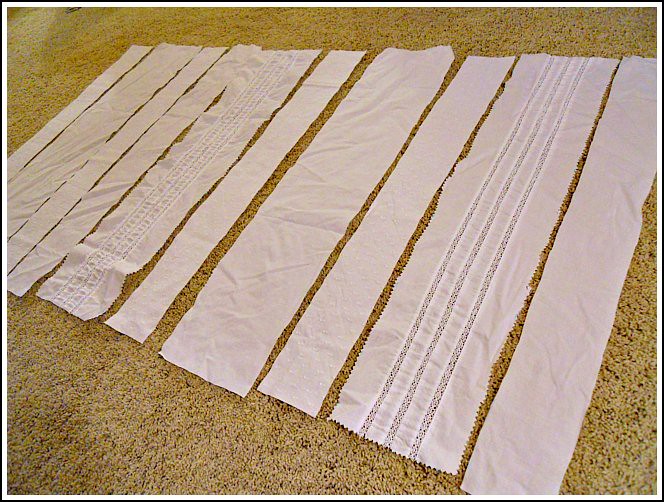
STEP #1: Cut Your Strips of Fabric.
I used 3 different white fabrics and cut a variety of 7″ and 4″ wide strips that were all about 28″ in length {which is the size if our crib mattress}. You could obviously make the quilt as big or as small as you want, but just make sure you know what you want your finished product to look like BEFORE you start cutting!
I alternated different sizes and textures just based on what I thought looked nice, so you can be your own designer and get as creative as you want!
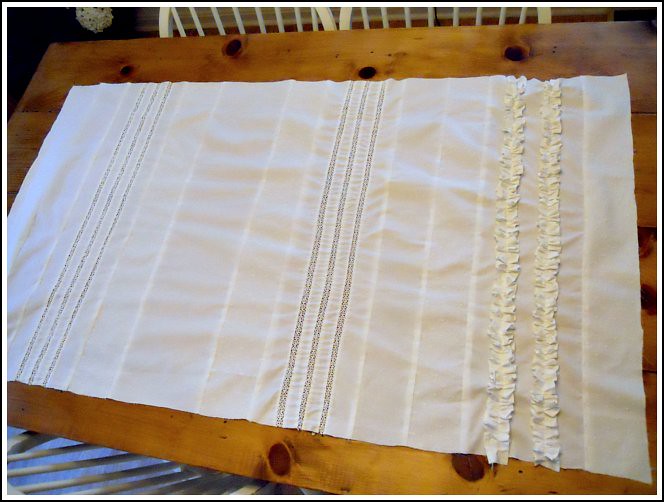
STEP #2: Sew Strips Together:
You only need to know how to sew a relatively straight line!
You will also want to make sure that you plan for the “seam allowance” when you cut your strips. I cut mine at 7″ and 4″ wide so that after each side was sewn together it would be about 6″ and 3″.
Once all the strips were sewn together, I ironed the seams flat to make sure the top of the quilt laid nicely.
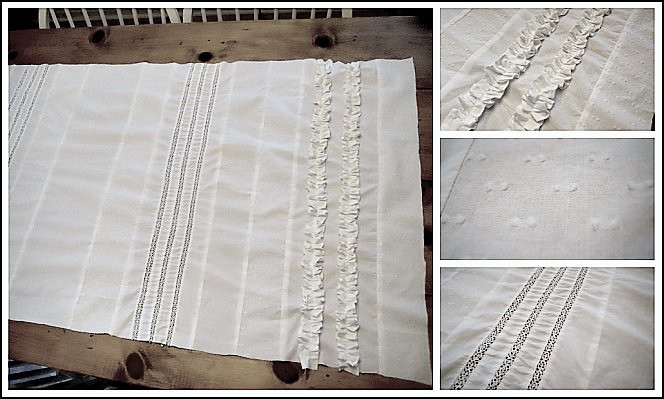
Because all the fabric is white, it was really hard for me to get a good picture of the fabric details; so I made this photo black and white which helps a little. You can see the different lace trim, raised polka dots and the ruffles {that seriously took me forever to make but are SO worth it!!}
STEP #3: Sew The Front, Back, and Batting Together.
I call this a baby “quilt”, but it technically involves no “quilting” — just several straight lines {see I told you it was easy!}
Although I got almost all the fabric for free, I did have to buy the batting for the inside of the quilt, but it’s only about $2 per yard and I didn’t even need a full yard! I used part of an old white flannel sheet for the back of the quilt to make it really soft and add a little extra warmth.
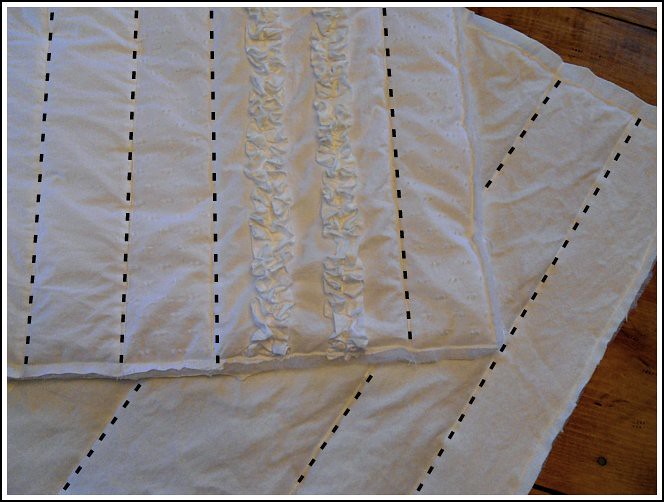
Once I had all 3 layers {front, batting, back} sandwiched together, I simply sewed a straight line right next to the seams for each fabric strip — so approximately every 3-6 inches {see dotted lines below}. Then I sewed around the edge of the entire quilt and trimmed off any extra fabric.
You don’t need to worry about finishing the edges or making them look nice because the blanket binding will cover all the rough edges. This is also really nice because it means you don’t need to sew the quilt inside out and then try to flip it and shove the batting in.
STEP #4: Sew the Blanket Binding Around the Edge.
This is the most complicated step… but still not too bad. I purchased one package of white silky “blanket binding” which was about $6 and saved me a ton of time.
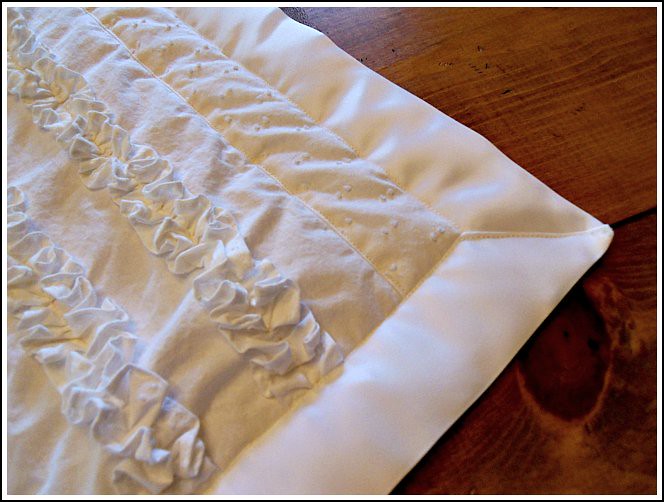
Blanket binding is the silk fabric that often goes around the edges of blankets {see photo below}. It comes in a bunch of different colors and it is already pre cut, pre folded, and it won’t fray so you can simply sew it right over the edge of the quilt to hide any imperfections or ugly edges!
The tricky part is figuring out how to get the corners just right, and I’m not exactly positive I did it “right” but I followed this video to “help me out” and I think it turned out OK!
The Finished Quilt:
Since I did this project completely without a pattern or any idea of how it would turn out, and I was a bit nervous. However, I figured that with an $8 investment, I wouldn’t be out too much if it didn’t turn out!
The quilt looks stunning in my Jenny Lind crib {which I’ll show you when I take you on the full nursery tour!} and I made it using my Grandma’s sewing machine so it will really be a special addition to our nursery and hopefully I’ll be able to use it for all our children.
What do you think?
Do you {or did you} have a special hand-made item that you or a close relative made specifically for your children?

Jennifer says
It’s beautiful. I’m filing this idea away for the future! Can’t wait to see your gorgeous nursery.
Ann says
So, how did you make the ruffles?
Andrea says
Ann… unless you have lots of patience, DON’T attempt the ruffles!! Ok, well they weren’t that bad, but first I had to sew two very long, skinny strips of fabric; then hand sew a “loose” stitch down the middle of each skinny strip to scrunch it up {or ruffle it}; then pin the scrunched up fabric evenly on the quilt; then sew it without breaking my needle or letting the ruffle get too flat.
It looks fantastic so I’m happy about that, but it was definitely more work and more time consuming than I was planning on!
Andi S says
I love your quilt! I saw that you said you had to hand sew when making your ruffles. I avoid hand sewing whenever possible. To make ruffles, I sew a gathering stitch – set your machine on the longest stitch length it will allow – then sew a straight line down the piece you are wanting to ruffle. Be sure to leave long tails of thread at both the beginning and end of your fabric. Then carefully pull the bobbin thread tail from either side to ruffle. I work very slowly to make sure not to break the thread but it works very well for me and I avoid hand sewing. I am definitely going to give your quilt a try for my sister’s new baby. I’ve never made one and you made it look so easy!
Cortney says
Oh it came out sooo sweet.
I made all of my sons crib bedding along with a new hamper and refinished all his furniture, added some homemade artwork etc…. for his shared nursery with his older brother. Can you tell I was nesting like crazy : ). It came out so fun, full of sentimental value, and REALLY economical.
I cannot wait to see your finished nursery!!!!
Andrea says
sounds lovely Cortney! I can’t wait to show you my finished nursery — but I’m still waiting for a few finishing touches… that I just can’t seem to find yet!
Suzanne says
It’s beautiful!!!
Thrifty Mom in Boise says
Super, super cute! Great job!
sarah says
Very Cute!
Robin says
Just beautiful! I’m adding this to my crafting binder for the next time I need a baby gift! Can’t wait to see the finished nursery!
megan @ whatmegansmaking says
I have to say, after seeing this quilt in person, that it is even cuter than you describe! I love the way it turned out – so sweet and girly, yet classy! 🙂
Andrea says
Thanks Megan! If I had your photography skills, I probably could have made the pictures look a bit better… but at least the quilt gets your approval!