I bet you never thought the words “simple” and “homemade bread” would go together in the same sentence.
I didn’t think so either, until now…
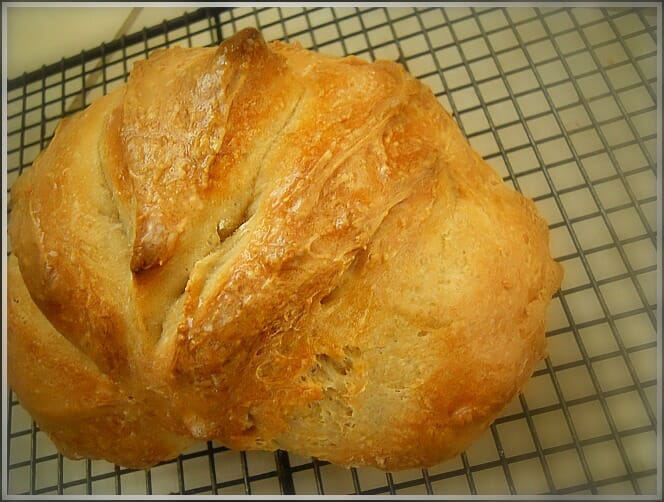
For the last couple of weeks, I’ve been making ALL our bread and rolls — from scratch.
This was something I always wanted to do, but never thought I would have the time to actually do it. I’m mean, who has hours and hours to mix bread dough, let it rise, bake it, and then clean up day after day…not me!
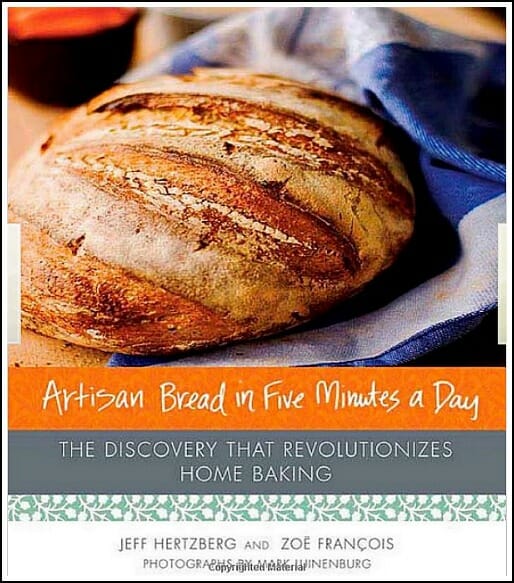
But then I came across this really great book, “Artisan Bread in Five Minutes a Day” — and now I’ll never go back!
The main concept behind this book is making delicious, homemade artisan bread in your own kitchen with only a few minutes of “hands-on” work every day.
And the basic recipe only has FOUR ingredients!
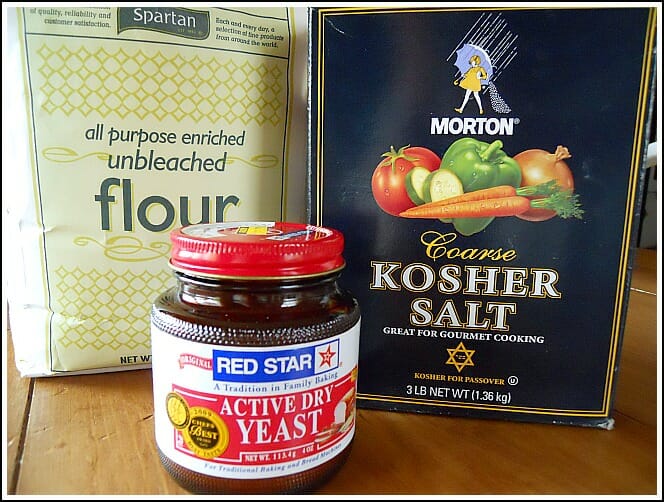
1. 3 c. warm water
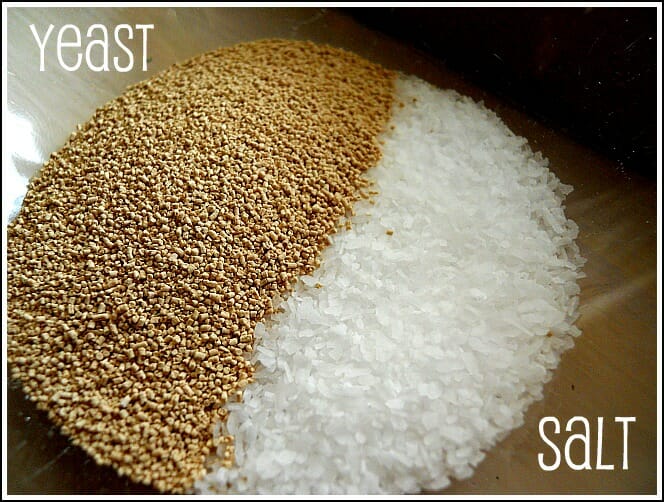
2. 1.5 T. granulated yeast
3. 1.5 T. kosher salt
4. 6.5 c. unbleached, all-purpose white flour {they have other recipes for different types of flour too}
DIRECTIONS:
Quickly mix the ingredients in a large food-safe plastic tub with a wooden spoon.
Let it rise for 2 hours.
Put the entire tub into the refrigerator and use throughout the next 2 weeks.
That’s it — no kneading, no fancy equipment, no expensive ingredients, no sink full of dirty dishes.
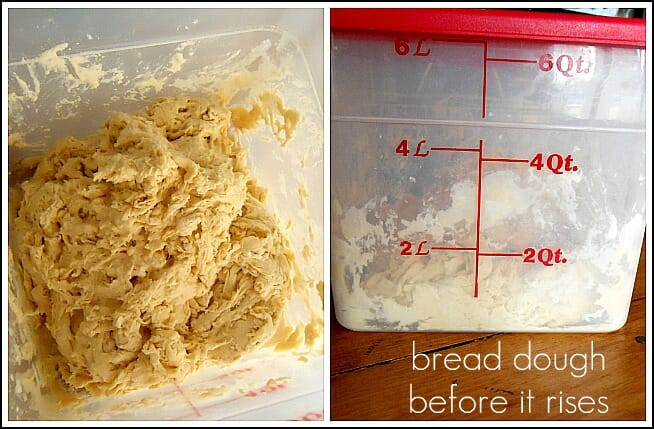
This is the dough right after I mixed all the ingredients:
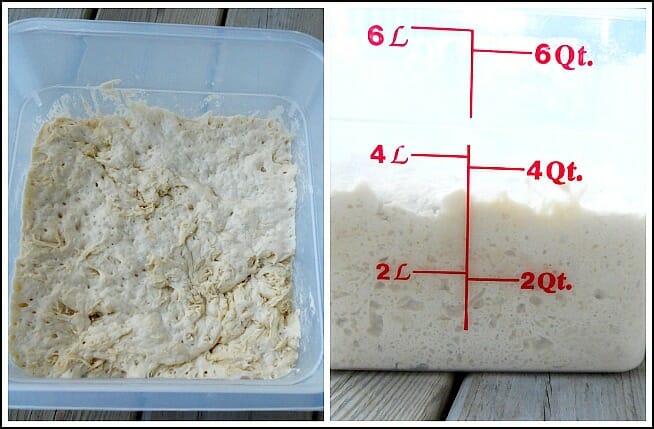
This is the dough AFTER I let it rise for 2 hours:
The tub of bread dough now has a designated spot in our fridge, and whenever we want fresh bread, all I have to do is grab out a chunk of dough, put it on a parchment-lined baking sheet, let it sit at room temperature for about 30 minutes, bake, and enjoy.
The book has SO many different bread recipes, but so far, I’ve only tried the basic recipe {the one I listed above}.
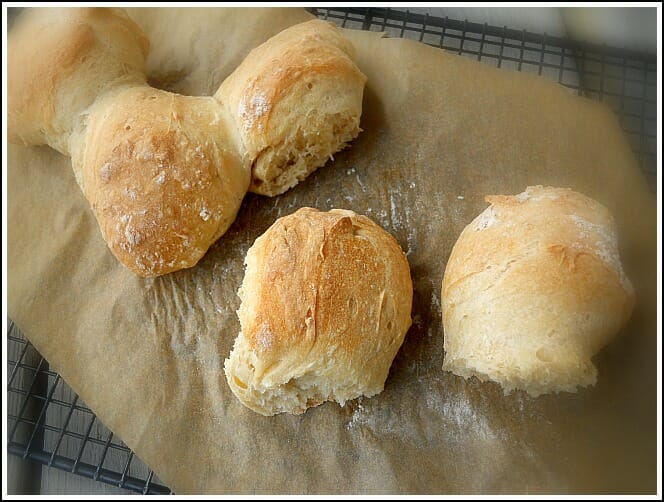
I’ve made a loaf of sandwich bread, dinner rolls, round bread loaves, a pizza crust, and I’m going to try cinnamon rolls this weekend — all from one batch of dough.

Oh, and I don’t even need to wash the plastic storage tub after the dough is gone. I can simply add my next batch of ingredients, stir, and put the tub back in the fridge — doesn’t get much easier than that!
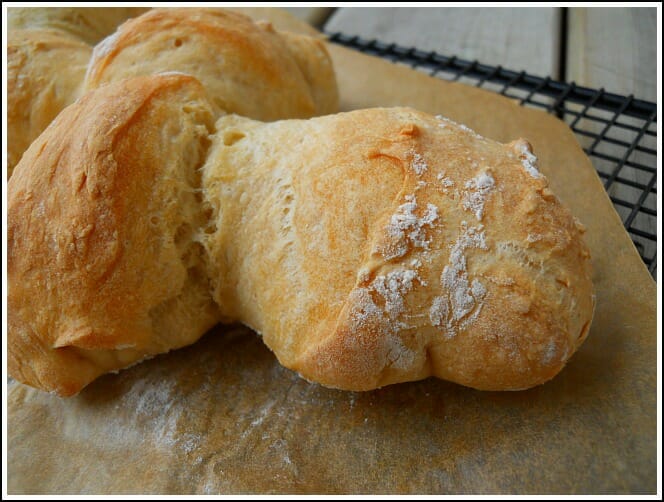
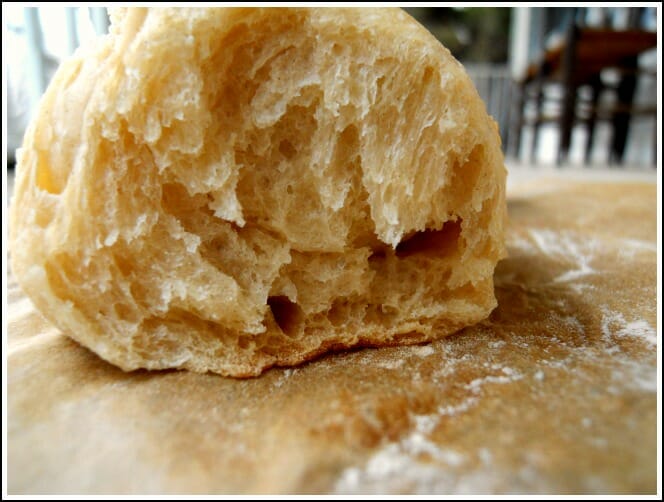
This bread is SOOOO delicious! A perfectly crunchy crust and really soft “crumb” on the inside.
I’ll definitely be sharing more of my bread-making adventures as well as the many different recipes I plan to try.
But if you are at all interested in making your own homemade bread in just a few minutes a day, I would recommend buying the book for yourself! You can also read more about the bread and the book over at ArtisanBreadinFive.com
I was not compensated in any way for writing this post — I just love homemade bread THAT much 🙂

sonya says
thought Supposed to put the Yeast in warm water.
Thought the cool refrigerator destroy the yeast.
Thought salt even destroys the yeast.
Temperatures affect the dough from rising ?
Rachele says
Just found this on Pinterest and am definitely pinning. Thanks for a quick and easy !
Tammy says
Do you put the lid on the dough right after you mix it up?
Andrea says
yes, you can put the lid on right away — but don’t fully close it. You always leave a corner popped open so the dough can rise and expand
Pam says
Do you know if you can substitute in some wheat flour and what the measurements would be? I like the mixture of both white and wheat – preferably a “light” wheat bread.
Thanks!
karen says
do you keep the plastic lid on the container while in the frig. I read dough needs to breath , confused … ty
Andrea says
Karen, I keep the lid on so the dough doesn’t dry out, but I leave a corner “unsealed” so the dough can breathe
Bec says
I would like to pass on my warm thanks 🙂 I’m not a confident cook, yet I just made my very first loaf of bread using your recipe. It was crisp on the outside, soft and fluffy on the inside and delicious!
I’m in Australia and use Celsius, I had my oven at 200 (this oven seems hotter than others I’ve used) and judged the time by the breads appearance which was 15-20 minutes for my mini loaf.
Thank you for giving me the tools and confidence to try something new. I always found bread a little scary in the past. Now I can’t wait to try other variations.
Amanda says
A little confused. One response stated 450 degrees and a latter response states 375. That’s a considerable difference.
Joann Acantilado says
Can you tell me what degrees you baked the bread at and for how long?
Mica says
Just made this and loved it!! I have really bad arthritis in my hands so I was really excited to try a bread recipe that doesn’t require a lot of work. It came out really tasty. Also I had these 4.25L plastic ice cream tubs that I used for my bread. It was just the perfect size, it had a handle, and I already had a bunch of them.
JJ says
Loves it! It just goes to show you that there are so many things you can do yourself without having to spend extra money. Your site is amazing and I look forward to all of your posts (and hope to coupon as well as you do someday!)
JJ
Savannah Yturria says
what temperature and how long do you bake it for?
Andrea says
It depends on what type of bread you’re making. The different recipes in the book call for different baking times. I think I usually use 375*F for about 20 minutes or until the center is set.
Sav says
thank you! it turned out delicious 🙂
Terri says
Hi! I tried this recipe and I am so sad that mine didn’t work 🙁 It looked great up until I took it out of the fridge to grab some to bake and it was a wet, sticky mess…. any idea where I went wrong? All my ingredients were fresh…I have no clue what happened. Just curious if you might have any suggestions! I usually make my bread from scratch the “long” way and was excited to find this process. I love you blog btw!
Ray says
How many degrees do I set the oven for and how long? Is this recipe too salty? (I read about it in other forums that is salty so now I’m confused) I went and purchased this book but lent it to a friend and forgot to write down the baking instructions, and now that it’s thanksgiving she’s not at her house to tell me what the instructions are! Eep! If you could respond by saturday that would be wonderful!
jodimichelle says
I don’t have Kosher salt – is that NEEDED for the basic recipe or would reg. salt be fine? Do you know?
🙂 yay!
Andrea says
Well, I’m not a bread expert — that’s why I stick to the really simple recipes!
The book makes it sound like Kosher salt is the best option because it’s more “course” but my suggestion is always just to try it and see what happens. You could even try a 1/2 batch if you’re nervous. I honestly can’t imaging that the type of salt would greatly affect the outcome, but I also don’t want to say anything for sure since I’ve always used Kosher salt.
What that helpful or just wishy-washy!!!
Megan M says
This looks amazingly easy and delicious!
Also, I’m geeking out a little over your container, and I’ve decided that I need it. Does it fit easily in your fridge? Do you think the 4qt container would be big enough? I just have a stupidly small fridge and need to be extremely efficient in what I can keep in there. But if the 6 qt is a must, I think homemade bread (really all carbs right?) is definitely worth it.
Thanks!!
Andrea says
Megan, we have a small fridge too and the 6qt fits just fine. I do think that a 4 qt would be a bit too small because my dough almost always expands over the 4 qt. line.
Montina says
You rock! Thank you so much for sharing this recipe. This will be a super fantastic to do with my daughters’. My children are really spoiled and enjoy all things homemade. Now I can add this bread to our dinner with homemande honey butter. Yummy! I’m getting that book too!
Danielle says
Just ate pizza using their recipes. I found the book about a year and a half ago and it’s wonderful! I really need to make my way through more of the recipes.
Megan Camp says
I too own this book, love it and share it. I haven’t used it for awhile because I have another bread recipe I’ve been using lately. However, I do love that book and the bread the recipes produce. You have to try the naan recipe. It’s WONDERFUL. We love Indian food and can’t buy Naan where we live. The naan recipe in this book is great and it’s wonderful to take camping and cook over a campfire because you use a cast iron skillet to cook it at home or over the campfire.
Andrea says
Thanks Megan,
I’m hoping to try several of the recipes in this book — but since you recommended it, I might have to try the Naan first! Well, my husband requested cinnamon rolls today, so those will be first — but then the Naan!
Lora says
Andrea-
Is granulated yeast different than a powdered type of yeast?
I’d like to try this here but I’m not sure I’ve ever seen granulated yeast here in Nica…I’ve only ever found little packets of powdery stuff. Not much baking happens here so I’m really excited to try this recipe and future ones that you post. We’d love some simple recipes for whole grain or dark breads.
Thanks for all your great information!
Andrea says
Hey Lora,
Um….I actually don’t know if there’s a difference in results. I did show a very close-up picture of the yeast I use {You can see it looks like little brown pellets}. I’m assuming powdered yeast looks more like baking powder or baking soda, right?
You could always try a half batch and see if it turns out. Or you could order granulated yeast on Amazon and have it shipped to you {I actually do this b/c it’s a lot cheaper than from the store}.
However you do have me thinking now — maybe I’ll do a post about “the differences between ingredients”!
Hope this helps a little…I suppose you could just come to MI and I could make you bread 🙂
Lora says
Thanks!
Yes, I would much rather just have you bake it for me!
This summer 🙂
Thanks for the thoughts. I’ll do a little searching for different types of yeast this weekend and if I don’t find something that looks like what you used, I’ll give it a try with the baking powder looking type and see how it turns out. I’ll let you know the results!
Amanda Gray says
GENIUS!
Karen @ Abundance on a Dime says
Andrea, I’ve made bread from scratch for quite a few years now. I have quite a few friends who love the Artisan book, but I use a different recipe: Whole Wheat Refrigerator Dough
http://abundanceonadime.blogspot.com/2008/05/bread-solution-refrigerator-bread-dough.html
It uses mashed potatoes to keep the dough moist and feed the yeast (it keeps in the fridge up to a week). It makes a fantastic sandwich loaf and I use it to make many other things as well!
Oh, and if you’re going to be baking a lot of bread, I recommend buying yeast in bulk, it is soooo much cheaper than the packets or small bottles at the store. It will keep for several months stored in the freezer.
Andrea says
Thanks for the recipe Karen — it looks delicious. And what a good reason to make extra mashed potatoes!!
Oh, and I do buy my yeast in bulk…and store it in the freezer 🙂 Great minds thing alike!
Kim says
Do you use the stone it calls for and the pizza peel? or are you just using a cookie sheet? if just a cookie sheet are you rising and baking on the same one? how’s the crust then? I JUST got this book from the library to “try out” before purchasing (a saving method of mine after owning too many cookbooks that I never use). But I don’t want to invest in all these items if not really necessary.
thanks!
Andrea says
Good question Kim — I’ll probably be talking more about this later too, but I do NOT use the stone or the pizza peel — just a normal cookie sheet with parchment paper and flour. The bread turns out amazing!! The crust is very crunchy and the middle is so soft and dense — perfection! I do put a pan of hot water under the bread while it cooks — which helps make the crunchy crust {I think}
I also got the book from the library first, and after my 2 weeks were up, I KNEW I wanted to buy it {and that’s ALL I bought so far}
Allison Hale says
I bought 6 inexpensive unglazed tile on clearance for .50 each about 10 years ago. They sit nicely on my oven racks (due to the grooves on the underside) and are much nicer, cheaper and larger than a pizza stone. A Julia Child cookbook suggestion that has worked great for me!
Andrea says
Wow — what an excellent idea Allison!
Thanks for sharing this…I just might have to buy some tile tomorrow!
Julie says
Allison ~ How do you keep the tiles together?
victoria k says
Please let us know how long and at what temperature to bake it at. Thanks!!! This sounds great!
Andrea says
Thanks Victoria, nearly all the recipes in this book bake at 450F. however, the baking time totally depends on what type of bread/rolls you’re baking.
I’ll be sharing more specific recipes in the weeks ahead but for a normal/small loaf of bread, 30 minutes at 450 should do it. And for rolls, I usually bake them for 20 minutes.
Stay tuned for lots more bread recipes though — this post was just to whet your appetite!!
Keri M. says
I also discovered this bread book about 2 weeks ago and I’m totally addicted! In fact I’ve got a bread wreath on the counter right now, waiting to go into the oven for dinner tonight! I’ve given these loaves as Thank-you gifts and everyone loves them 🙂
Andrea says
Wow Keri…you’re fancy! The bread wreath sounds fantastic, and I’m sure I’ll be giving bread gifts for Christmas this year!
Becca @ Crumbs and Chaos says
I’ve been wanting to try this method for a while. I haven’t seemed to find the right container for it. Where did you get your container with the red lid?
Andrea says
Becca, here’s the link to the storage tub I use {I use the 6 qt. container for the dough but I also have other sizes too}.
I LOVE these containers because they are really inexpensive and they stack great. I use them for flour, sugar, bread dough, ect.
Also, they sell the lids separately, so here’s the link for the lids.
Hope this helps!