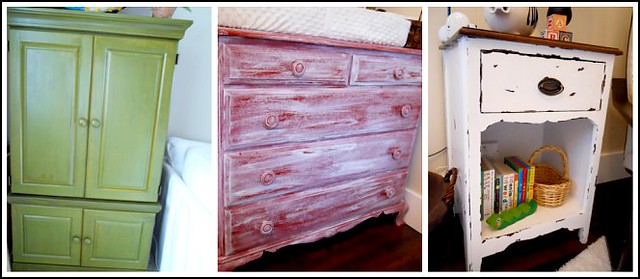
One of my favorite hobbies is to paint and distress furniture — which is interesting, because it’s not something I EVER saw my parents do, and I honestly wouldn’t even consider myself to be overly creative or crafty.
However, my desire for “old farmhouse style” on a very limited budget forced me to get creative and start making my own “distressed furniture” from cheapy Craigslist finds!
And over the past five years, I’ve become a much better painter, learned many new techniques, and figured out how to REALLY streamline and simplify the whole process — betcha that doesn’t surprise you though 🙂
Here are 3 of my favorite SIMPLE furniture distressing techniques:
1. Stain/Glaze Technique: used on green armoire
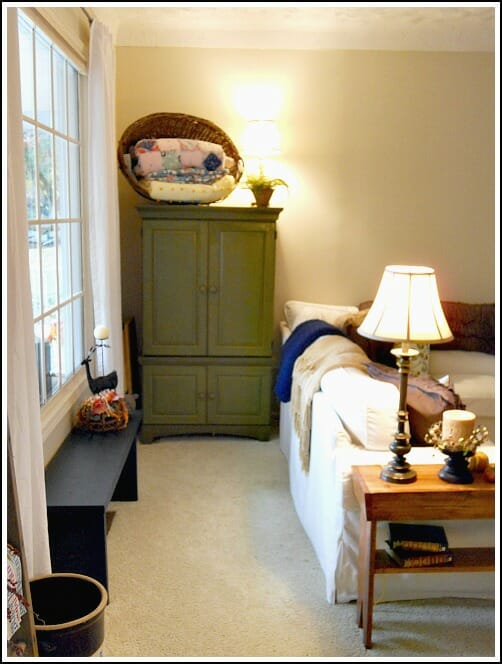
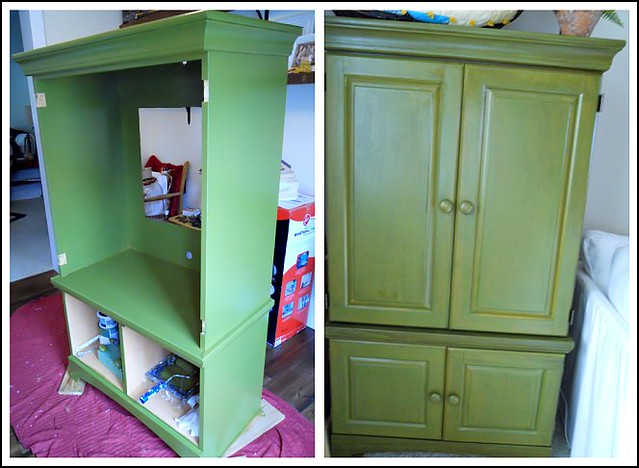
I found this armoire on Craigslist and I immediately snatched it up. Yes, I know it’s ugly and made out of particle board, but it was only $20 and I was able to transform it into a make-shift mudroom!
INSTRUCTIONS:
1. Clean the wood/board with denatured alcohol to remove any oil, grease, and dirt.
2. Remove doors, hinges, knobs, etc.
3. Paint 2 coats of whatever color you want the cabinet to be. Let Dry!
4. Use an old rag or t shirt to rub a dark brown stain or glaze over the paint
5. Make sure you really work the stain or glaze in with a “random” motion so it doesn’t look too perfect.
NOTE: If you use glaze, it will probably “harden up” quite quickly and then you’re finished. However, if you use stain, it will NOT soak in and will become very sticky. Once it gets sticky, move onto the next step.
6. Use a foam brush to apply one or two coats of polyurethane directly over the sticky stain {The stain will not soak into the paint so unless you do the polyurethane over top, your furniture will stay sticky!}
You can see the difference before {left} and after the glaze. I love the deeper green color after the glaze!
TOTAL TIME:
About 3 hours plus drying time.
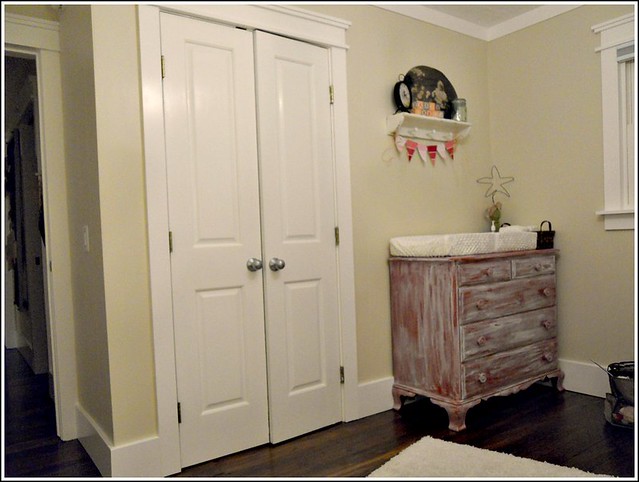
2. Dry Brush Technique: used on our changing table
This was another fantastic Craigslist find. It’s an absolutely gorgeous, solid wood, Bassett dresser, and I loved everything about it… except the stain {very yellowy and NOT my style at all.}
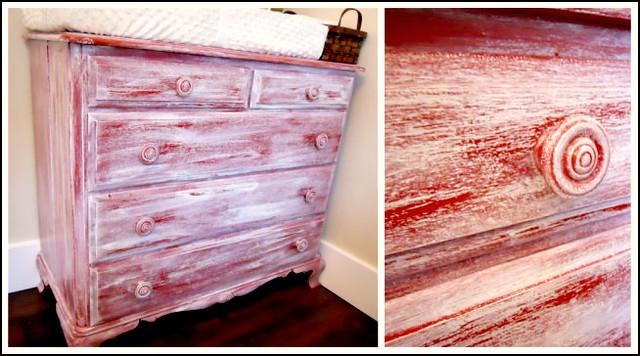
However the structure was great, I loved the chunky wooden knobs, and it was literally the perfect size for our nursery — so I painted it red and then distressed it!
INSTRUCTIONS:
1. Clean the wood/board with denatured alcohol to remove any oil, grease, and dirt.
2. Remove drawers, knobs, etc.
3. Paint 2 coats of your “base color” {mine was red}. Let Dry!
4. Use a VERY dry brush and get a VERY small amount of white or lighter colored paint on the tips of the bristles.
5. With a light “stroking” motion, quickly and gently “dry-brush” the white paint over the base color… always going in the same direction.
6. While the white paint is still a little damp, you can go over it with a steal wool to get an even more distressed look… or just leave it “as is”.
TOTAL TIME:
About 2 hours plus drying time.
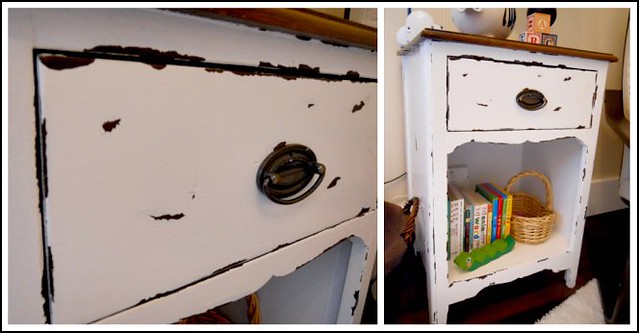
3. Steal Wool Technique: used on our nightstand
Sorry, I don’t have any “before” pictures of this one!
This nightstand is another solid wood piece I snatched up for only $10 on Craigslist — and it was already stained a really, really deep brown. I loved the stain color but wanted to lighten it up a bit so it didn’t blend in with our floors.
INSTRUCTIONS:
1. Clean the wood/board with denatured alcohol to remove any oil, grease, and dirt.
2. Remove drawers, knobs, etc.
3. Choose a contrasting paint color — if your furniture is a light stain, then choose a dark paint. If it’s a dark stain, choose a lighter paint.
4. Paint 2 coats of paint over the entire piece {I obviously left the top unpainted but that was just my choice}.
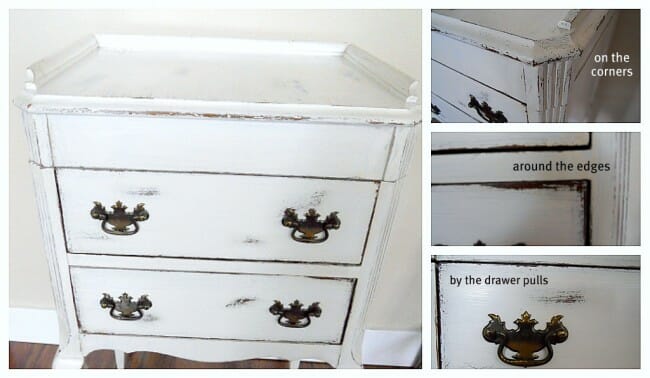
5. Wait until the paint is ALMOST DRY and then use a piece of steal wool to gently rub off the paint on the corners, around the handles, or anywhere else you want to look distressed.
I used the same technique on this night stand too.
TOTAL TIME:
About 30 minutes plus drying time.
The Materials I Use:
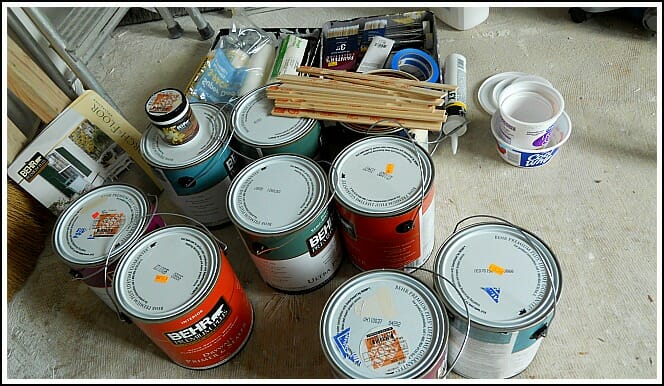
I almost always use Behr paint from Home Depot — and I ALWAYS stock up on Labor Day and Memorial Day because they have great rebates at that time. You can just purchase a bunch of un-tinted paint and then when you’re ready to paint something, go back to the store and have it tinted.
I use semi-gloss or satin for all my furniture projects, and rarely waste the money for primer!
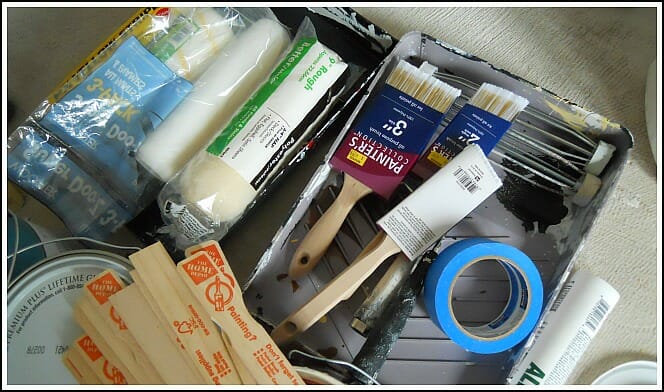
I use whatever brushes and rollers I can get free after rebate from Menards — and I’ve never had any issues! I do always look for the 2″ angled brushes for furniture though.
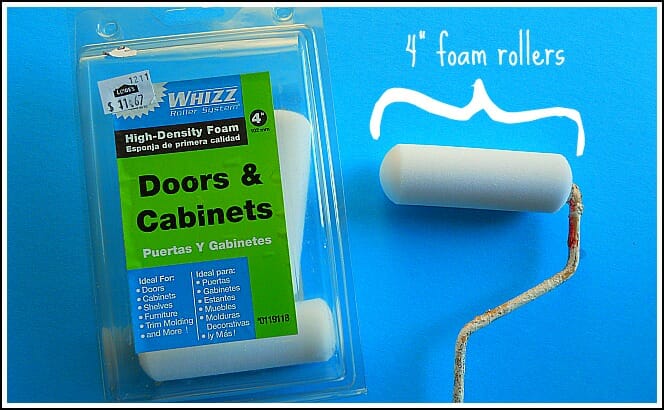
For furniture, I use these 4″ foam rollers because they allow me to get into tight places, and they leave a really smooth finish.
And as you can see, I don’t spend a lot of money on paint trays and buckets — just simple paper plates and disposable food containers!
See, I told you it was simple!
I know a lot of people are intimidated by painting anything… let alone furniture. But I want to assure you that you can do this!
Just find a piece of furniture for super cheap at a thrift store or on Craigslist and give it a try. If you totally fail, you haven’t wasted much except your time. And I guarantee you’ll get better with every piece you paint!




Brenda says
I have looked for denatured alcohol but it all says denatured alcohol fuel and that concerned me. Is it the same thing?
Andrea says
it’s the same thing — but if you’re concerned, just ask an employee at the store.
Karla says
When using glaze do u use polyurethane to protect or is glaze the last step. What kind of glaze do you use?
Mara says
Thanks so much for these tips. I actually have an old coffee table I want to restore. Could the stain/glaze technique be used for outdoor furniture as well. I’d love to put the coffee table in my backyard and put potted succulents on top.
Andrea says
yes, I’m sure it would work — however, keep in mind that if the furniture is outside, it will likely start rotting since it’s not pressure treated lumber. If you’re going for a really rustic look, it might be perfect!
cassandra says
I love it! I actually wanted to do the same with my furniture, but was put off by the “sand it all down”. Is this method just as good??
Andrea says
Cassandra, in the majority of cases, using denatured alcohol is just as good as sanding (and way less messy!) If your item is very rough, you’ll probably still want to sand it smooth. However, if you just need that “tacky” surface for paint to stick to, the denatured alcohol should do the trick!
Debi setzer says
Would you ever paint the chair red then distress elders glue and then go over it with dark brown or does that sound bad
Andrea says
Hi Debi,
I have no idea what “distress elders glue” means — sorry!
Jami says
What’s the name of the color you used on the green armoire? The final result is lovely!
Andrea says
Thanks Jami! Here are all the paint colors I use in my house: https://andreadekker.com/our-favorite-farmhouse-paint-colors/
The Green is Jungle Trail 🙂
sherrie says
I am wanting to disstress my living room furniture. your instructions were absolutely great ! they are simple and easy !!thank you !!
Andrea says
thanks Sherrie — and good luck! It’s not nearly as challenging as some people make it out to be. I would say that almost anyone can paint and distress furniture!
Nancy Williams says
Decorating for Christmas on a budget?. I just saved myself $13 to $25 dollars! I picked up pine cones from my yard. To clean them, I took 2 cookie sheets and covered them with foil. I preheated my oven to 200 degrees and let the pin cones bake. This kills any bugs and melts any sap that are on the cones. It’s amazing how they dried out perfectly. They opened up and the natural pine scent is AMAZING!!!!
Andrea says
Thanks for the tips Nancy! I’ve always wondered about bringing pine cones inside (we have tons of them in our yard). I didn’t want the dirt or bugs, but I never thought about baking them first!
Nancy Williams says
I just rescued an all wood side table from a neighbors garbage. My living room is small so It’s a perfect size to use as a coffee table and it’s already distressed.
I love your techniques for distressing furniture. So many sites make distressing labor intensive. Yours is not.
Thanks for sharing your tips!
Andrea says
yay — what a score! And yes, distressing furniture does NOT have to be complicated. As with most things in life, it can be simplified quit a bit 🙂
Connie says
Do you always use a polyurethane after distressing? I just did an old buffet in flat black but when I distressed it the areas are dull around the distressing compared to the rest of the piece. Thought perhaps the polyurethane would bring the color back to these areas but afraid to try without knowing.
Thanks.
Andrea says
Nope, only when I want to STOP the distressing process from going any further. Also, in the case of my green cabinet, I used stain to make the paint look darker and the stain stayed really sticky so I had no choice but to do poly over top to stop the stickiness 🙂
patricia says
very nice work! i love to distress furniture, it’s fun and like you did, you can pick up cheap pieces and then make them wonderful. i have an old particle board cabinet and people tell me i should get rid of it because it’s ugly. the thing is those old particle board pieces are pretty darn sturdy (i have had mine since 95) and if you can change the look for it with paint then why on earth would i throw it out? i’m going to turn it into a little pantry for my kitchen since i need more space. i’m excited to do it. thanks for the inspiration.
Meleeiab says
This is beautiful! I went to your web site to see if you had worked with Chalk paints before. I am doing a few old pieces and was looking for the distressed look. Do you do it the same way with clear glaze after the base coat ? Any advise would be great! This is my first time with Chalk paint. Thanks Meleeia Brown
Andrea says
Hey Meleeiab, I’ve actually never used Chalk Paint before — so I don’t think I’m the best person to ask. Sorry!
Maybe try googling it or something 🙂
Cathy Williams says
I want to know if there is an easy way to destress cabinets that are already painted off white I just want to rough up the edges but I’m scared I paint a lot but have never done this any good ideas. Love the furniture on your site they are beautiful.
Andrea says
you could rub a brown glaze over them… but otherwise I’m not sure. I would be hesitant to start sanding as you’re not sure what’s under the paint.
Heather says
Hi, was wondering what color glaze (light or dark) you used in the green armoire?
Andrea says
It was actually a dark brown stain (not sure of the color anymore. sorry!) — and then we went over it with polyurethane so it wouldn’t be tacky. But if you used a glaze, I would go dark.
Yolanda says
what color did you choose for the nightstand?
Shannon says
Curious – when you buy paint do you choose only wood paint or will you also use wall paint?
Andrea says
Shannon, I use “wall paint” — which is the same as “wood paint” 🙂 I always use Behr paint from Home Depot and it’s great for walls, wood, and so many other surfaces!
Doris Schmaljohn says
Have a newly stained antique. table. Don’t like stain-so want to paint apron/legs and then wipe off leaving most of stain for distressed look. Top ok as legs are different wood and looks odd. Was thinking of mustard color-flat paint, as colors in room are mustard/red/tan, brown. Will that look ok?
heather says
I love your ideas and tips…I also redo furniture but usually just paint or stain I can’t wait to try these!!
Angie Newsom says
Great site!!!! Love the pieces you’ve done, they look awesome!!!!
Susan Johnston says
Do you remember the name/brand of the paint you used for the armoire?
Cheryl says
I have some furniture with a clear coat on it. Do I need to do anything to it before I start this process? Thanks
Andrea says
Cheryl, I have personally painted right over clear coats before — but if you want to be safe, just give it a light sanding first, then wipe it down with the denatured alcohol I mentioned in the post. Good luck 🙂
Beverly says
Love your ideas and tips! I am a lazy painter and these will be perfect for my yard sale finds! My husband sells steel wood by the sleeve, so I am set!
Lorraine says
I have had an island for my kitchen made using parts of my kids old baby bed — lead paint, parts lost, not usable as a bed anymore. I was going to paint everything new, but now that I see it, I want to “old paint aka distress paint” the new parts to match the old parts. Thanks for your tips. I can hardly wait for the cabinet maker to finish it so I can start painting!!
Valerie says
Just curious if you sand your furniture first? And if not, do you ever use primer initially? I love this post! I just bought some furniture to refinish and this will be so helpful!
Amber says
Love the distressed look! so thanks for the tips! But what glaze do you use?
Emily says
Awesome!! I have a desk I purchased for $10 at a garage sale. I painted it black and put it in our classroom (we homeschool) but it’s sticky (all my papers stick) and just looks unfinished. I will have to redo it this winter using your tips. Thanks!!