As many of you know, I enjoy sending out cards to family and friends on occasion — usually once around the holiday season, and then whenever we have a new baby.
Although I know most of our friends and family will see our recent pictures and read about our family updates on Facebook or on my blog, I personally think there is still something extra special and fun about getting a card or pictures in the mail.
Maybe I’m weird (I probably am) but it’s something I personally enjoy doing and I hope our friends and family enjoy the card when it arrives — even if they just quickly look it over and toss it in the trash (which I’m totally OK with).
However, I know many of the cards and photos get hung on their refrigerator, on their bulletin boards, or get put in their card baskets so they can periodically look through them and see our smiling faces. I also know that many people put cards and pictures of friends and family in a special prayer basket or folder and spend time praying for the people they love on a regular basis.
So while I prefer to do most of my communication electronically, I do reserve a few special occasions to send out “snail mail”. And with the recent birth of baby James, I had one of those snail mail opportunities!
My goal is always to get the birth announcements out within the first month, because if I don’t do it right away, I won’t do it… so even though there was a glitch getting the photos back from our photographer, I still got the announcements in the mail with a week to spare before his 1 month birthday 🙂
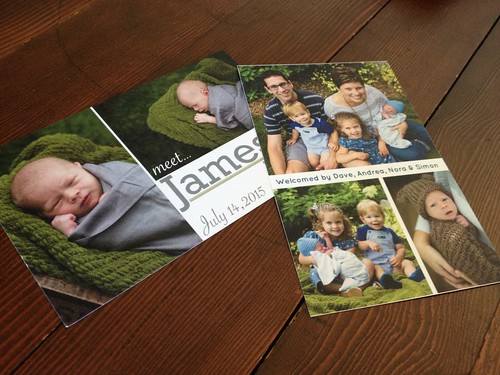
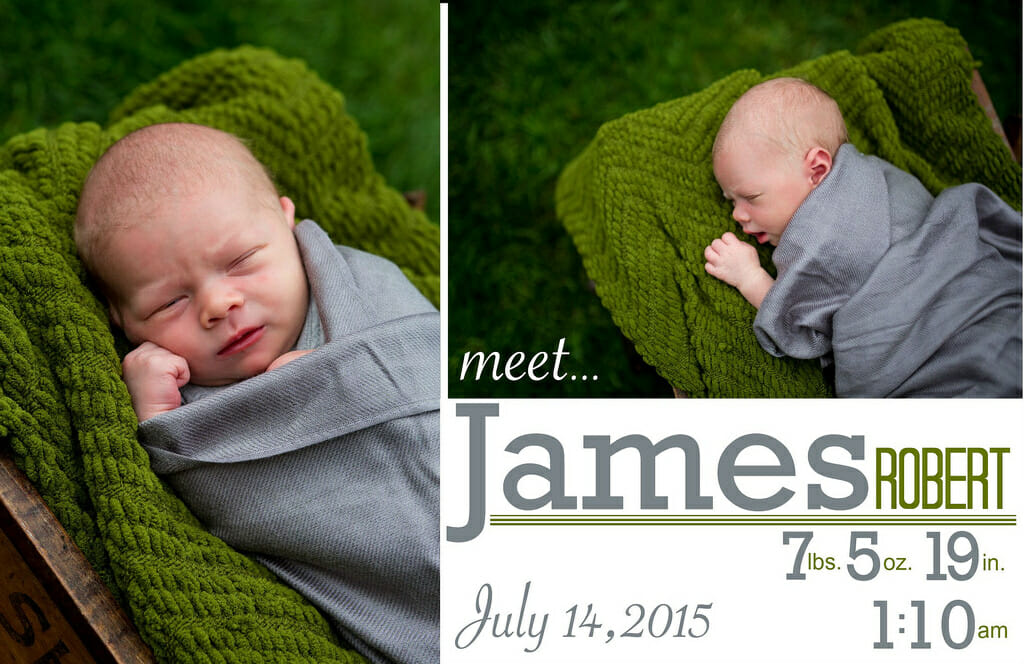
James’ birth announcement!
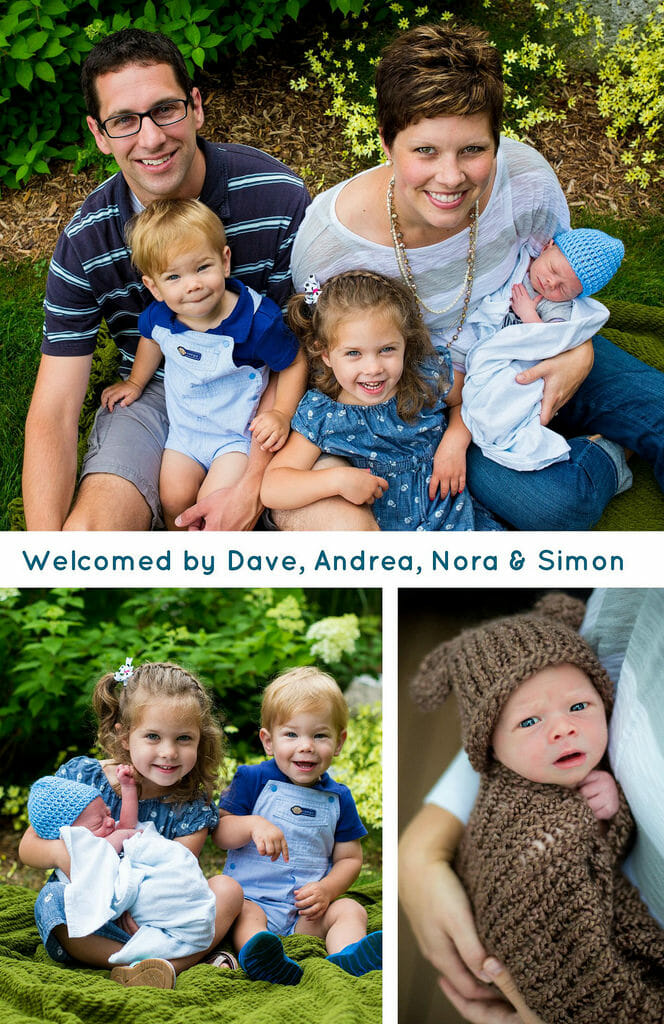
And here’s the back side — it’s vertical instead of horizontal, but that’s just how it worked best with the pictures I wanted to use.
.
Believe it or not, I actually created this myself, with PicMonkey (a free photo editing program) and then printing it through Vistaprint with a great coupon code. I got 75 double-sided, full-color announcements on super nice, thick card stock for about $22 with free shipping. I also purchased through eBates so I got a percentage of my sale back in cash 🙂
Now, obviously I still had to pay for the postage to mail out the invitations, but for those of you who have ever purchased pre-designed cards, invitations, or announcements, you know that paying less than $0.30 per card for double-sided, full-color is a pretty great deal!
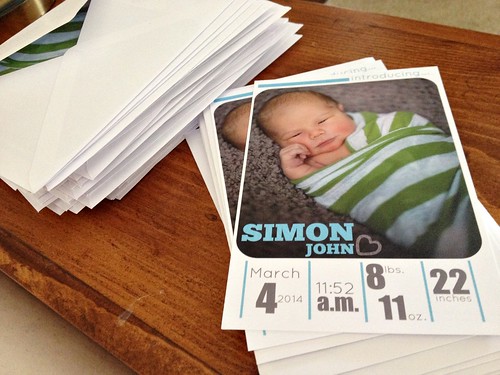
I shared a little bit about how I save by creating my own cards and announcements when I did Simon’s birth announcements a year ago, but I think this is such a great idea that so many people can utilize that I wanted to share it again.
Plus, I wanted an excuse to share James’ announcement with all of you!
Here’s how I did it:
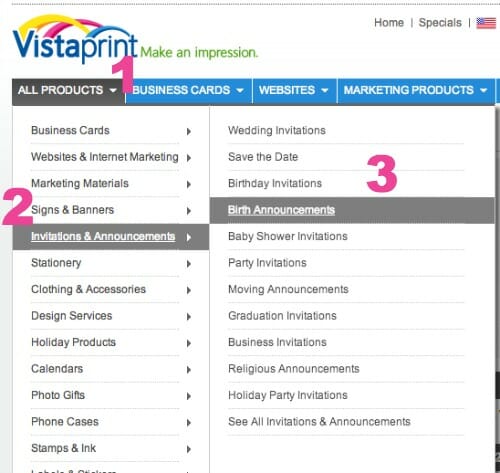
I knew I wanted to use VistaPrint.com to print my announcements because they always have really good coupon codes so I knew I could get a deal. I’ve also used them several times before and know they produce good quality products for their prices.
STEP 1: Create The Front and Back of my Announcement
As I mentioned above, I used PicMonkey.com to create the actual images that I uploaded. I’ve been using this free program for years to edit all the photos for my blog, so I’ve become quite knowledgeable about many of the different features and ways to arrange various photos, add text, resize, crop, etc.
There are plenty of other great photo editing programs around… and if you’ve never used any type of photo editing program before, you’ll probably want to play around with the different features for a bit. You can also look up tutorials online if you’re interested.
One other VERY important thing to consider BEFORE you start creating your card is the size of the card you are planning to make. I made our announcement a 5″ x 7″… however, just because it’s a 5″ x 7″ card, doesn’t mean the design I upload will be exactly 5″ by 7″.
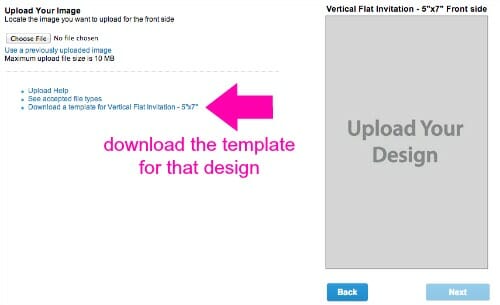
If you go to the Vista Print website (or wherever you are ordering from) they will most likely have an option to download a template for your card — or at least view the specific size requirements. Then you can make sure to create the exact right size so everything will show up properly after you print it (I learned this the hard way a few years ago when I printed Nora’s birth announcements)
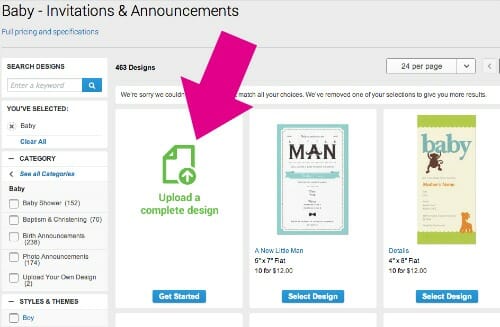
STEP 2: Upload Your Design
I designed the front and back of my card as 2 separate files which I could quickly and easily upload into VistaPrint’s website via the following steps.
STEP 3: Order Your Cards
I always search online for a coupon code (or wait until one is emailed to me) before I order… and I always try to get free shipping too 🙂
The whole process is quite simple, especially if you’re already using a photo editing program. I literally made James’ birth announcements within 2 hours of getting our digital prints back from the photographer, and they only took about 30 minutes to put together.
I love that we have a “custom” birth announcement at a fraction of the price of ordering a pre-designed card!

Rachel says
your pictures are beautiful! Would you share your photographer? I’m local and hoping to get family pictures taken again this year.
Andrea says
Thanks! It was Zander and Breck photography. I went to school with Kari, the photographer (she’s out of Byron Center)
JoDi says
These came out so nice! I love the colors, and that picture of James in he brown knitted outfit is seriously the cutest thing EVER!
Andrea says
haha — my dad says he thinks James looks like ET in that picture with the brown hat. Glad someone else things he looks cute in it!
Amber says
You did such an awesome job on James’s birth announcements!! I also really love the natural green foliage background you all chose, such pretty pictures of you all!
Thanks for sharing how you made them and for less than .30 cents a card, you got an incredible deal! I know those kind of birth announcements can easily go from $2-$5 a card! Hope you all have a wonderful day and weekend~ 🙂
Andrea says
Thanks 🙂
Mrs. Crackin' the Whip says
Awesome pictures! I love how you send out cards. I have a small family so it’s something I’ve never done but I think it’s awesome that you do!