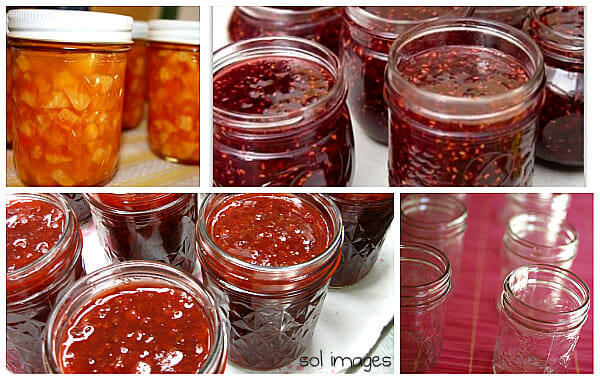
I honestly don’t even remember my first jam-making moment. I was so young, probably only 5 or 6 and excited to “help” my mom and grandma during their annual “jam-athon”.
I didn’t do a lot, but I did always help pick (and eat) the fruit from local U-pick farms or from neighbors who had wild rhubarb, raspberries, and blackberries. I was also the designated “listener” to assure all the jars popped as they sealed.
It was memorizing to watch several pounds of fruit transform into a kitchen full of Mason Jars filled with sticky, sweet jams and jellies – all within an afternoon.
I loved the whole process and knew I would continue the tradition after I got married – and I have! I even teach classes on food preserving, in an effort to revive this dying art.
Contrary to popular belief, jam-making is surprisingly easy. It doesn’t even require a hot-water-bath or other fancy processing techniques. (Note: this only applies to jam. Preserving other produce is a VERY different story).
Still not convinced that you can handle an afternoon of jam-making?
Let’s have a look at the simple ingredients, tools, and basic jam-making method – I think you’ll change your mind!
Ingredients:
There are countless recipes for different jam and jelly, but they all consists of three main ingredients:
1. Fruit
Talk about endless possibilities! Although classis berry jam is hard to bet, don’t limit yourself. I’ve come across recipes for fig jam, bacon jam, onion jam, jalapeño jelly, mint jelly, and more.
2. Pectin
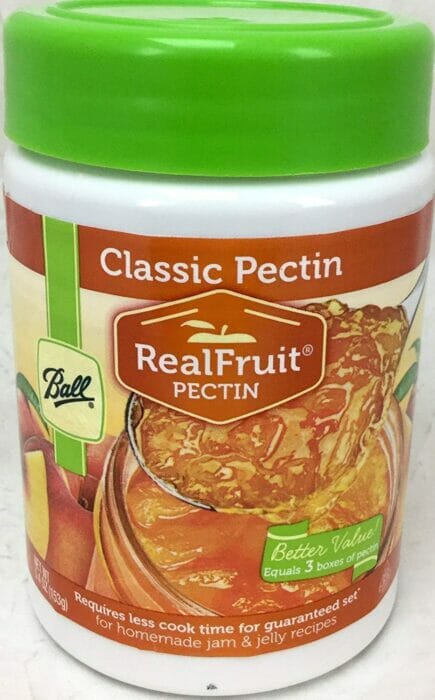
Available in liquid or powder, this natural thickener is often made from the rinds of citrus.
Some well-known brands are Certo, Bernardin, and Ball. (Note: I always use this powdered pectin as these jams have triple the shelf life than those made with the liquid).
3. Sugar
Before you misinterpret home-made jam to be a health food, let me assure you, it’s not! There’s lots and lots of sugar in a single batch of jam and you should NEVER reduce this amount.
Sugar is a preservative as well as a sweetener and should always be measured with a dry measuring cup.
Tools & Equipment
The start-up costs for making jam are minimal – just the cost of your jars (which you can probably get for free from someone) and a few tools.
Here’s a starter list of what you’ll need; you might even own most of them already.
- 2 1-cup measuring cups; one for dry sugar, one for wet fruit
- Wooden spoon, for stirring (you don’t want to use metal utensils)
- Jars, lids and screw rings
- 10 qt. sauce pot – this should be the largest one you own. A heavy-bottomed pot is helpful to prevent scorching or burning.
- Ladle and a wide-mouth funnel, for pouring hot jam into the hot jars
- Timer: accurate timing is important
- Several clean dish towels
Basic Method for Making Jam
Prep. Your Equipment:
1. Gather the tools and equipment listed above.
2. Wash everything in hot, soapy water.
3. Sterilize your jars and lids. This is important, but not as difficult as you may think.
Lids: Place your lids in a small sauce pan and cover with water. Turn the water on while you finish cooking the jam. Once they boil for a few minutes, they are sterilized
Jars: Place your jars in the sink and fill them to the top with boiling water (from a tea kettle). Let the boiling water sit in the jars until you are ready to fill them with jam.
Prep. Your Fruit:
Wash, stem, pit, peel, cut, chop, and/or mash your fruit according to the recipe’s instructions. This can be the most time-consuming part of the whole process so you may want to recruit helpers!
Cook Your Jam: (not applicable for freezer jam)
- In a large bowl, measure your sugar, one-cup at a time. Set aside.
- In a large saucepan, measure your prepared fruit, one-cup at a time.
- Cook fruit with pectin according to the recipe directions. (using your timer)
- Add sugar when the recipe instructs you to do so (sometimes it is after the boil, sometimes before)
Fill Your Jars:
- Remove your boiling lids from the stove and bring them over by your sink.
- Remove fruit from heat and immediately skim off the foam (only because it looks better this way).
- With a hot pad, grab one jar filled with boiling water. Dump out the water into the sink and ladle fruit mixture into the hot jar (use your funnel).
- Cover with lids and screw the screw rings on tightly.
- Flip the jar upside-down and set your timer for 5 minutes.
Repeat these steps with every jar until all the fruit mixture is gone.
- Then, after approximately 5 minutes, start flipping the jars right-side-up again.
- Leave jars at room temperature for 24 hours without touching the jars, even if they “pop.”
- Check if the jars sealed (if you can’t press down on the center of the lid, they are sealed)
- Wash all jars in hot soapy water to remove sticky residue
- Remove the screw rings for the jars that sealed and wash under the ring.
- If they did not seal, wash them, store them in the fridge and eat within 4-6 weeks.
- Label sealed jars and store in a cool dry place (they will keep for a couple of years)
Recipes:
When you purchase your fruit pectin there will be a sheet with several recipes inside. Use those recipes to start out with and then try a few more daring combinations.
I will be updating my site with lots more canning recipes this fall, but until then, you’ll find plenty of recipes in the links below:
So there you have it. You CAN can jam!
I know a lot of people who preserve their own jam because it’s cheaper and healthier than buying jam from the store. However, I do it because there is honestly nothing better than the taste of home-made jam, especially during those winter months, when fresh berries are only a distant memory.
One taste of your OWN home-made jam and you’ll never go back to Smucker’s again!
Just remember to start small; don’t be overly ambitious or you could get discouraged. Pick a simple recipe and complete it from start to finish. Enjoy your first batch of home-made goodness and then move onto bigger and better recipes.


Debbie says
I just did my first canning this Labor Day! I made peach jam and excited to eat it and give a couple of jars away. It’s now sitting in room temperature on the kitchen counter until 25 hrs. I had to use your instructions because the one from the Pectin box confused me when it said to put the filled jars on elevated rack in canner. I had no idea what to do so I went to your instruction and it just said to turn the hard upside down for 5 min. I do have a question on why you say to wash the rings after the 24 hour period.
Thank you for teaching me to can jams Andrea!
Debbie says
Sorry for the typos. I meant “24 hrs” and “turn the jars upside down”.
Andrea says
yay for canning jam! Hope you love it!
as for taking the rings off after 24 hours, there are 2 reasons for that:
1. to make sure they actually come off! If you leave them on for a really long time, they could get extremely stuck on if any jam seeped out of the jars and “glued” the ring to the jar
2. to wash the jars. Again, if any jam seeped out of the jar, it could get mouldy between the ring and the jar. So if you take the rings off and wipe down the jars, you will pretty much eliminate this possibility.
hope this helps!
Jane says
So a few weeks ago I finally got around to canning some raspberry jam since Meijer had such a great price on raspberries. I knew you had blogged about it and easily found this post. Here are a few tips for your readers that may seem obvious but when you are in the thick of canning you may overlook these small details:
Don’t wear a white shirt unless you want a pink polka dot shirt at the end of the day.
Don’t forget that boiling water is really hot.
Don’t start the process at 5:00 Sunday evening when you haven’t even thought about making dinner.
I have never canned before and I have now successfully canned 24 pints of raspberry jam that has meet the approval of my dear children. Thank you so much for this post, and your blog. I appreciate your detailed instructions, tirelessly answering questions and continued encouragement. I never really learned how to cook and relied heavily on boxed food or fast food but now I have made many successful home cooked meals using your blog recipes and I can add preserving to my list of accomplishments. I’m really excited to try the drop biscuits from your post today because I do have some leftover smashed raspberries in the freezer, I’ll thaw them and add sugar for dessert tonight. Thanks again 🙂
Andrea says
Thank you so much for this lovely comment Jane! I really appreciate it and I’m SO glad you were able to successfully can your delicious raspberry jam (WOW 24 pints!) That’s amazing!
You could even give some as frugal Christmas gifts!
Also, thanks for the additional common-sense tips (all of which are 100% accurate) that I left out of the post 🙂