A couple weeks ago, I mentioned that my fridge was getting a little “cluttered” with pictures, cards, coupons, etc. — but I can only imagine how much more “cluttered” it will be once Nora starts drawing and coloring 86 pictures every single day!
And based on the number of emails and questions I get about “what to do with kid’s artwork”, it sounds like many of your refrigerators are covered with kids artwork!
So, since there’s a good chance some of the art projects from school will end up at your house, I figured it’s a good time of the year to share a few of the ideas I’ve successfully implemented with many of my organizing clients.
If you’re looking for ways to display your kid’s artwork, here are 7 “off the fridge” ideas to get you thinking.
1. Post them on a board
This is the simplest option — which is why I listed it first 🙂
You can buy any type of cork board or magnetic board from the store for a very reasonable price, and then mount it in their bedroom, laundry room, play room, hallway, or any other place you want to display their works of art. Of course, you can also make your own board using an inexpensive picture frame and cork, chicken wire, ribbons, etc.
The reason I really like this option is because you can put the board in an out-of-the way place (a.k.a NOT in the middle of your kitchen) and contain their art all in one location. Plus, if the board starts to overflow, you know it’s time to purge.
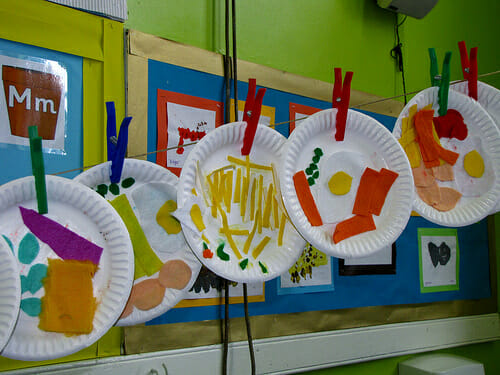
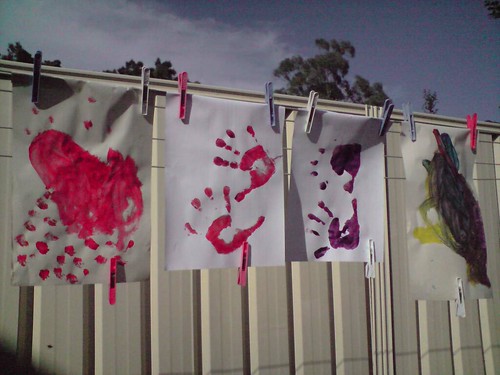
2. Hang them from a clothesline
This is also a really simple idea that you can probably implement for free… in about 10 minutes or less!
Simply find a long piece of ribbon, twine, clothesline, thin rope, yarn, etc. and hang it from 2 or 3 nails or hooks — letting it swoop down a bit between hooks. Then take clothes pins and pin their artwork to the string.
Done!
I really like this idea for their bedrooms, playroom, or a long hallway.
3. Put them in frames
I love the idea of framing the artwork and then rotating it out every month… and it actually looks fabulous — especially with matching large poster frames like these.
I know it’s not always practical to limit your child to one or two pieces of artwork… and it takes work to change out the artwork every month, but it sure is fun for them to see their work in pretty frames!
4. Reuse them as gift wrap & cards
I LOVE this idea, and I think it’s my favorite of all 7 ideas listed here. This is a perfect way to use up some of the large drawings and art projects your kids bring home (maybe after you’ve displayed them for a month).
Let your kids use their artwork as wrapping paper for their grandparents’ gift — or use smaller artwork to make invitations, thank-you cards, or even blank note cards.
Talk about a great way to reuse, repurpose, and recycle!
5. Make a Book
You can take pictures of (or scan in) your children’s favorite artwork (or all their artwork if you have the time) and then make a digital photo album using Snapfish, Shutterfly, etc. Let them keep the books in their room, or offer to display them on your coffee table.
Another great idea is to take a few pictures of your child holding their artwork — then you can remember approximately when they created the artwork.
6. Go Digital
Once you have digital copies of your child’s artwork (either by taking pictures or scanning it into your computer) you can send those images to a digital photo album, use them to create a fun screen saver, or even save them as your desktop background.
Every time you and/or your children use the computer, they’ll see their artwork! Plus, it doesn’t require a ton of work or creativity on your part 🙂
7. Get Creative
I’m not the most creative person, but there are definitely lots of ways you can use kids artwork while also displaying it. Some ideas I like are to…
- Laminate some of the larger pieces and use them as place mats at the dinner table.
- Print it off and decoupage it to a piece of cardboard. Then cut it into puzzle pieces.
- Shred some of the really colorful pieces to make a soft place for them to store their ornaments or other “precious treasures” (like rocks and jewelry from gum ball machines!)
- Order a deck of playing cards with their artwork as the image on the back
- Decoupage smaller pieces of art (or cut smaller sections) onto clear plates and then give them as holiday gifts (with baked goods, of course!)
Not only will these ideas help to limit the amount of artwork that piles up, they can also teach your children that they don’t need to save everything (yes, this is a really good lesson to learn early on!)
Remember to let your kids help you make the decision about what artwork stays and what goes. The more they are involved in the process, the easier it will be for them to let some of their creations go — and that means you’ll have less paper clutter lying around your house!


Karen says
We could never seem to display all the art work that our 3 kids produce … from paper crafts to canvas paintings and more. Read about our solution for displaying all kinds of treasures at http://www.simplyfunfamilies.com/ (blog post for April 22, 2014). You’ll see how our MAGNIFICENT ART WALL keeps our little artists inspired and showcases their work for all to see!
Eliana Cordoba says
I transformed my daughter’s self-portrait into a professional looking piece of art and printed it on a canvas. This is how I started I Love my Kids’ Art. Take a look at my website http://www.ilovemykidsart.com to get some ideas. I am also looking for kids’ artwork donation for my program Kids’ Art for The Cure. Donate your kids’ artwork for a good cause. Show your kids they can help a good cause with their wonderful artistic talents.
The Diaper Diaries says
I LOVE how we display our kid’s artwork so I am pimping out my own post 🙂 http://thediaperdiaries.net/display-your-childs-artwork-works-for-me-wednesday/
Andrea says
So cute Jill — thanks for sharing 🙂
Liz says
I put a few Command hooks on the bedroom door, then hang the artwork using a binder clip on the Command hook. Since the hooks are removable, I can move them later with little paint damage. When It’s time to rotate, I save the most memorable in a memory box for each child. I also use some as thank you notes when that child gets a gift.
Amy says
When my daughter makes a piece of art, we look at it together, but then she stores it in a special drawer of her desk. When the drawer is full, she goes through it and decides what to toss in order to make room for more. I agree that it is important to tech her that we can’t keep everything! Of course I keep a few of the really special pieces.
Stel says
Thanks, Briana, for the tip-off on the app! Installed it yesterday, already sent 2 pieces to the grandparents 1000 km down south and my sis in Ireland. What a great idea.
Briana says
🙂
Demaroge says
Lea ~ You are so blessed to have such a creative and organized Mom! I have some of my children’s artwork still. I love the idea of the hanging!
Another idea that I read somewhere: Make a notebook for each year. Most artwork can be folded and put into a plastic sleeve. Keep in mind that the MOST artwork is pre-K and Kindergarten. It tapers off through elementary school. After that their artwork gets much less and much more ‘professional’ so is easier to store/display anyway.
It wouldn’t take much to organize the art in a notebook for each year …. and with current technologies …. it would be easy to copy/shrink if absolutely necessary.
Also ~ It is important to keep ‘the best.’ One of my children insisted on keeping EVERY scrap of paper that was ever scribbled upon!… and that had to change! I couldn’t keep EVERY thing!
So, we did our best to scale down to the most important pieces. It is also important to write (maybe on the back or on a post-it note) WHAT the artwork is. Ask your child to describe their drawing. Ex.: This is a yellow horse with a blue saddle. This is mommy riding the horse and daddy climbing a tree.
‘Cause you know… sometimes you just can’t tell!
LOL!
Jen says
My daughter started hanging hers on her bedroom wall. She calls it her “gallery”. Yeah, it means there’s tape on the walls, but I think a kid’s room should be a pretty free place, anyway, so I don’t worry about it much. We’ll have to repaint, anyway. She loves being surrounded by her work and I love not having it all (gorgeous as it is!) on the fridge. Or counter tops. Or floor. Or under the couch cushions.
Ivy Miller says
We let our kids tape theirs to the closet doors in the their room. Once its full we take a picture of it to save and then they go through and pick what the want to take down and send to family that is out of town to make room for new things.
Lea Stormhammer says
My mom did this with me when I was growing up. She had me stand next to it as she photographed it so we knew how old I was (roughly).
I love looking back and seeing all the things I did! My Grandmas loved getting notes on the back of the pictures we sent out – Mom would use them to write a long letter about all that was going on in my life at that time.
She also saved the 3-5 best drawings/paintings from each age from ages 3-7 and made a lovely wall hanging using aplique quilting and and embroidery with the pictures as the “pattern”. The wall hanging has 5 rows – one for each age. It’s roughly the size of a baby/lap quilt and has a hanging pocket on the back for a rod. I have it hanging in my kids’ play area in our family room and we all just love it!
Andrea says
Wow, sounds like your mom was/is super creative. How fun that you can share your childhood artwork with your kids!
Briana says
Check out the “artkive” app for iPhone. Kind of awesome!