This post is one I NEVER expected to write… because personally, I feel like photography is not one of my strengths.
No, I’m not the worst photographer in the world, but it’s definitely not my area of expertise, and I’m still not sure I’m qualified to give advice on the topic.
However, over the past 2-3 years, I have learned A LOT about taking and editing photos. And since I’ve gotten quite a few requests asking me to write a post about photography, I’m venturing out into uncharted waters today and will show you some of the photos I’ve taken of my kids that look good digitally (I think it would also be cute to have these photos printed on metal.)
As I mentioned above, I’m specifically focusing on pictures of children — food, landscape, craft projects, and home decór are totally different subjects, and I’m even less qualified to talk about those types of photography!
First a few photography myths, dispelled.
You don’t need fancy or expensive equipment.
I have never owned a SLR or DSLR camera.
In fact, I had to look up what those letters stood for before I wrote this post! In case you’re wondering, SLR = Single Lens Reflex. DSLR = Digital Single Lens Reflex.
One of the main differences between a point and shoot camera and a SLR/DSLR camera is that SLR/DSLR cameras have detachable lenses. In other words, you’re not limited only to the lens that comes with the camera. SLR/DSLR cameras also give you more control over manual settings such as exposure, aperture, etc. (don’t worry if you have no idea what those words mean either!)
I did have a decent point and shoot camera when we first got married, but for the past 2 years, I’ve used my iPhone 4 to take EVERY SINGLE picture. Seriously!
So while I’m sure it would be really fun to have a fancy camera (and then take lessons on how to use it!), you definitely don’t need fancy or expensive camera gear to take decent photos — I say “decent” because I know my photos are nothing fabulous!
You don’t need to know what you’re doing!
OK, so it would help if you knew what you were doing… but as with all things in life, “practice makes perfect” — or at least “practice makes you better!”
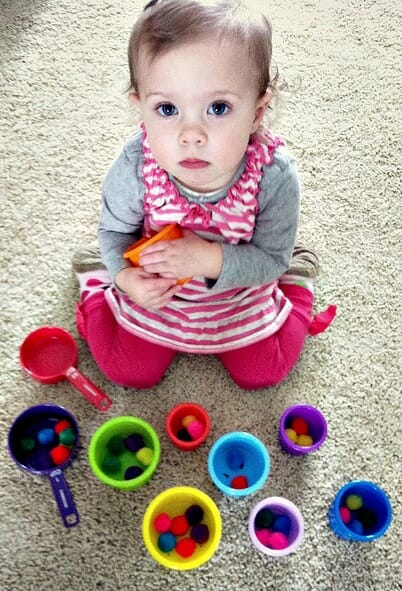
I look back on MANY of my pictures and wonder “what on earth was I thinking?” Seriously, they are that bad. Cropped heads, blurry, one person standing smack in the middle of a photo, not zoomed in, always 100% centered, boring (see picture below)!
Although Nora is super cute, this picture is just awful… SO boring!
I never got any formal training. I just watched what other photographers were doing, read online tutorials, and tried implementing those ideas in my own photos.
I’m still not world-class… but I’m better than I was!
this picture isn’t “perfect” but I like that it’s a little off-center and I love the splash!
You don’t need a pretty house or background.
I always thought I needed the perfect background or location to take a good photo — but really, all I need is enough light.
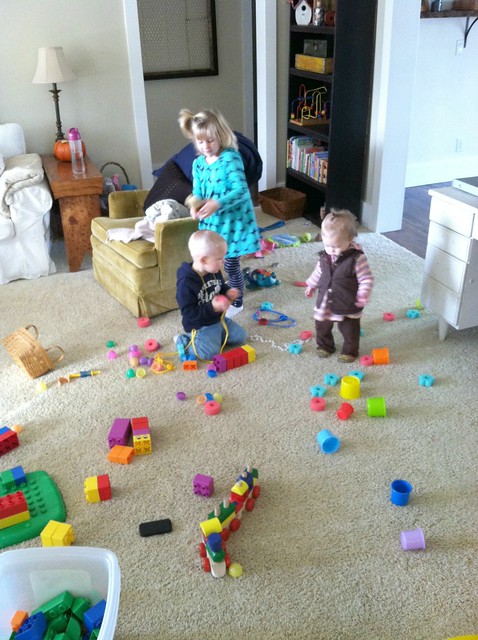
Yes, a nice backdrop would help, but when you live in toddler toy land, your house is not going to look perfect and you will most likely have a whole bunch of junk in the background of your pictures.
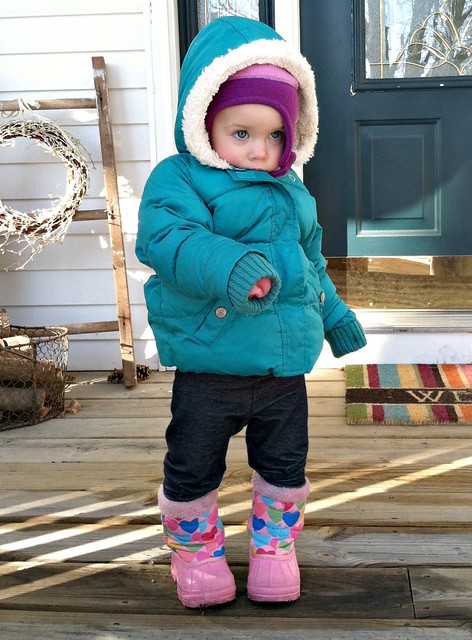
So as you may have noticed, most of my pictures are close-ups — partially because Nora is just so cute that I want to get nice and close, but also because I don’t want the busyness of toys, books, food, decorations, etc. in the background.
Also, I’ve found that my phone takes MUCH better close-up pictures than it does far-away… so I’m just working with what I have here 🙂
OK, so now that we’ve got that all cleared up, here are 7 tips that have helped me when it comes to my quest for improving my photography skills.
1. Keep your camera with you at all times.
I’ll be honest, there is no way I’d walk around with a camera all day long — so this is one of the main reasons I use my phone to take photos. I always have my phone with me, and it takes 2 seconds to whip it out and turn the camera on.
If you don’t have a nice camera phone, I’d suggest letting your camera sit out on the counter, on the TV stand, or on your desk so it’s always available whenever you want to quickly snap a picture (make sure you keep the batteries charged too!)
2. Take lots more pictures than you need or want.
Since I have no idea what I’m doing, it usually takes me at least 20-30 pictures to capture a few good shots. I take many pictures every day — some of Nora, some of recipes for future blog posts, some of decorating ideas, some of the snow on our porch, etc.
I end up deleting most of them once I see how horrible they are, however, there are always at least a few gems that become some of my favorite photos… photos I wouldn’t have found unless I was constantly snapping photos throughout the day.
3. If possible, take photos outside.
Natural light makes pictures look SOOOOO much better. In fact, this is probably my #1 tip. You want lots of light — but not direct sunlight, as then you get shadows and squinting.
However, if you live in a cold climate (like Michigan) you might not be able to go outside every day. If so, read my next tip…
4. Find a couple spots in your house with really good light.
Our house is relatively dark (especially during the winter) because we have a large porch that shields a lot of sunlight. I’m not complaining, because I LOVE our porch… but it creates a new challenge for taking nice indoor photos.
However, I’ve managed to find a few spots in our home that still allow for plenty of light to take relatively good indoor photos (at least by my standards.) We have one “bright” spot by the double doors in our office and another one by some windows in our kitchen.
5. Don’t worry about posing.
Some of my most favorite pictures of Nora are ones when she’s not even looking — or sitting still!
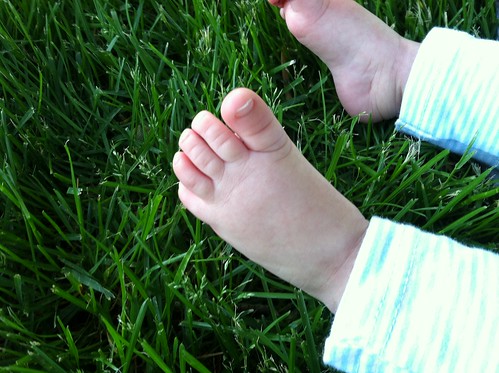
6. Take “faceless” photos.
I think baby feet are one of my favorite things to photograph!
And let’s not forget about little wisps of curly hair!
7. Learn some basic editing skills.
Again, I had no idea what I was doing… but about 3 years ago, I Googled “free, easy photo editing programs” and tried a handful of programs out. Through trial and error (lots of error) I found my favorite programs and learned SOOOO much about photo editing.
And like I’ve mentioned before, I’m definitely not a pro — but if you’ve never taken the time to edit your photos, you have NO idea what you’re missing out on!
Just look what a difference it made in this picture:
yes, I did add the numbers with my photo editing program!
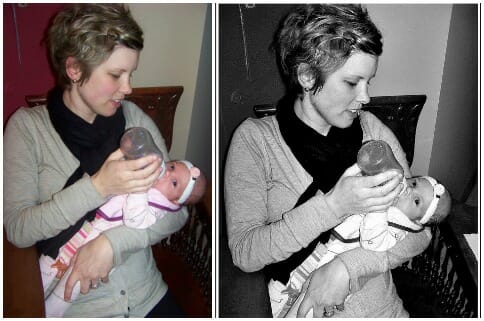
Since I’m often forced to take pictures inside — and possibly in the evening or in a darker room, I just edit them to look a little more “washed out” or I make them black and white. It’s amazing how much better some poorly lit photos will look when the colors are muted… or in black and white!
In the photo below, you can see all the shadows on the left picture — but when I muted the colors and zoomed in a bit, it gives the photo a whole new look (and I think it looks a lot better!)
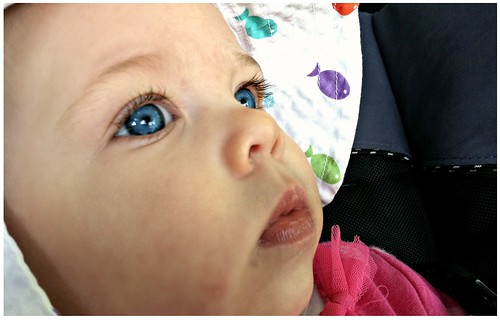
And look how much nicer this black and white photo is compared to the colored image — I feel like Nora’s eyes really “pop” in the black and white photo — not to mention the “new mom bags” under my eyes aren’t as noticeable 🙂
Here are a couple of my favorite free photo editing programs. I also want to mention that I’m now using Ribbet (almost exactly like the old Picnic) to edit many of my photos.
And here’s a link to more free photo editing resources on MoneySavingMom.com
So like I said earlier, I’m definitely not an expert in photography — but I think all the tips I’ve mentioned in this post are totally doable for the average busy parent with simple cameras (or just a phone!)
Looking for more tips? Read this guest post from my friend Jodi — all about how to take amazing photos of your kids.
And if you’re wondering what I do with all the pictures I take — read this post!












domain says
I’ll immediately take hold of your rss feed as I
can not find your email subscription hyperlink or newsletter service.
Do you have any? Please permit me understand so that I could subscribe.
Thanks.
Paul Yuen says
Great post, Andrea!
A photographer once told me that 10% of the image in most pictures that amateurs take tell the whole story. Translation: take tighter pictures. That supports what you’re saying here.
Couple other awesome tips for point and shoot cameras (and some camera phones):
1.) If your camera has a macro setting (the setting that looks like a flower) you can use that to get really dramatic depth of field photos (the kind where the foreground is in clear, sharp focus and the background is blurry). It’s great for close-ups and especially great for food pictures.
2.) If you can turn the flash off, take pictures without your built-in flash. It washes everything out and creates harsh shadows. BUT… if you’re shooting indoors with a white ceiling, you can take a white index card and put it in front of the flash at a 45º angle to reflect the flash up, which will cause it to bounce the light off of that white ceiling. You’ll get really nice results with natural-looking light.
3.) If you’re shooting people or animals, make sure to get the eyes in focus. The rest of the photo can be completely blurry if the eyes are in sharp focus.
4.) If your camera will allow you to auto-focus with single focal points (focus on a single dot area rather than a whole matrix area) that can enable you to a trick that’s called “fooling the iris.” On most digital cameras, the shutter is a 2-position button. The first position focuses and the second position takes the picture. If you focus on a single dot in the center of your view-finder, that ensures that one part of the picture will be in sharp focus. Let’s say we want to take a close-up picture of someone off-center and want to be sure their eyes are in sharp focus. Place the focal point on one of their eyes, squeeze the shutter 1-position to autofocus on that. The camera will freeze on that auto-focused point. Then, before you squeeze it all the way and take the picture, move the camera, slightly to reframe your shot the way you want it and squeeze to the 2nd-position to shoot the picture. Some camera phones will let you do this by touching the screen in the area that you want it to focus before you take the shot. It can take an extra second to shoot with this method… which, with children, you don’t always have. 🙂
Andrea says
Thanks Paul — great tips!
I’m going to have to try your auto=focus tip. I’ve always done that on my iPhone, but I didn’t know you could touch the screen and then move it before snapping the shot. We’ll see if it works on my phone!
Amy @ Fun With Family and Fitness says
Hi Andrea! I am so happy to read this post! I just started a blog (you are more than welcome to visit me!) and one of the things I was worried about was the photos not looking good. I also have a regular point and shoot camera (no IPhone!). I will have to do my best with that and I will look into photo editing too. I just visit so many blogs where the photos are amazing!
Also, since I am just getting started with blogging, my theme is generic. I’d love to upgrade when I start getting some traffic. Thanks for the post…..it will really help me out a bunch! 🙂
Andrea says
Thanks Amy! With blogging, I think any photo is always better than no photo… and although fabulous photos will often get more attention, the main priority should be the content of your post!
Have fun!
Amy @ Fun With Family and Fitness says
Thank you, Andrea! I appreciate your feedback. May I ask one more question about the photo editor you use (Ribbet, right?)
Was the beautiful photo of the new bud that is on your “Big Changes” post edited using it? I just LOVE the look of the focus on the bud and everything else blurred in the background. That’s one look that I would like to use in some of my pictures. I am thinking about downloading it. I am also of course making sure my content will be fun for others to read! Thanks again and best of luck as you begin your transitions!
Andrea says
Amy, as I mentioned in the post, I use a variety of photo editing programs (Ribbet and PicMonkey primarily right now). The picture of the new bud on my other post is from a few years ago and I was using Picnic then (which is not available any longer). However, the blurred affect was done with my camera 🙂
Also, you don’t have to download any of the photo editing programs I talked about, they are just free internet-based programs.
Hope this helps.
Amy @ Fun With Family and Fitness says
Thank you! 🙂
Kalyn Brooke says
Picture taking is one of my love/hate things about blogging. I don’t particuarly enjoy taking and editing them, but its a must! My patience level goes out the window. Lol. I really need to learn how to be better at though, I’m just procrastinating… 🙂
Emily says
Loved what you said about using your phone. Glad I’m not the only one! 🙂
Navya says
Thank you Andrea, your tips have helped me so much!
You are always an inspiration with all that you have accomplished with a baby. Having a 5 month old baby myself, and recently working from home, I always look upto you !!
Andrea says
Thanks Navya — enjoy that little baby!
Sarah Bosma says
I think for me the #1 photo tip I’d give is GET ON THEIR LEVEL. It is amazing how much more “real” it seems when you shoot down on a child’s level. It doesn’t portray looking down at them but rather almost getting in on their fun with them! 🙂
susie says
I agree with you on the all the points except the one that says to get up close…. when I look back on photos after a few year I like the ones that show more of the background, then you can see what your house looked like at that time. I thought those two photos which you thought were your bad ones were really cute!
Kristen says
I’ve been using Picmonkey since Picnik closed, and really like it, but will have to give Ribbet a try! Thanks for the tidbit!
Nicole D says
Andrea, thank you so much for this post! I think my biggest problem is being a perfectionist- always looking for the perfect background, perfect pose, etc. Your best tip for me is to start taking a higher volume of pictures. Once again, thank you!
Dana says
Great tips! I especially like the advice to take close ups – eliminating the background and better quality from the camera on my phone. And sometimes zooming in even more than you think you should creates interesting shots as well.
Barb says
Do your two favorite photo editing sites do a better job than the “editing” option in iPhoto on the Mac? Are they just as easy? Like you, I know NOTHING about editing, so have just been using the very easy editing in iPhoto.
And thanks for all your wonderful articles. Yours is one of the very few blogs I look at daily. Blessings to you and your dear family.
Andrea says
Thanks Barb!! And yes, in my opinion, the photo editing programs I mentioned are much easier to use and produce better results than iPhoto. However, to be fair, I’ve been using these photo editing tools for almost 3 years so I never gave iPhoto a fair chance. I just realized it wasn’t as intuitive for me so I kept using the free internet-based editing tools!
Heidi says
Awesome post! Great tips for people like me who don’t have the time and money to invest in using a high-tech camera!
Demaroge says
My Mom taught me to take the picture of the person. It helped me immensely because I was taking photos too far away from the subject. Of course, that was LONG before digital cameras were invented! However, it is still good advice today even using digital. Zooming in can make even digital pics looks grainy. So, I concentrate on keeping the picture about my subject and I pay more attention to what is in the background. The background plays an important part of the story I want my picture to tell …. but I want the background (and sometimes foreground) to tell the story I want to show!