I think it’s about time for a kitchen update. Don’t you?
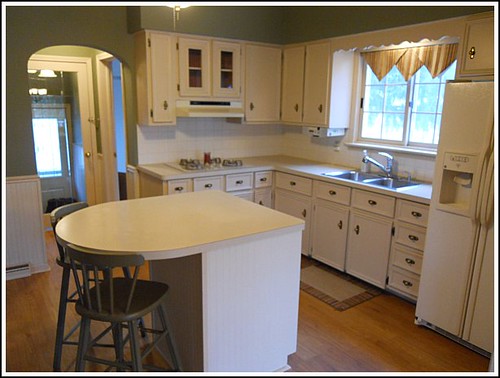
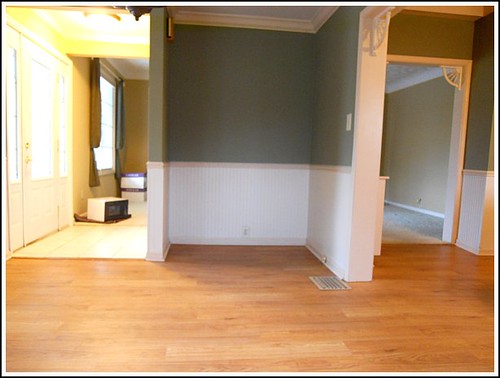
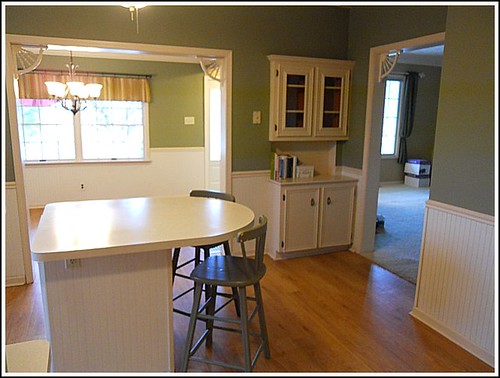
This is what the image above USED to look like before we tore it all apart!
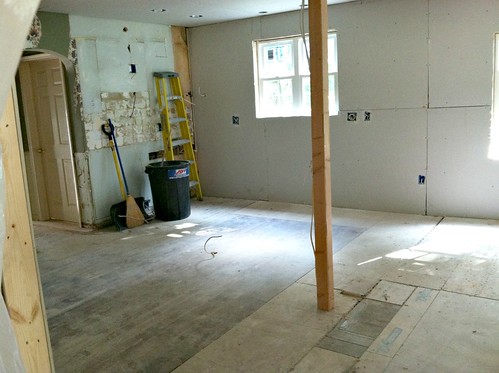
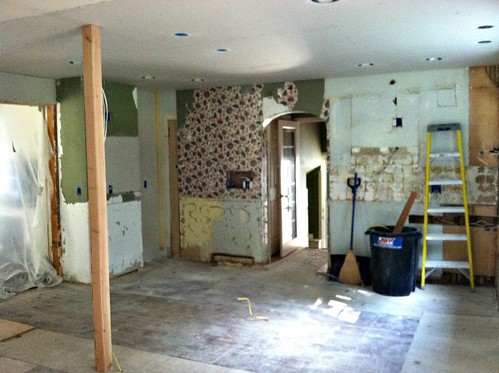
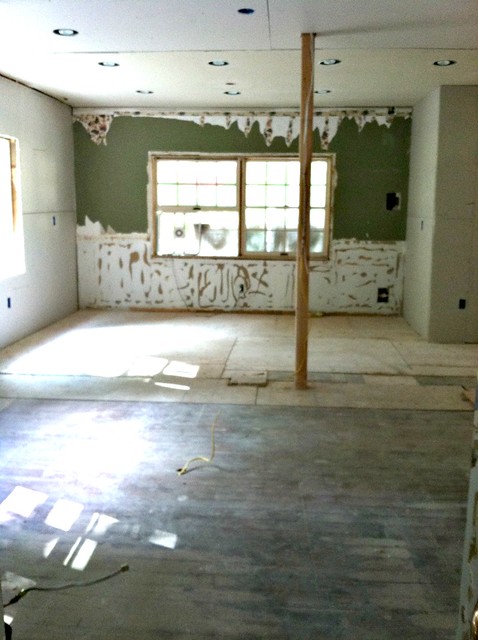
Demolition took MUCH longer than we thought because apparently for the past 120 years, anyone who’s ever done any type of renovation in our house simply covered over what was previously there with another layer.
look at all those layers of wallpaper!
For example:
We had 4 layers of floor to rip up {laminate, 2 layers of linoleum, and wood}
We had 2-3 layers of wall paper {one of which was painted over}
There were a couple walls that had two layers of drywall, a layer of thick wooden boards, and THEN the original lath and plaster {of course, there was absolutely NO insulation in the walls at all!}
Half the ceiling had 2 thick layers of drywall.
Etc. Etc. Etc.
Every time we ripped something out, there was another layer behind it that also needed to be ripped out… so it’s safe to say that we are pretty sick of demolition.
But we figured we needed to do it right — and we did.
We also did more demolition than we planned because we put another “hole” in the wall to open the kitchen and dining room up to the living room.
Once all the demolition was FINALLY finished, the electrical work was next — and can I just tell you how ecstatic I am to have new electric (and plumbing) in our super old kitchen!
We used to have a grand total of 3 outlets in our kitchen… now we’ll have 13.
We also put tons of lights in our kitchen — four different sections of can lighting, special lighting for over the range, under cabinet lighting, pendant lighting over the island, in-cabinet lighting, etc. Our kitchen will NOT be dark 🙂
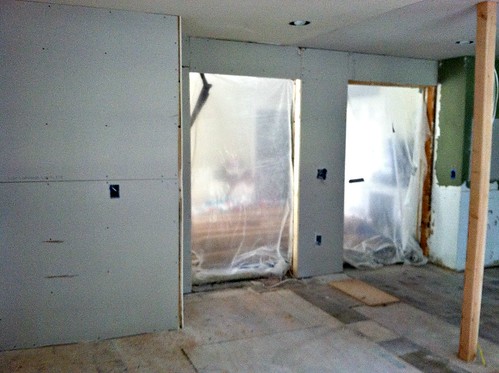
The ceiling went in after the lights were finished, and it finally started to look like one big room instead of a separate kitchen and dining room {which was my goal for this project}.
After the ceiling came the new windows, LOTS of insulation, and new drywall for most of the walls. There was one wall that we didn’t remove because it actually had insulation and it was part of the newest addition — plus, we were just so sick of tearing things apart.
Oh, and my farmhouse sink arrived!
The next steps:
For the next week, we’ll be finishing up a bunch of odds and ends while a professional comes to mud the drywall. Then we can paint the ceilings and the walls, install bead board on the walls, and get the window trim up.
The cabinets are scheduled to arrive 7-10 days from today so hopefully we’ll be almost finished with everything on my list above by then {although that could be a bit optimistic!}
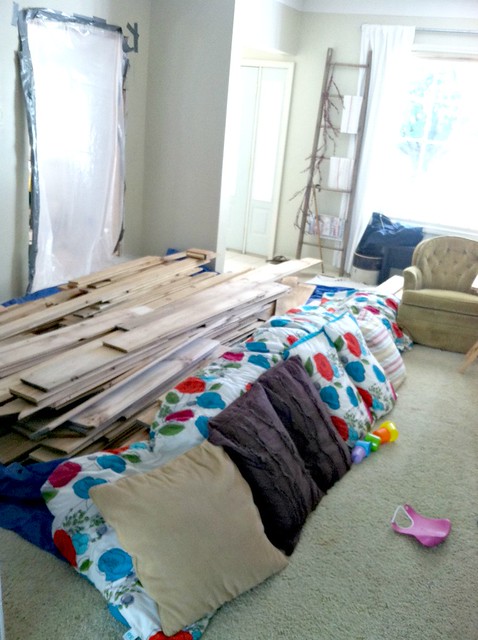
Once the cabinets arrive and are installed, then we will install the piles of wood flooring that are currently sitting in our living room. Since it’s real wood, it needs to sit in our house for at least two weeks to acclimate to our home’s temperature and humidity — yup, that part of our living room isn’t exactly baby-friendly right now!
I’m in the process of ordering counters from a local West Michigan business… but haven’t totally decided yet. I’m fairly certain I want butcher block for the island, and I’d like to do black granite for the rest of the counters, but I’ve heard that black is hard to keep clean.
We’ll see what I decide!
Once the counters are installed and the flooring is stained, we’ll have our appliances delivered… and then I can start to decorate and add all the fun finishing touches.
When we started this project, our goal was to have a “usable kitchen” by Labor Day… and I honestly think we are still on-track to meet that goal.
I’m just so excited to have a kitchen again — and to finally share some “after” pictures!
Oh, and if you’re wondering what it should {hopefully} look like when we’re finished, you can see a few drawing here.

Jessica says
I have followed your blog for awhile now and did not even realize that you used beadboard as the backsplash in the kitchen! I was researching this today because it is our plan to use beadboard in our kitchen as well.
Anyway, I said all that to ask you this: Did you get your beadboard from Lowes? I saw on your budget breakdown that you bought “paneling from Lowes” so I was wondering if that’s what you were referring to. Do you remember what kind you chose? There is the peel and stick kind, hardwood kind, etc. and I’m a little overwhelmed and wondering if you could give me some insight.
Andrea says
Thanks Jessica,
We actually just used the top 1/3rd of the paneling we used for the dining room walls.
The beadboard paneling comes 8 feet long by 4 feet wide. So since we only used 5 feet sections in the dining room, we used the other 3 feet sections for the backsplash (we really only had to use about 2 feet). We did the same thing in our old kitchen and I loved it there too!
Our paneling was nailed into place, then we patched the holes, sanded, and did a couple coats of paint.
Debra says
I just can’t wait to see your new kitchen, so exciting.
Christina says
You MUST reseal granite annually! Martha Steward says! lol! I just read it by the pool and am soooo excited to see the kitchen finally! (Her August talks about countertops… FYI.)
Jen says
We had black granite and it drove me crazy!! No matter what I did, I could not keep it free of fingerprints, swipe marks.etc. it was a lot of work. And I promise, I’m a neat freak too! Just my. $.02!! Can’t wait to see the finished kitchen!!!
Megan Camp says
We installed black granite into our former house. It had some speckles and texture to it. Wasn’t pure black. Personally, I didn’t have any issues with it. (Just asked my husband what he thought and he loved it too). With your type of personality, I don’t think you’ll have a problem keeping it clean. I didn’t see things like fingerprints and such. Water residue would show up but I notice that on lots of counters.
One PLUS with black granite is that it doesn’t need to be sealed nearly as often as many other colors. It’s not as porous as a lot of the lighter granites that really do need to be sealed (learned this from our granite guy). Make sure you ask about the type of granite and how often it needs to be sealed whatever you buy. They’re not all the same. 🙂 I can’t wait to see your finished kitchen. I’m sure it will look amazing, as does the rest of your beautiful home!
brenda w says
love your blog! good luck on your kitchen remodel. we bought a foreclosure house and spent the last 2 1/2 years doing a whole house remodel. we put black granite (black uba) in our kitchen… and i love the look! it’s absolutely beautiful… but i would think twice about black granite if i had that choice to make again. it shows every fingerprint. ring from the cups, crumbs. if you wipe it down with a damp rag, instead of the granite cleaner… it leaves streaks that show up … especially with the under cabinet lighting. we put a brown/gold/green slab in our bathroom and it’s so much easier to keep clean!
good luck with your remodel
Cammy@TippyToeDiet says
Even though I liked the original kitchen (I wouldn’t have liked having 3 outlets, though!), I’m excited to see what the finished project looks like!
Kaui @ Thrifty Military Mommy says
I used to work at Home Depot’s Kitchen and Bath Design center and people were constantly complaining about how hard it was to keep black countertops clean. The black just tends to highlight any particle that settles on it all the time. In fact we had a display of black corian and it ALWAYS looked dirty. Even just after we cleaned it. I don’t think you want black.
Zolane says
Crazy amount of work renovating an older home but so worthwhile in the end. There’s just something about refurbishing something that has stood the test of time and making it even better. Looking forward to all the updates and LOVE the sink!
Demaroge says
I wonder just how much BIGGER your kitchen is because you removed so much around the perimeter!
Even if you removed 5 inches from one wall, 2 inches from another wall, etc. you will have added area! …. Come to think of it…..I hope you included that in your measurements!
I am sure its going to be absolutely fabulous when you are done!
: )
Sarah says
Who needs insulation when you have soooo many layers? 🙂
abby says
My mom just re-did her kitchen (a 6 week project that turned into 6 months!!!) She did her island with a black granite and the wall cabinets with a cream granite. She loves the black! Yes, it is a little more work to keep clean, but nothing that isn’t too manageable. Basically she just always makes sure to dry up water immediately so there’s no water spots and she runs a rag over it every day or so to pick up any dust. Based off of what I’ve read from you here on the blog, those are probably things that you would do anyway, no matter what color your granite is! Go with your gut instinct!
Andrea says
Well thanks Abby — you’re right that I always wipe down the kitchen counters at least once a day! We’ll see what I end up deciding!
Stel says
Oh it’s going to be great! Yep, black granite is horrible. In the end we also went for a reddish sand-coloured aptly named “Namib” and it works very well. No fingermarks.
Shelia says
So excited for you. It’s a lot of hard work I know but it will be so worth it.
As for the black granite – my mother had that installed when they remodeled her kitchen 3 years ago and she’s said she wished she went with something more neutral or blended colors as the tiniest crumb or even fingerprint shows. It is quite frustrating for her and myself when i visit. it’s been a constant struggle to keep it clean as her kitchen is the first thing you see when you walk into the house. Just wanted to throw out that tidbit if you’re on the fence about that. It’s beautfiul no doubt but a pain to keep clean. Especially for someone like me who likes things neat and tidy and can’t stand to see every little crumb or smudge.
C Munson says
I know what you mean about black granite – I love the look. I put it in our old house before we sold it so I didn’t use it very long but it was HARD to keep clean. I have 3 kids and I was glad that I didn’t have black in our new house. Now I have beige which is a little boring but definitely I don’t walk into the kitchen and see every spill! I think the butcher block island will keep it interesting. Just my 2 cents!
Melissa says
I feel your pain! We renovated our kitchen and found many layers of flooring and ceiling as well. It felt good to take it all out and do it the ‘right’ way. Much more lighting and outlets at counter height and on the island make life so much easier. 🙂 Best of luck with the continued work. Can’t wait to see the finished product.
Starla says
I admire you for putting up with all that mess for so many weeks! That takes grace on your part ’cause everything is harder to get done efficiently when there is a big project going on like that.
Glad to see an update… I was wondering how things we coming along for you. =)
Jen says
Is it weird that I think I’m as excited to see this finished as you are?
That’s weird.