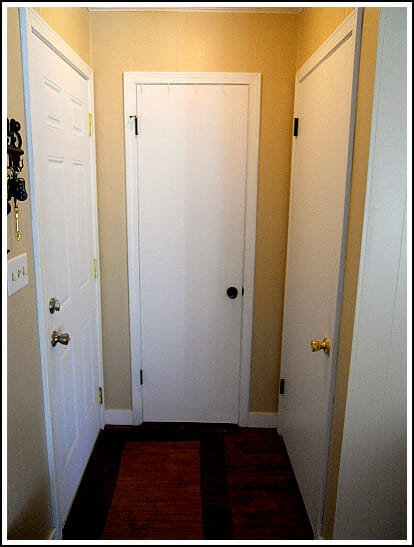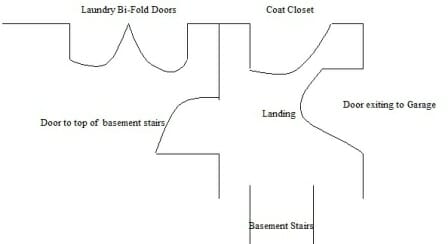
At our old house, we had a really awkward back entryway with 3 doors that all opened into each other. It was always crowded… no matter what I did to try and keep things organized.
So the other day, when my friend Leslie sent me a before and after picture of her crowded entryway, I immediatly asked her if I could share the pictures on my blog.
She willingly agreed, and even offered to write a bit about the fabulous transformation!
The following is a guest post from Leslie:
When my husband and I first moved into our house the day after Christmas in 2008, we knew we had our work cut out for us. We began by cleaning and painting our entire house since it had been empty for almost 9 months and there were several “appearance” items we wanted to take care of right away.
Fast forward about a year, my husband began his Master’s Degree program for a MBA in Finance and all household projects were put on hold… until this spring.
After thinking about how we wanted to transform our home for two years, we decided to tackle the coat closet near our garage. But since my husband was in the final semester of his graduate degree, I decided to tackle this project all by myself!
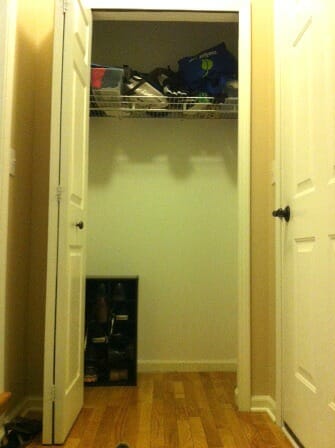
This is what our coat closet looked like BEFORE.
A poor design in our opinion, the 4’x4’ landing at the top of our basement stairs had 4 doors (FOUR!!) that swung into one another, limiting our space and making things feel very crowded. Forget trying to put your shoes on comfortably or make your way into the house if you forgot to close ANY of the doors.
The coat closet had great bones but poor storage options so it didn’t need a complete gut- I started by removing the bi-fold door, any hardware related to the door, pulled all shelving from the walls and pulled off the door casing and nearby baseboard.
I knew the closet would be challenging, as it was not square — so some things took a little longer than expected. I started by building a frame on the floor and framed in a bench seat using 2×4’s and securing directly into the stud.
I knew I wanted something different than just plain drywall for the closet, so I purchased some wainscoting and placed it horizontally rather than vertically to make the closet feel larger than it appeared. To cover the seams in the corners, I used quarter round and sealed with caulk.
After installing the wainscoting, I put in my shelves, braced with an 1×4 and a 1×6, for support on three sides into studs. Plywood was used for the shelving and decorative dividing supports were cut from a 1×4. The shelving fronts were finished with decorative trim.
While I searched for an acceptable decorative shelving brace at my local hardware store, I primed the wainscoting, bench, shelves, etc. Finally I gave up on my search and built my own braces from 1×2’s and scrap pieces of plywood (when in doubt, build your own).
I ordered some great cast iron hooks from an online hardware store, and after adding a few coats of paint to the wainscoting, the bench, and shelves, it was time to put in the seat cushion.
I cut a similar piece of plywood to the seat already installed, cut my foam to match, and then attempted to upholster the seating, not once – but twice because I messed up the cuts for the inverted corners.
Finally, the last portion of the makeover was to build some boxes for storage under the bench. While it would have been nice to find some of those wonderful fabric boxes or something to stash under our bench for shoes, I knew that there was no way I was ever going to find storage cubes the size I needed….so I built some!
I wanted the crates to feel “vintage-y” so I built them out of plywood in a “plank style”. I wanted to have them look like crates so I put two coats of stain on them and finished them with rope pulls (purchased at my local hardware store, by the foot).
I couldn’t be happier with the end result of my project!
Seriously… doesn’t Leslie’s closet transformation look fabulous!
I LOVE those crates and definitely have a few places I could use them around our house — maybe I’ll have to see if I can make some as cute as hers!


Debra says
That turned out GREAT! 😀
Heather@Creative Family Moments says
I am inspired and jealous of the carpentry skills! Now I’m rethinking our closet…
Katie says
Wow – this is almost an exact copy of the entry way “mudroom” from The House of Smiths (http://www.thehouseofsmiths.com/2012/08/our-home-tour-outside-and-entryway.html#more). They really are an inspiration!
PS: Andrea, I just saw an ad for Simple Organized LIving on the sidebar of MoneySavingMom.com – kind of made me feel like I knew a celebrity blogger 🙂
Andrea says
Wow Katie — you’re right, the entry ways look the same 🙂 Maybe that’s were Leslie got her inspiration! Either way, they both look great and I ALMOST wish we had an awkward entryway in our farmhouse so I could do something similar.
About the ad on Money Saving Mom — I work with Crystal and she’s just nice enough to display my ad 🙂
Rebecca@thecleverspender says
Now THIS is clever! I would love to see more details – a step-by-step on the bench, seat cushion, and the drawers would be great!
Christine says
I love this transformation. This is a great example of redoing an area to better serve the home and family. Not only is it practicle by serving as a great organizational area for the family, it looks great too! I love how it opened up the space and basically created a small “mudroom” area. Very creative! Well done!
Christina says
This is amazing! I have debated taking over some of those tools myself to tackle a project and this is exactly the inspiration I needed! Well done and hats off to Leslie!
Leslie says
Hi Everyone! Thank you for the lovely comments. I’d reply to them but for some reason when I click the reply button it doesn’t prompt me with a box, so I’ll reply here:
@Amy- Yes, this is the first project of this size I have tackled. I have had small “fixer” projects I have done in the past, but nothing to this extent. I did not gut the closet, so yes, it is recessed on each side. I pretty much built it to fit what was existing.
Thank you to everyone and your kind comments- I appreciate all of them!
Sandy says
WOW! That looks so inviting. I am a big fan of Ana White (she builds beautiful items) and now I am a fan of yours. You should continue your design and building projects. You are very inspiring. Thanks Leslie and Andrea!
Elaine says
I’m so impressed by your carpentry skills! Nice job!!
Andrea says
How smart is that to add a built-in seat!! Genius! : )
evelyn says
Beautiful makeover. I love the practicality!
Dawn says
I clean houses and I’ve really grown fond of pocket doors after seeing them in the houses I clean. If I ever built a home or remodeled, I think I would use more of these whenever possible. No open doors clogging up spaces!
Colleen says
Stunning results, and I especially love that she shared how she did it! Great work Leslie!!
Amy says
I LOOOVE THIS!! It’s giving me inspiration to finally buy an electric saw….I’ve been wanting one for years. Leslie, is this the first project like this you have tackled? Does the closet still go beyond the door frame inside?
Cammy@TippyToeDiet says
This is lovely! (Makes me want to gut/re-do my perfectly acceptable, but not pretty, coat closet!)