While I’m definitely not a super talented seamstress, I can easily follow simple sewing instructions, read a pattern, and complete basic sewing projects.
Since I made the baby quilt for our nursery before Nora was born, I knew I wanted to tackle another “quilt-type” sewing project for this baby — but maybe not on such a large scale. Plus, I wanted to make something I could also duplicate for Nora — you know, to eliminate any fights from the beginning 🙂
So when I came across these Rag Quilts, I decided they would be my project for this baby (and for Nora)!
I’ll admit that although I was making tiny 12″ x 12″ quilts, I was still a little intimidated by the process of actually quilting 5″ squares together to form a pattern. However, I was pleasantly surprised by how quick and easy the whole process was.
I finished both quilts within about 2 hours — and that was with several interruptions and some delay as I was trying to figure out exactly what to do.
For anyone who’s interested in trying this super simple sewing project, I’ve included some very basic instructions below — however please don’t ask me specific questions. I honestly had no idea what I was doing and just learned as I went along. You can check out these Rag Quilts on Pinterest for LOTS more ideas, tips, and instructions.
STEP 1: Buy the fabric.
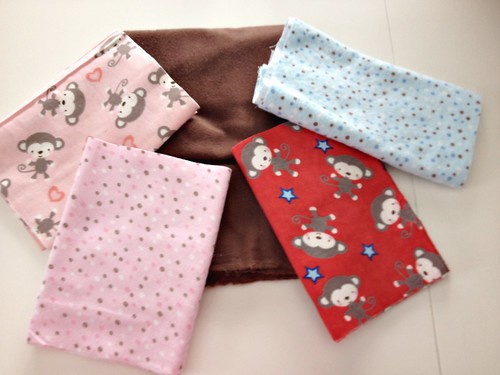
If you’re going to make a tiny quilt like mine, you’ll only need 2 coordinating flannels for the front, and then another solid flannel for the back.
I purchased the 40″ bolts and only needed 7″ wide strips of each front fabric (I purchased 2 extra inches to allow for shrinkage when I washed it). I purchased 30″ of the brown fabric — but that’s because I wanted extra for another project.
Since there was a huge sale on flannels at JoAnn’s I got ALL the material I needed for $3.78 — and I even have enough left over to make two more tiny rag quilts 🙂
Oh, and in case you’re wondering, I went into the fabric store with a very specific idea of what I wanted — and it was NOT monkeys 🙂
However, due to the sale I mentioned above, they were completely out of everything I wanted. So since Nora loves monkeys right now (and she LOVES things that “match”), I figured these fabrics would be cute — and I know she’ll love that she and her brother will have “matching” blankets!
STEP 2: Wash and dry the fabric.
You’ll DEFINITELY want to wash and dry the flannel before you cut anything or sew the quilt as it shrinks a lot.
You’ll also want to make sure you clean out your lint filter really well after washing the fabric… trust me on that one!
.
STEP 3: Cut the fabric.
This part was by-far the most time-consuming for me — but I think part of the reason was because I’ve never ever made this type of quilt before so I was double and triple checking every cut!
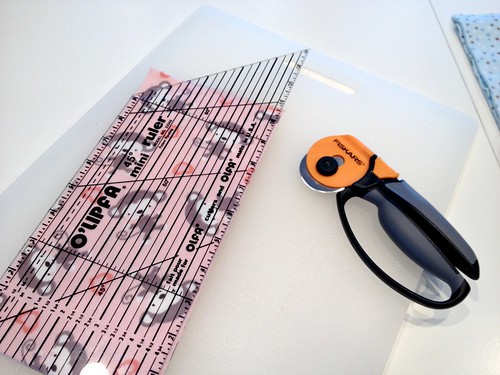
I first folded the 7″ strips of fabric into fourths so I wouldn’t have to make as long of cuts and then cut a little off each side (using a kitchen cutting board, straight edge, and rotary cutter) to get them down to exactly 5″ wide.
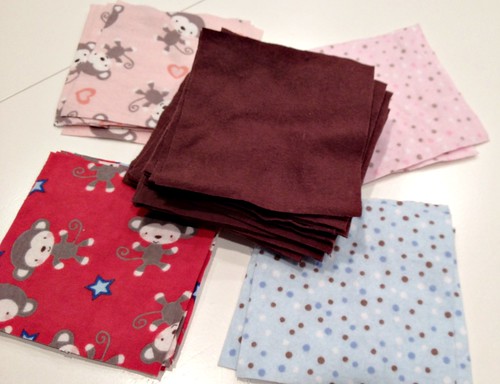
Then I cut those 5″ wide strips into 5″ squares.
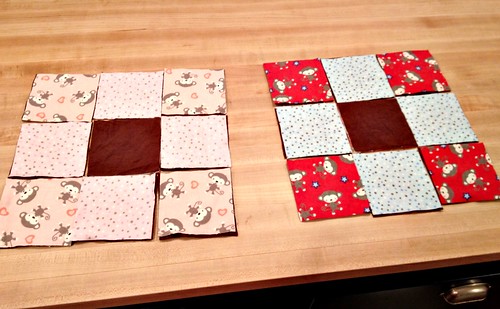
All together, I had 12 squares for the front of each quilt and 12 squares for the back of each quilt — so 48 squares total.
STEP 4: Lay out your pattern.
Obviously, you’ll need at least an idea of the pattern you want to create before you cut the fabric; but after the fabric is cut, it was helpful for me to lay it out so I could visually see it (and make sure I cut everything properly).
STEP 5: Sew the quilt.
The sewing part was MUCH easier than I anticipated — it literally took me less than 10 minutes per quilt to sew all the squares together. I first sewed each row together, then I sewed the rows to each other. Finally, I sewed a seam all the way around the edge of the quilt.
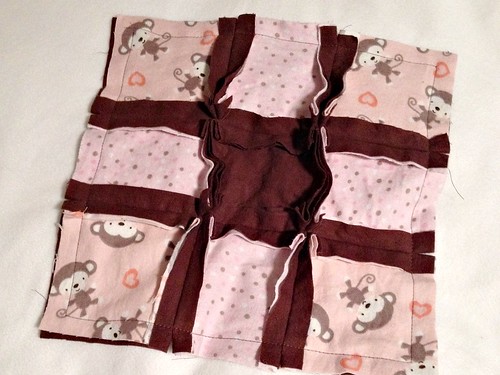
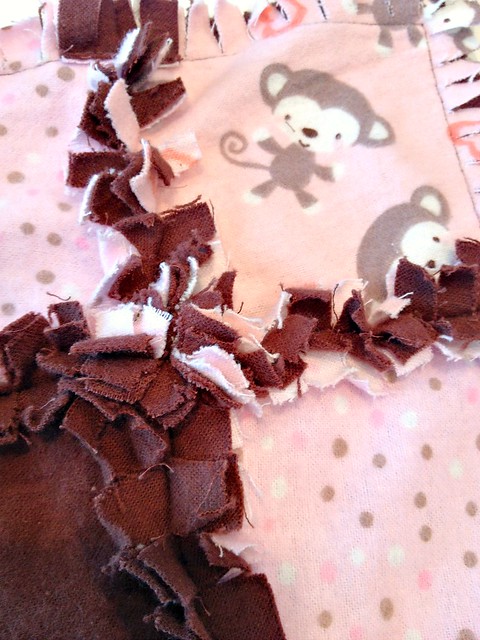
You’ll want to make sure to sew RIGHT SIDES together so the seems are on the top of the quilt (see photo below). I used a 3/4″ seam-allowance which gave me a good amount of material to cut and made them look quite “raggie”. But obviously, the larger the seam, the smaller the over-all quilt ends up.
P.S. don’t be alarmed — it will look REALLY ugly at this point!
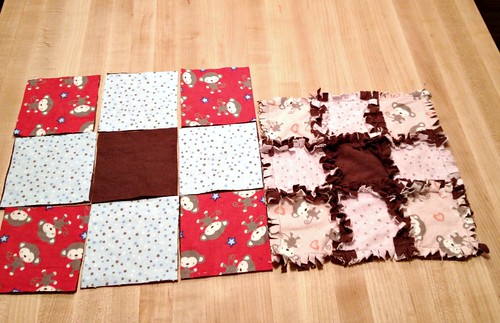
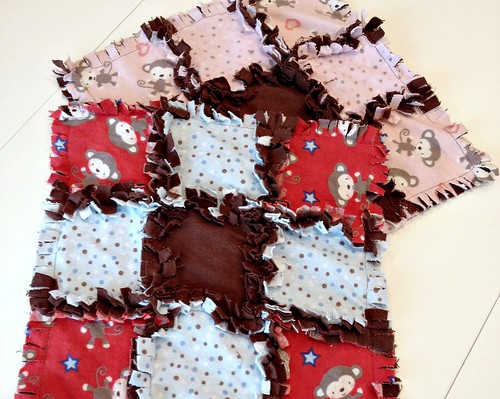
Just to give you an idea of how much smaller the quilt is AFTER you sew it, you can see the comparison photo below.
STEP 6: Cut the edges to make them look raggie.
Before you even start the cutting process, make sure you have a very, VERY sharp scissors and a good TV show to watch 🙂
It took me a good 20 minutes to cut each quilt (and remember, they are tiny). I cut slits every 1/4 – 1/2 inch — and no, I definitely did not measure or do anything exact. I just snipped, snipped, snipped, until my fingers were sore… then I took a little break and started up again.
STEP 7: Wash and dry again.
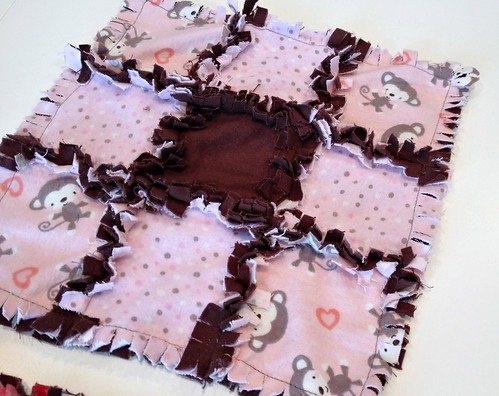
In order to REALLY see the rough “raggieness” come through, you’ll need to wash and dry the quilts again to “fluff” them up and fray the ends. I actually just sprayed my quilts with a spray bottle and then put them in the dryer all by themselves — because they let off TONS of lint and fabric fuzzies the first time. I was very glad I did this!
When they come out of the dryer, they will still have lots of lint and fabric fuzzies on them so I actually took my quilts outside and shook them vigorously which seemed to work like a charm.
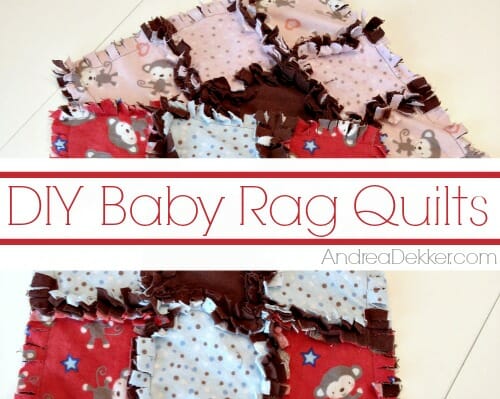
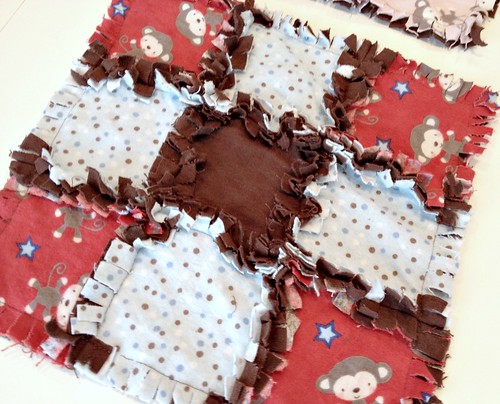
Don’t they look cute!
These quilts will be the PERFECT size for bringing along in the diaper bag, in the car, for Nora’s babies, or just for a quick little snuggle while watching TV or taking a nap.
I have a feeling Nora will LOVE running her hands over the frayed edges — and of course, the fact that it has monkeys on it!
I already have the quilts wrapped and ready to go as we’re planning to give these to the kiddos right when we get home from the hospital. That way, Nora has a little gift to open and can see that she and her brother are both getting the same blanket in different colors.
Not bad for $3.78 and about 2 hours of my time!
Oh, and for those of you keeping track, I’m now finished with EVERYTHING on my to-do before baby list except making the baptism outfit (and I’m leaving my sewing machine set up so I have no excuses!)


Amy says
They came out great!! I did the same for my son before I had my daughter. Actually made full size rag tie blankets for them and let my son pick out the fabric for his new sister. They both still use them 2 years later. I think my hands still hurt from cutting! 🙂
Brenda says
Good Job on only buying what you need…I would have bought a yard of each and had leftovers and spend waaayyy more money!
A different quilt that I found handy to have around was a simple fleece tied blanket. Buy 1 yard of the fabric and then just knot it togather. It will be a long skinny rectangle. Perfect size for covering up on the floor or couch AND for covering up exactly 1 kid in the car without overlapping onto the brother sitting next to them (who has their own blanket the same size). I used this with thte carrier-type car seat as an infant and then the toddler size car seat and my 3 yo loves it now in the house. perfect size without alot extra to tuck-in or drag an the dirty car floor!
Andrea says
haha — it wasn’t hard for me to stick to my list. I’m not a huge sewer so I didn’t really want extra fabric. However, it was an amazing sale!
Jeanine says
These are so cute! Thanks for sharing all of your great tips!
Sherry L says
Those are adorable! I like the idea of the coordinating big sister blanket. I made one rag quilt for my youngest daughter last year and I’m thinking of making a larger one. My older daughter is learning to sew right now. We just finished a little purse for her and we are moving on to quilting! Great job on the blankets and for knocking out the before-baby list!
Andrea says
Thanks Sherry, I think Nora will actually get a lot more use out of the little quilt than the baby — which is why I really wanted to make her one too. I’m sure she’ll end up using it for her “babies”! And yes, I think your daughter could definitely do this sewing project if you helped her with the cutting!
Shelly says
Adorable! Too bad I can’t sew a stitch. If I ever take it up, though, I’m trying these cute quilts! Love it. I will pray for a safe delivery for you and your baby. 🙂
Andrea says
haha — well the quilts are SUPER easy sewing wise. Maybe you could cut everything out and have a friend do the little bit of sewing involved!
Amy says
Oh so cuddly and soft! You are so good for doing crafty things so late in your pregnancy! I had nooo energy after about 33 weeks:)
How do you like your rotary cutter? Are the edges easier to get even? I have fabric scissors but keep contemplating getting a rotary cutter. The cost of the darn board is what holds me back…but it looks like your cutting board works just fine!
Ashley in Wyoming says
Amy–
If you sew much at all, I’d definitely recommend investing in a rotary cutter. I’m a quilter, but I even use my mat, rotary cutter & rulers for almost every other sewing project I do! Even though they’re more expensive, I’d go for a bigger mat right away unless you plan to travel with it a bunch. Get a *good* rotary cutter, and I’d start with a 6″ wide ruler (very versatile!). Watch for sales and coupons 🙂 Happy sewing!!
Amy says
Thank you Ashley! That’s a big help! xo
Andrea says
Thanks Amy… but don’t beat yourself up. As I’ve mentioned before, pregnancy gives me TONS of energy… and then I totally crash after the baby is born with no desire to do anything. So I’m trying to get everything accomplished now before he arrives 🙂
And yes, the cutting board worked well!
lydia @ Five4FiveMeals.com says
So cute! They look great. I can’t sew to save my life and just the thought of learning intimidates me. I am jealous.
Julie H says
Very pretty! Another tip, if you have some scissors that have a spring in them, so they open back up by themself, it makes the clipping part a little bit easier and saves your hands a bit. 🙂 I love rag quilts!
Andrea says
thanks Julie — someone else suggested the spring loaded scissors and I’ll definitely look into them IF I ever attempt another rag quilt again 🙂
Kim says
Super cute! Great job!
Jane says
Aw, really cute. I have never made a raggy quilt but they look so cute! I have made flannel baby quilts before. We were just going through my daughter’s memory items getting ready for her high school grad blanket and we found her original flannel quilt. It was in tatters – literally threads. She was the only one of my kids to suck a finger and have a lovey blanket. I salvaged the blanket as much as possible through the years! Later, when hers was beyond repair, I found some of the scrap squares and made a mini blanket – until she was ready to retire all of them to the attic. Now she’ll be heading off to college soon!