

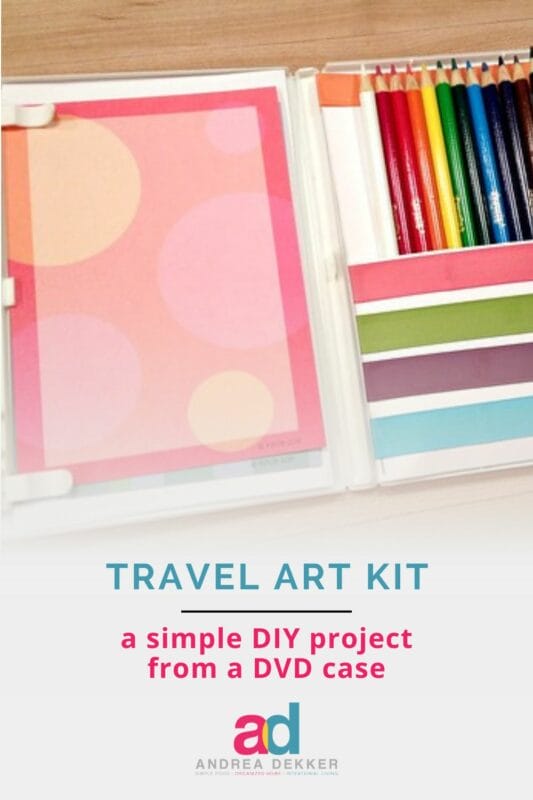
Got travel plans coming up? Or maybe you need a way to occupy your kids over a school break, or even while you wait at doctors’ offices? Either way, this super simple, DIY travel art kit fits in almost any bag and will keep your kiddos entertained and engaged without a screen!
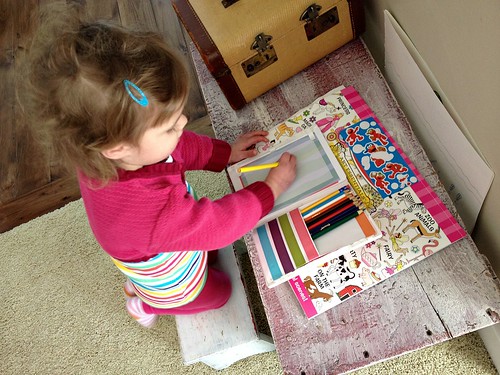
I originally created this simple travel-size art kit for my oldest daughter, just a few days before I was due with her younger brother.
She was 2 at the time, she loved coloring and drawing (she still does!) and she was very independent (she still is!)
I wanted her to have an art kit she could bring with her around the house or in the van, and something I didn’t need to get for her or monitor her when she used it.
To say it was a “hit” is an understatement… she absolutely loved it!
Now, many years later, we still love these travel art kits as they are such a simple, non-messy, non-bulky way to carry a few craft supplies wherever we go.
They are the perfect size for almost any bag, they fit in the back of most vehicle seat pockets, they can be customized for individual preferences, and (best of all) they don’t require any batteries or charging cords!
If you’re headed on an upcoming family vacation or if you simply want to help a smaller child work independently for a few minutes without supervision, a travel art kit might be just what you’re looking for!
It’s also a really cute and frugal gift idea.
How to Make a Travel Craft Kit from a DVD Case
Supplies:
- An empty DVD case
- A scissors specifically for cutting plastic
- Cardstock
- Stapler
- Tape
- Hot glue gun or double-sided sticky tape
- Decorative construction paper, stickers, and ribbon (optional) to decorate the case
- Colored pencils, crayons, paper, and other smaller craft supplies to go inside the case.
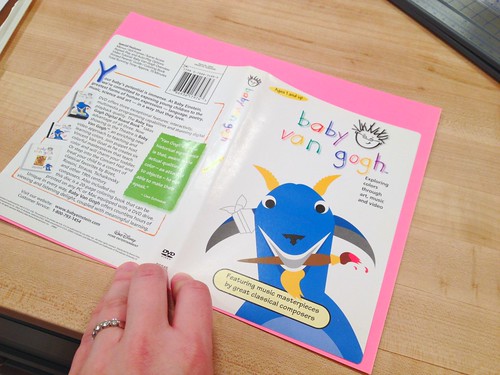
1. Find an old DVD case.
If you don’t have a few lying around your home already, you can likely find old DVDs in their cases at any thrift store (often for $1 or less).
Toss the DVD and cut out the raised part that holds the DVD.
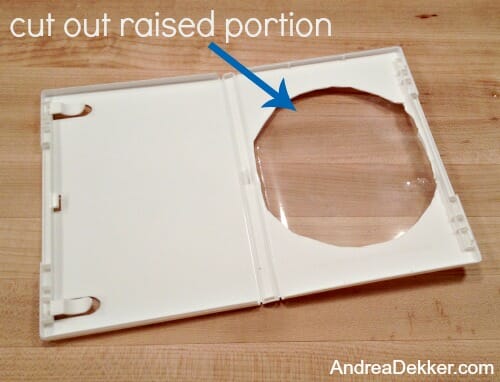
NOTE: This was the most difficult part because the plastic is really tough. I used a scissors specifically for cutting plastic, and it was still hard.
Just take your time!
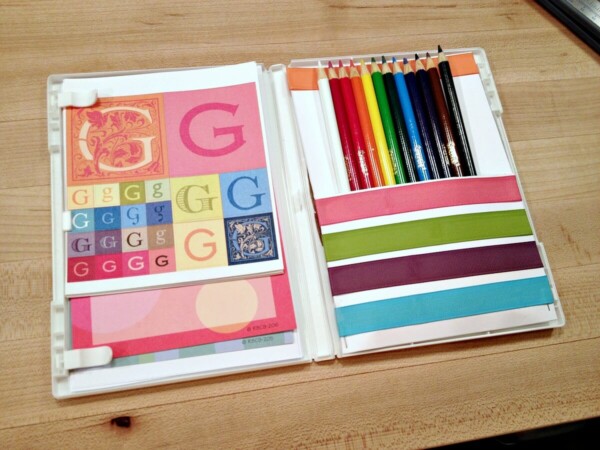
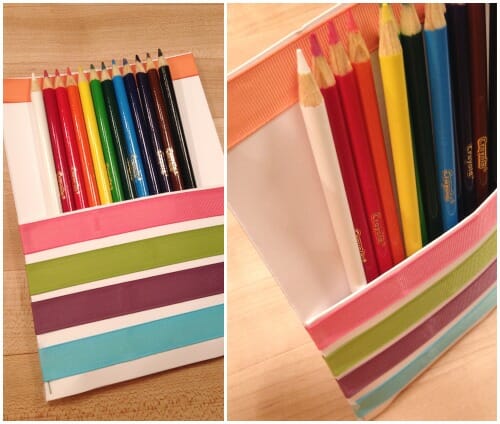
2. Create a “pouch” for pencils or crayons.
I used a piece of card stock, cut to the size of the DVD case. Then I stapled a 1/2 sized piece of card stock to the front and covered it with some ribbons (so you couldn’t see the staples).
I also taped the bottom of the pouch so the pencils wouldn’t fall out.
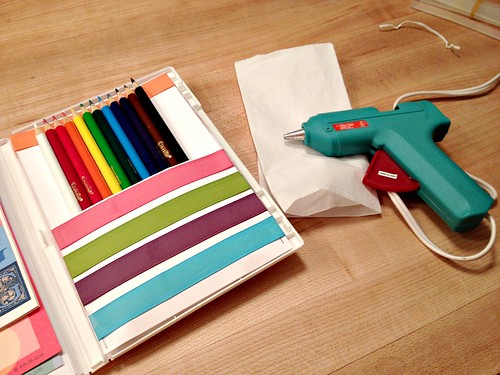
3. Glue the pencil pouch into the DVD case.
I used a hot glue gun — but I’m guessing super glue (or even really sticky double-sided tape) would also work.
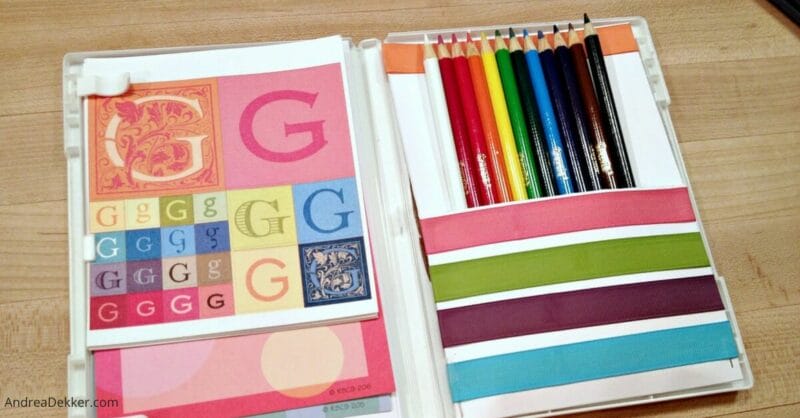
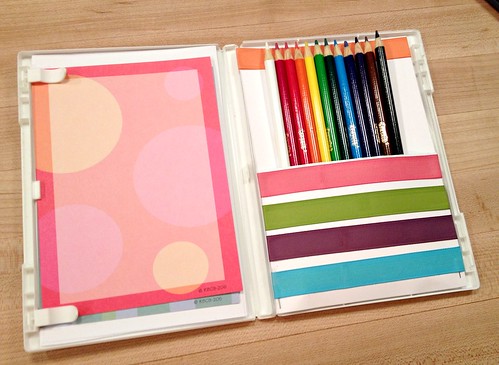
4. Add paper and/or stickers.
I cut some plain white paper to the size of the case and stuck that inside the clips on the left side of the case. I also had a few 5″ x 7″ colorful note cards that I added so she could have some colored paper to draw on too.
Finally, I added some stickers.
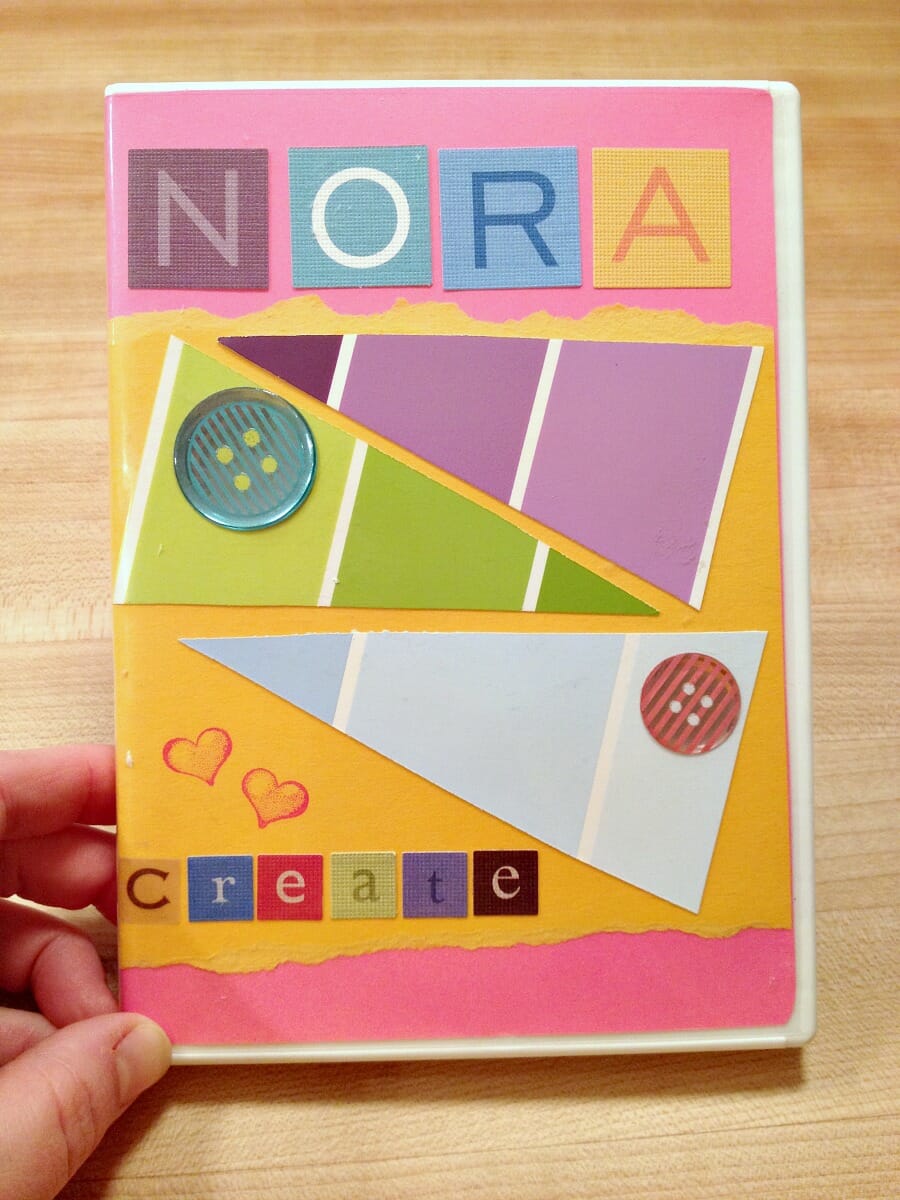
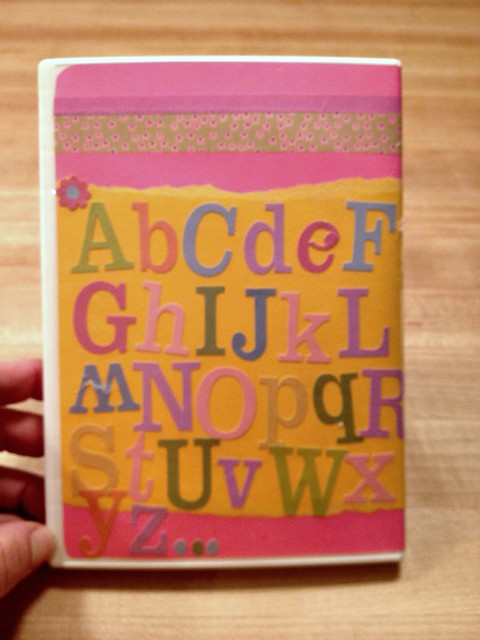
5. Decorate a cover for the case.
This was really easy and fun!
I saved the previous DVD cover and used that as my template to cut bright construction paper in the exact size to fit the cover.
I personalized the cover with some extra stickers and craft supplies we already had in the house.
I also added some additional alphabet stickers to the back of the case, which is a fun idea if they are practicing writing their letters or just like to sing the ABCs.
I’m not a particularly “crafty” person, and even still, this project took me less than an hour until I was finished and had my supplies cleaned up.
Use this as a starting point and feel free to elaborate on anything I did for our craft case, especially if you find an extra-thick case and can include more items.
What are your favorite non-tech ways to occupy young children when traveling?
Linda Jean says
Thank you for hanging in there with us all summer! I miss you when you are gone. My Wednesday morning routine is to go to the gym, get changed for work and the first thing I do at work is open your email (I’m always early to work so I’m still on “my time”). I look forward to reading your words of wisdom every week and the visual pleasure of seeing your photos – your colors are always so rich. I know it takes time away from your family to keep up with the blog and just wanted to say how much you are appreciated!
Andrea says
Oh this makes me so happy! I love that my Wednesday emails are part of your routine!
thanks for sharing this with me!
Lisa Rohrssen says
When my daughter was small I kept a special backpack. We did a lot of 10 hour road trips so that is a lot of time to keep a toddler or a small child occupied. I would fill the backpack with things for her to do. Usually a few snacks I don’t usually let her eat. Then I would always put a fresh box of crayons. Kids love fresh crayons with nice sharp points. Stickers would go in. Stuff from the dollar store. Whatever would keep her attention at her age. It varied from trip to trip.
She got to love to wait for the backpack for each trip. It became a real ritual. As she got a little older she knew I was filling it and it was like a mini Christmas for her. he rule was she didn’t get to look at what was inside until we were out of the driveway or ON the plane.
It worked so well when she was really little say 2-4 years old. I kept a separate backpack for restaurants and other long errands. She only got those toys and craft items when we were in those places and it because exciting for her. It also gave me peace and the ability to eat a meal out in peace because she was enthralled with whatever was in there.
Because lets be honest, when they are that young if the child is not happy the Mom isn’t happy either.
Carrie says
We have had many road trips and I have 3 boys. I have found that anything that moves is an awesome car toy. The hidden treasure water bottle is a good idea. It is a good idea to glue on the lid. I have used water, corn syrup(baby oil and sequins. Whirly Gigs which can be found at the dollar store are another inexpensive idea. The spinning action is mesmerizing even for adults on a long car ride:) I have wrapped up little gifts and passed them out periodically along the trip. I used little snacks, stickers, mini books and toys. I even used little toys that we already had at home:) I collected and hid them a few weeks before our trips. Out of sight out of mind. Hot Wheels are awesome….even for girls
Tracey says
PS – I meant to say that I was in my 30’s, and that I made it for my kids, who were 2 and 4
at the time. It was a hit! 🙂
Tracey says
Here’re a frugal knock-off of a $20 travel toy…a treasure hunt in a jar!
1. Take an empty cleaned out peanut butter jar with label removed.
2. Toss in several (10-20) small items, like a Lego, a paper clip, a marble, dice, a thimble, and other small items like that from around the house…check the garage too!
3. Then, fill the jar up with rice or small pasta, like orzo. (You can make it extra fun-looking by coloring either. Just put some in a ziploc bag with a couple drops of food coloring and smoosh it around then spread out to dry on a cookie sheet.)
4. Finally, put on the lid and secure with a band of duct tape around the edge so the lid stays on!
To play, they just shake and turn and roll the jar around and watch as different things pop up. I played with one in a store once and I was mesmerized…into 30’s – lol! Money was tight, so I made my own. 🙂
Tracey says
a tip to remove jar labels…
Fill jar with water and submerge in hot soapy water for awhile to loose label, then scrape off. If there is sticky gunk left behind, try rubbing it off with an oil dampened paper towel. If that doesn’t work, try Goo Gone. It’s a miracle worker and a small bottle lasts a long time!
Alison Rasmussen says
This is such a creative idea. I like that you jumped on it immediately. I need to apply that same principle to pinterest projects and ideas. My son is only 8 months, but I have already learned the value of packing (or finding!) things to keep him busy while traveling. We just got back from a trip out West and I found that giving him an empty water bottle kept him occupied beautifully. It seems like more often than not, the most ordinary objects are the ones they like best!
Heart and Haven says
Super cute idea!
When we travel (by car) we make a “to go” toybox using a basket with a few select toys…one small car for each child, favorite stuffed animal, their wooden train set, coloring book and crayons, and they have an awesome kids camera to take pictures of our adventures and it even has a few games on it that are perfect to keep them occupied on road trips.
Avia says
Such a great idea! We leave for vacation via airplane tomorrow and I might have to steel this idea!
Carle says
We travel internationally to visit family and I have to keep my two year old occupied…I came up with this because he was SO interested in going through my wallet! He once pulled my credit card out and dropped it on the floor of our supermarket…sigh! Thank goodness for honest people!
I used an old wallet I had lying around and cut lots of cardstock into sizes that would fit into all the pockets and slots. I also put sheets of stickers into some of the pockets. In the zippered coin pouches I tucked a few crayons. My son has been playing with his wallet for about a year now…pulling out cards and putting them in, coloring on them, sticking on stickers, zipping and unzipping, buttoning…the fun is endless, and it keeps him out of my wallet! Give this a try – you can add small sheets of origami paper, small toys, fake money, anything! 🙂
Thanks for the great idea Andrea, and keep them coming! 🙂
Sherry L says
That’s a cute idea! It sure beats the Ziploc bag full of paper and crayons I carry around in my purse. I have a 4 year old who would enjoy this!
Ashley says
So cute!! You did a great job 🙂
Cheryl Wertherington says
Love it!
Heidi says
My husband’s family lives in Missouri and both of our girls (ages 2 and 4) have made the 800 mile trip by car from SC at least once or twice per year since they were newborns. I pack a treat bag for each state with a snack and new activity to keep them enertained. Definitely will be making a few of these for our next trip!
Emily says
What a super cute idea! So simple and compact enough to throw in a purse or diaper bag. We’re hitting the road next week (traveling from Michigan to Colorado in our RV) and I may need to make a few of these. My three kiddos would love them! Thanks for the great idea!!
Jennifer says
That’s really cute!
When I was growing up, my mom used old travel-size baby wipe containers to keep crayons in her purse. They were square boxes, fairly thin, which snapped open and closed. They were probably too small for pencils, but just right for crayons. We travelled a lot but she always carried these in her purse and brought them out when we were waiting in the airport, at restaurants, etc.
Amy says
I love that idea Jennifer!! I’m going to do this for sure. I bet I could put a bit of paper in there too:)