

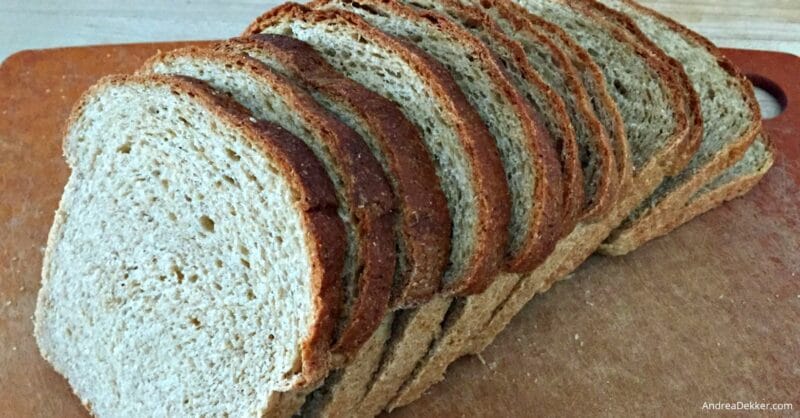
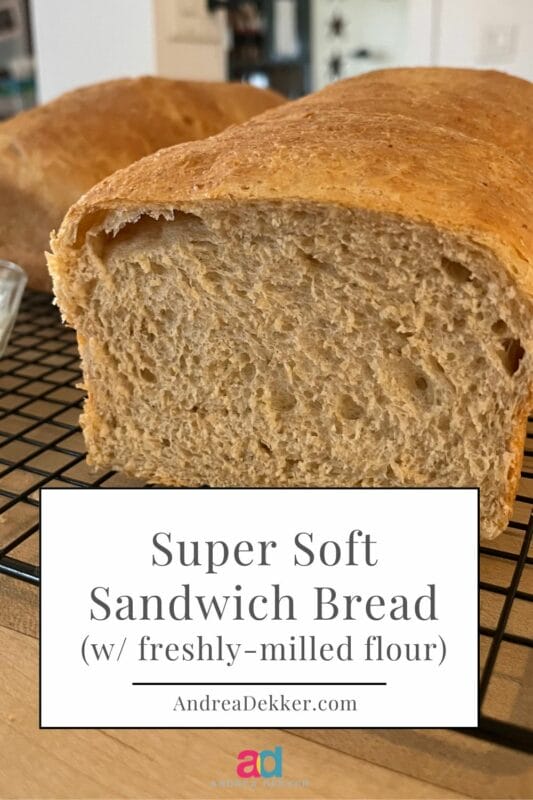
If you’ve ever thought whole-grain bread had to be dense or heavy, this recipe will change your mind. Soft, fluffy, and made with freshly milled whole grain flour – this sandwich bread is the perfect blend of nourishing and delicious.
There’s nothing quite like the smell of freshly baked bread filling my home… so in 2018, after my last baby was officially a year old, I resumed my pre-children routine of making homemade bread each week.
However… after lots of research and dozens of internet “rabbit trails”, I decided to switch to using freshly milled flour for maximum nutritional benefits.
I thought it would be a fun experiment with a brief learning curve… now, looking back, I don’t think I’ve ever been more frustrated, annoyed, or downright angry regarding baked goods in my entire life! I was even reduced to tears on more than one occasion due to yet another flopped loaf of bread I was sure would turn out based on tweaks I made in the recipe.

Thankfully, I’ve made continual progress in my freshly-milled flour baking hobby!
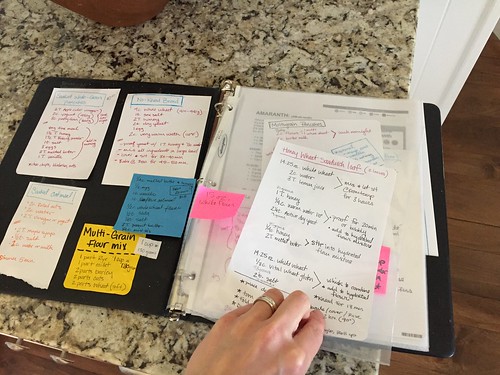
I’ve found my stride and developed a handful of go-to recipes that (for me) seem to work well every time I make them. I even have a dedicated binder for all my whole-grain recipes.
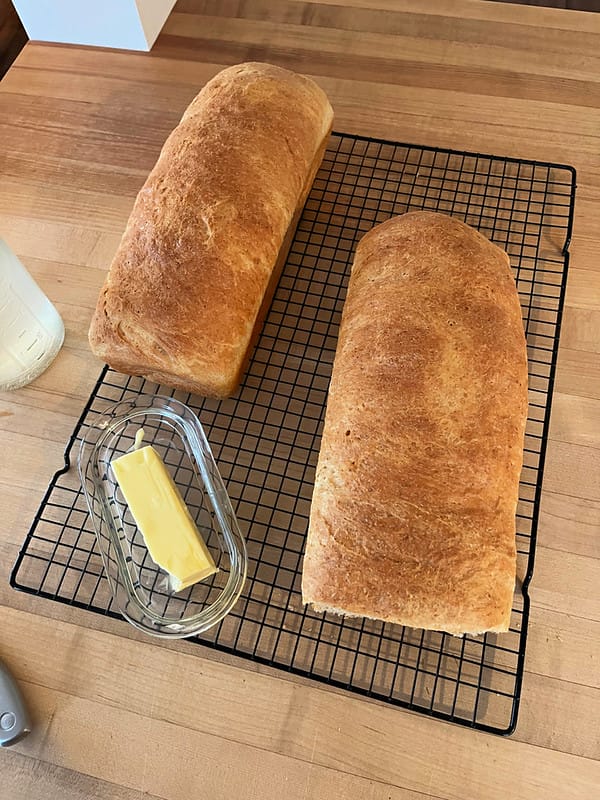
Most importantly for our family, I finally landed on what we consider the “best”, softest, most delicious sandwich bread recipe — made with freshly milled whole grains.
It’s even good enough for PB&J, and that’s saying something!

This same dough recipe works for sandwich bread, dinner rolls, hamburger buns, cinnamon rolls, stromboli, pizza crust, and more.
I won’t claim my recipe is “foolproof” because if you’re new to making bread, or new to freshly milled grains, you will likely need a few rounds of trial and error before you find what works for you.
But, if you’re looking for a super soft loaf of whole-grain sandwich bread, my recipe has worked well for our family for many years now, and I think it will be a great starting point for you, too!
If it doesn’t turn out the first time, just make it into French toast or croutons!

Super Soft Sandwich Bread Made with Freshly Milled Whole Grains
This recipe can easily be halved or doubled… depending on your mixer capabilities and your need for whole-grain bread dough. However, as written, it makes enough dough for:
- 4 loaves (8″ x 4″ — 25 oz.)
- 3 large loaves (9″ x 5″ — 33 oz.)
- 2 giant loaves (13″ x 5″ — 50 oz.)
- 10 mini loaves (5.5″ x 3″ — 10 oz)
- 48 dinner rolls or slider buns (2 oz.)
- 24 large hamburger buns (4 oz.)
- 45 cinnamon rolls (15 per pan)
- 3 large Stromboli (18″ x 6″)
- 5 Pizzas (12″)
Ingredients for Whole Grain Sandwich Bread
2 c. water — any temperature is fine. I always use city tap water, but others swear you’ll get better results with filtered water.
1 c. milk (or buttermilk) — I always use full-fat whole milk, but feel free to try whatever you have in the house.
4 T. butter — you could substitute coconut oil
4 T. honey — feel free to use granular sugar, brown sugar, or even molasses
1 egg (optional) — this helps the bread stay fresh-tasting longer. If you’re going to eat it in one day, you likely won’t need the egg.
2 t. sea salt — you will immediately realize if you forget the salt (speaking from experience 😩)
2 T. Rice Bran — this helps to soften the texture of the bread. It makes a big difference (in my opinion).
2 T. Vital Wheat Gluten — adding additional gluten helps with the stretchiness of the dough, and creates higher-rising bread.
1,000 grams freshly milled hard white or red wheat berries (6-7 cups)
2 T. Instant Yeast — you can use active yeast, but it’s faster and easier with instant (I’ll explain more below)
melted butter for brushing — this helps to ensure a softer crust

Substituting All-Purpose Flour
If you want to try this recipe with all-purpose flour, you’ll likely need more flour. You will also be able to omit the rice bran and vital wheat gluten.
I’d say start with 6 cups of flour, and slowly add more until you reach the desired dough texture. You might need as much as 9 cups of flour!
You could also make this recipe with half freshly-milled flour and half all-purpose flour, if you’re not sure your family would like 100% whole grain bread yet (I did this for a long time).
I personally wouldn’t take the time to substitute store-bought whole wheat flour, as it creates very dense bread and doesn’t have any of the nutritional value of freshly-milled flour, as it has been sitting on store shelves for well over 24 hours.

How to Make Whole Grain Sandwich Bread
1. In a microwave-safe bowl, combine water, milk, butter, and honey.
2. Microwave on high for 1 -2 minutes, or until butter is completely melted and the temperature is between 110º and 120ºF.
3. Pour melted butter mixture into a heavy-duty mixer (Kitchen Aid or Nutrimill) with the dough hook attachment.

4. Add egg, salt, rice bran, wheat gluten, and 600 grams of freshly milled flour.
5. Mix on low speed for 1 minute, or until combined.

6. Let this mixture sit at room temperature for 20 minutes (this allows time for the freshly milled flour to absorb much of the liquid).

7. After 20 minutes, sprinkle yeast over the dough and add half of the remaining flour (about 200 grams).
*NOTE: If you were using active yeast, you would need to “activate” the yeast with the wet ingredients, and it would start to rise while letting the dough rest for 20 minutes. This is why I choose instant yeast, because I can add it dry to the dough when I add the extra flour.

8. Mix on medium-low speed for 5 minutes, adding more flour as necessary.

9. Continue mixing the dough for 4-5 minutes, until it’s soft, sticky, and easily forms into a ball. (It should be a bit sticky, but not fully suctioned to the bowl or your hands.)

10. Form the dough into a ball and place it into a very large greased bowl.

11. Cover with greased plastic wrap or a wet towel and let rise in a warm place for 45 minutes.

11. After the dough has risen significantly, punch it down and form it into another smaller ball by pulling the dough from the outside into the middle.


12. Divide the dough into smaller portions and form into bread, buns, cinnamon rolls, etc.


13. Place prepared dough into greased baking pans, cover, and let rise for 30-45 minutes, or until doubled in size.


14. Preheat the oven to 375ºF.
15. Brush melted butter over the tops of risen dough and bake according to the details below.

16. Brush melted butter over the tops again once the bread is removed from the oven.
17. Let bread sit in baking pans for 5 minutes, then turn out onto cooling racks to cool completely.

Baking Times
Remember… all ovens are different, so watch your dough the first time.
- four 8″ loaves = 40-45 minutes
- three 9″ loaves = 45-50 minutes
- two 13″ loaves = 45-50 minutes
- dinner rolls, buns, & cinnamon rolls = 15-18 minutes
- strombolie (after you fill it with toppings) = 20-22 minutes
Whole Grain Sandwich Bread
After years of experimenting and tweaking, this is our family's favorite recipe for super soft sandwich bread made with freshly milled whole grain flour!
Ingredients
- 2 c. water
- 1 c. milk (or buttermilk)
- 4 T. butter
- 4 T. honey or granular sugar
- 1 egg (optional)
- 2 T. Instant Yeast
- 2 T. Rice Bran
- 2 T. Vital Wheat Gluten
- 2 t. sea salt
- 1,000 grams freshly milled hard white or red wheat berries (6-7 cups)
- melted butter for brushing
Instructions
1. In a microwave-safe bowl, combine water, milk, butter, and honey.
2. Microwave on high for 1 -2 minutes, or until butter is completely melted and the temperature is between 110º and 120ºF.
3. Pour melted butter mixture into a heavy-duty mixer (Kitchen Aid or Nutrimill) with the dough hook attachment.
4. Add egg, salt, rice bran, wheat gluten, and 600 grams of freshly milled flour.
5. Mix on low speed for 1 minute, or until combined.
6. Let this mixture sit at room temperature for 20 minutes (this allows time for the flour to absorb the liquid).
7. After 20 minutes, sprinkle yeast over the dough and add half of the remaining flour (about 200 grams).
*NOTE: If you were using active yeast, you would need to “activate” the yeast with the wet ingredients, and it would start to rise while letting the dough rest for 20 minutes. This is why I choose instant yeast, because I can add it dry to the dough when I add the extra flour.
8. Mix on medium-low speed for 5 minutes, adding more flour as necessary.
9. Continue mixing the dough for 4-5 minutes, until it’s soft, sticky, and easily forms into a ball. (It should be a bit sticky, but not fully suctioned to the bowl or your hands.)
10. Form the dough into a ball and place it into a very large greased bowl.
11. Cover with greased plastic wrap or a wet towel and let rise in a warm place for 45 minutes.
12. After the dough has risen significantly, punch it down and form it into another smaller ball by pulling the dough from the outside into the middle.
13. Divide the dough into smaller portions and form into bread, buns, cinnamon rolls, etc.
14. Place prepared dough into greased baking pans, cover, and let rise for 30-45 minutes, or until doubled in size.
15. Preheat the oven to 375ºF.
16. Brush melted butter over the tops of your dough and bake according to the details below (40-45 minutes for regular loaves.)
17. Brush melted butter over the tops again once the bread is removed from the oven.
18. Let bread sit in baking pans for 5 minutes, then turn out onto cooling racks to cool completely.
Notes
Recommended Baking Times:
Remember… all ovens are different, so watch your dough the first time.
- four 8″ loaves = 40-45 minutes
- three 9″ loaves = 45-50 minutes
- two 13″ loaves = 45-50 minutes
- dinner rolls, buns, & cinnamon rolls = 15-18 minutes
- strombolie (after you fill it with toppings) = 20-22 minutes
Recommended Products
As an Amazon Associate and member of other affiliate programs, I earn from qualifying purchases.
-
 NutriMill Artiste Mixer
 -
NutrMill Harvest Grain Mill
-
KitchenAid 7 Quart Bowl-Lift Stand Mixer
-
USA Pan Loaf Pan 8 x 4, set of 2
-
Extra Large Bread Pan, 13 x 5, Set of 2
-
Instant Read Food Thermometer
-
WÜSTHOF Classic Bread Knife
-
Organic Hard White Wheat Berries - 10lbs
-
Lesaffre Yeast Instant, 16 Ounce
-
NutriCargo Rice Bran Powder 2.2 lbs
-
REDMOND Real Sea Salt - Natural Unrefined Gluten Free Fine, 26 Ounce Pouch (2 Packs)
-
Vital Wheat Gluten


Nutrition Information
Yield
24Serving Size
1 slice or rollAmount Per Serving Calories 44Total Fat 2gSaturated Fat 1gUnsaturated Fat 1gCholesterol 10mgSodium 39mgCarbohydrates 4gFiber 1gSugar 0gProtein 4g
Nutritional information is approximate and does not account for additional ingredients or added toppings.
If you’re an avid bread baker, I’d be honored if you tried my recipe and gave me a little feedback (and share it with others!)
If you’re still a wanna-be whole-grain-bread-baker, add my recipe to the list of recipes you’ll try until you find YOUR perfect recipe.
And if you have absolutely no desire to attempt your own homemade bread, I’d encourage you to try some of these (non-yeast bread) ideas to incorporate whole grains into your daily diet.

How to Store Homemade Bread
Homemade bread, buns, cinnamon rolls, etc., should ideally be stored at room temperature and eaten within 48 hours to enjoy maximum freshness and softness.
However, if you want to bake in bulk, or if you find yourself with a bunch of extra bread, simply wrap it well in plastic wrap or in a freezer bag and freeze it.
Baked goods will stay fresh in the freezer for 2-3 months with no freezer burn (if properly stored).
Do not store bread or rolls in the refrigerator, as they will dry out quickly.

More Whole Grain Recipes
- How to Substitute Whole Grain Flour in Almost Any Recipe
- 15 Easy Ways To Eat Whole Grains Every Day
- Beef and Barley Stew With a Kick!
- Baked Oatmeal
- Homemade Oatmeal
- From-Scratch Granola Bars
- Rhubarb Crisp With Whole-Grain Oat Topping
- Whole Grain Cornbread from Scratch
- Hearty Whole Grain Oat Pancakes
- Homemade Croutons
- Banana Bread with Whole Grains
- Monster Cookies
- Overnight French Toast Casserole
- Rustic Whole-Grain Granola
- Whole Grain Apple Cake with Cinnamon Yogurt Whipped Cream
- Whole Grain Oatmeal Caramel Bars

My Favorite Whole Grain Bread Tools
- NutriMill Harvest Grain Mill (they are regularly out of stock — sorry!)
- NutriMill Artiste Stand Mixer (with dough hook)
- Huge food storage container with lid (to let the dough rise in)
- USA bread loaf pans
- USA extra-large sheet pans
- Large Baking Stone
- Colapsible Cooling Rack
- Bulk Instant Yeast
- Wüsthof Bread Knife
- I buy my grain in bulk from Country Life Natural Foods, but you can also get it on Amazon
It’s a lot of information for one post, but I certainly hope it’s helpful for any of you who are interested in baking, eating, or simply learning more about whole-grain bread!
Feel free to ask any questions in the comments, or contact me directly.
Happy Baking (and Eating)!
Amanda says
I can’t have the rice bran or wheat gluten ingredients. Do you have any suggestions for substitutions?
Andrea says
Hi Amanda, you can easily just skip them — they are both optional ingredients.
Also, if you can’t have wheat gluten, you likely can’t eat this bread as it’s all wheat flour — so if you plan to make this with a gluten-free flour, I would not be able to vouch for how that will turn out using this recipe.
Amanda says
I am gluten sensitive, but if I grind wheat berries into flour, I’m fine. Odd, I know, but true. I can’t have rice at all however.
Andrea says
It’s actually not that odd — store bought flour is terrible for our bodies. You’re likely not “gluten sensitive” but actually “white store-bought flour sensitive”.
Freshly milled flour can’t even be compared to store-bought flour in terms of how our bodies digest it. I have several “gluten sensitive” friends who I’ve FINALLY convinced to try my whole grain baked goods and they can all tolerate them just fine. It’s not the gluten, it’s the way our white flour is processed (rather OVER-processed). Glad you figured this out!
Martha says
Andrea, Love all your posts and they are most helpful to me, a 70 year old grandma, especially since moving 3 families into one 8 bedroom home to help care for my 33 year old son who had an asymptomatic hemorrhagic stroke in August of 2025. He was a healthy energetic father to a 12 month old at the time and a wonderful husband of 5 years. All that to ask what day your menus you share for the week start on. Not a huge deal, but have been curious for some time and can’t quite figure it out. Thanks and love reading your organization posts, family updates and menus with recipes. Hug all your loved ones a bit tighter today. ❤️
Andrea says
Hi Martha,
Wow — that’s a unique situation for sure. Good for you for making it all work for your family and your son.
My meal plans start on Sunday and end on Saturday (so movie night is almost always on Saturday night).
Hope this helps!
stacie kaltz says
Hi Andrea,
I was recently given a bread maker and am going to follow your recipe. I was wondering how you store your bread?
Andrea says
You’ll want to store all fresh bread in a tightly sealed bag or container at room temperature. OR, for longer storage, slice it and freeze (in the tightly sealed container). Do not refrigerate the bread as that will cause it to go stale the quickest!
Good luck with the bread — hope you love it!
angel-n-alabama says
I’m grain free (gluten intolerance, what a bummer let me tell you!), but I had to let you know how much I appreciate you still being yourself and very “Real”. I’m older than you and I don’t have kids at home (all grown with kids of their own – love those Grands!), but your Christian values, ethics and “good” information keep me subscribed and coming back for more. Sincerely, thank you for being you and sharing you with the rest of us.
Andrea says
Thanks so much 🙂
I appreciate your readership and your kind words so much!
Colleen Luck says
Hi Andrea,
I love your tips, ideas, and recipes. Could you please tell me the specific brand of rice bran extract and vital wheat gluten that you use in your wholegrain bread recipe? There are multiple ones on the market and I have no idea which one to use. Thanks for all you do to help make my life more enriched and enjoyable.
Andrea says
Thanks Colleen,
I honestly do think the different brand of rice brand and wheat gluten should produce the same results.
That said, I buy the Bob’s Red Mill brand since that seems to be the easiest to find for me.
Hope this helps!
mt says
Thank you for so much detail. As an FYI – your links to Nutrimill are deadends. Are you still happy with the Nutrimill Mixer, 15-months after writing this post?
Andrea says
You’re very welcome! WE love this bread recipe 🙂
And yes, I’m still using my Nutrimill on a DAILY basis! Sorry for the dead link — they’ve been sold out of the Harvest model since Corona…Here’s a link to another one that’s even more powerful (and is in stock)
Hope this helps!
mt says
Thanks, but – I wasn’t asking about the grinder I was specifically asking about the mixer.
the links were to the Mixer; perhaps update them to go to the basic url (rather than the sale price that they were originally linked to)
Sarah says
Hi Andrea-
I’m heading down the home ground flour road and will soon be purchasing a mill. I noticed in the article the mill you use changed. Could you share why you switched from the Mockmill to the Harvest? I know I read about it at one point but can’t find the post.
Andrea says
Hey Sarah — I was borrowing my first mill, so I knew I would eventually need to give it back.
I purchased the Nutrimill Harvest as that was always the one I had my eye on, even while I was borrowing my friends. I just didn’t want to purchase one until I knew I would use it (and Now I use it almost daily all these years later!)
Linda Weemhoff says
Hi Andrea,
Is the rice bran extract that you use in your 100% whole wheat flour an oil or powder? Also, where do you get it?
Thanks
Andrea says
Hi Linda, it’s a powder and it’s from Harvest Health (or you can get it on Amazon).
Lea Ann says
Two questions….when you divide the recipe, do you divide all ingredients in half? Sometimes I know that yeast will stay the same. Also, do you make sourdough starter with your milled grain?
Andrea says
Hi Lea Ann,
I’ve never actually divided this recipe in half before — but yes, I would say that you should halve the yeast too.
And yes, I do make my sourdough with milled grain.
There is a book called Wild Yeast, and it details exactly how to use freshly ground grain for sourdough. The pictures are fantastic too!
JJ says
Happy Birthday, Andrea!!! This post is so inspiring–as usual!!! Thank you for all of the time, effort, and details you included!!! Children love what their parents love. You can see this in the photos. So precious!!!
Approachable
Neat(organized, clean, and great!)
Detailed
Realistic to live well
Eager to live intentionally
Abstract thinker(your ideas help simplify your life and so many others!)
Andrea says
This is such a nice comment — thanks so much 🙂
Clare says
I am impressed by your perseverance! I too have the bread making bug, although my obsession has been sourdough. Now I want a grain mill too. I can relate to the frustration and tears. It feels great to finally have success. Thanks for sharing your recipe. Can’t wait to try it.
Andrea says
thanks Clare 🙂
I’m just starting my sourdough “journey” so hopefully I’ll have more to share on that in a few months!
Elizabeth says
Hi Andrea.
I’m excited to try your recipe! I was wondering though: what is the rice bran extract for? Also, do you have a kitchen scale that you like? I got one for Christmas and half the time it doesn’t work, so was thinking of buying a new one…..
Andrea says
Hi Elizabeth!
My scale is from our thrift store (for $1) and it seems to work well. My advice is to get one that will measure in grams and ounces.
As for the rice bran extract — it’s a good source of lecithin, which is used in yeast breads (especially those with freshly ground flour) to give the bread a softer texture. Anything labeled “Dough enhancer” will serve the same purpose.
Jamie says
Impressive!! With the exception of a few seasons (like newborns), I’ve been making 95% of our bread from scratch for the last 8 years, most recently with sourdough. There’s nothing better than a counter full of cooling homemade bread! These tips and recipe look great and I’ll be sure to give them a try. Thank you!
Andrea says
yeah, I hear you about “seasons of life”… I can’t imagine taking the time to do this with a newborn.
I’m also starting my sourdough journey — maybe next summer I’ll blog about my “perfect sourdough bread”!!
Marva says
Happy birthday, Andrea! I’m very impressed with your tenacity at accomplishing all the beautiful bread products! I keep whittling down the number of blogs I follow (down to about 5) but yours is the only one I always read. My other 60-something friends probably get tired of me sharing tips from ‘this blogger I follow who has 4 children, the oldest of whom just finished 1st grade’!
Andrea says
Thanks Marva 🙂
I’m SO please to hear my blog “makes the cut” for you! Maybe some of your other friends will start following along too!
Carol says
Happy Birthday Andrea.
Your bread looks so delicious. I need to get back to making my own again. I was making it a few years ago and this post reminds me how much I miss it.
When my kids were small and I was at home I made bread every Friday. It was the day I also emptied the fridge of leftovers and made a pot of soup/ stew. It was so good and the flavour of the soup was different every time. Served with fresh homemade bread, we were loving our Friday’s and saving money too.
Andrea says
I love the routine of every Friday with “leftover soup”. I sort of do this on Saturdays right now — make bread and clean out the fridge!
Once school starts up again, I have a feeling I might switch my baking day to Monday so I can bake fresh bread for the week and clean out the fridge after the weekend 🙂
J says
Happy Birthday Andrea! This is a nice and very thoughtful gift to give everyone, after all your hard work!
Wow! How is Claire all of a sudden growing up!?
Andrea says
yeah, she’s a “big girl” now!
Heather Ratliff says
Thank you for sharing this. I’ve wanted to try whole wheat, but I’ve been intimidated. I might just try it for our fair this year!
Andrea says
try it!! It CAN be intimidating, and there are a lot of variables — but it’s sort of therapeutic in a weird way!
Jen says
Happy happy birthday! And congratulations on achieving a beautiful loaf of bread!
Andrea says
Thanks Jen 🙂
Karen says
Happy Birthday Andrea! Thanks for the recipe!!! Since I won’t be grinding my own wheat ~ do I buy the flour that says white wheat or 100% whole wheat? I’m not sure what “hard” wheat means…..than you
Andrea says
I would buy King Arthur’s stone ground white whole wheat flour.
Hard wheat just means that it has a higher protein content and is better for yeast breads. Soft wheat is lower in protin and better for pancakes, waffles, quick breads, etc. All-Purpose flour is a mix of both.
Jessica Canny says
Whew! I got exhausted just reading this-but good for you for sticking with it! I’ll definitely try it (one day)!
Julia says
Wow! You rock, Andrea! I am impressed with your determination, and am totally going to give this recipe a try.
Andrea says
haha — determined (or maybe just stubborn!)
Casey says
This is amazing! So much wonderful information packed into one post. Thank you for putting this together. Our family doesn’t eat much bread—more often than not, the one small loaf I buy each week goes bad. However I love the idea of making it. I’m thinking my love of the pioneer life/Little House books has something to do with that. I’ve certainly bookmarked this post for the day where I have the motivation and money to do so. 🙂
Andrea says
Thanks Casey!
Also, in regards to your bread going bad — you might consider putting a few slices in the freezer (like the ends) right when you get home from the store. That way, you have less fresh bread to use up, and you can use the slices in the freezer for stuffing, french toast, quiche, croutons, etc.
And yes, I TOTALLY “get” the allure of pioneer living! With all our modern conveniences like a stand mixer and a gas oven 🙂
Casey says
That’s a great idea! I’ve frozen whole loaves before but for whatever odd reason never thought of just freezing half. Thanks for the tip!
Andrea says
yeah, I’m super good at coming up with ways to “preserve” and use up extra bread that we might not eat fresh — I’ve had LOTS of frozen bread to deal with over the past 7 months! 🙂
Megan D says
If you choose to freeze part of your dough, at what stage in the process would you recommend doing that? After the first proof/90 min rise? Thanks for your help!
Andrea says
Hey Megan,
Yes, you’d freeze it after the first rise. Just punch it down, roll/cut it into the size you want to freeze it in, wrap it and freeze.
I usually put it in the fridge before the freezer, just to cool it down a bit more before putting it in the freezer.
Linda Tenhage says
Happy Birthday Andrea! Enjoy your day!
Christine Meurer says
Happy birthday to you! (A day late) I’m sure this was a good gift after months of hard work. You make me want to pull my grain grinder that I’ve never used down from the shelf and find some whole wheat berries. That’s what’s always stopped me – I guess i just need to order some!! I love that it’s soaked overnight. I have been wanting to learn to bake with yeast for a long time, and i think this will be it. Now I’m excited for you to teach me all about sourdough! 😉
Christine Meurer says
I dont know why i thought this was yesterday’s post…hahaha, happy birthday TODAY!
Andrea says
what — you have a grain grinder and you’ve never used it! You should sell it — they are much more common these days and I’m sure someone would buy it!
As for the grain, I buy all mine from Country Life Natural Foods
Annette Silveira says
Congratulations! When my kids were little I made four loaves of bread every week and I KNOW how frustrating it is when a batch you worked so hard on doesn’t turn out. My husband and I don’t eat much bread so I won’t be pulling out all my gear to give it a try, but your recipe sounds delicious. Your slices are perfect! Do you have a special knife? My mom bought me a beautiful serrated knife with a guide so I could slice each loaf uniformly.
Andrea says
Thanks Annette! Yes, it can be SO frustrating, but so rewarding when a “perfect” loaf comes out of the oven!
As for the knife — I linked to it in the bottom of this post. It’s just a normal bread knife but it works REALLY well. I love it!
Lee Cockrum says
Happy birthday!! I am not in a place to try this right now, but I am DEFINITELY going to try it at some point!! I can’t recall if I’ve seen in the past….do you have a kitchen aid stand mixer? And if so, did you try it originally?
So cool that you have done all this research and work! Very impressive!!
Andrea says
no Kitchen Aid — I never liked how heavy they were. So it was either by hand or with my new mixer — obviously the new mixer works significantly better! That said, I know tons of people who knead dough with a Kitchen Aid!