The following post is sponsored by Monkey Bars Garage Storage. All opinions are my own.

Almost 3 years ago, when we first moved into our house (in the middle of winter) we shoved everything that didn’t have a designated home into the garage. At the time, we knew our plans were to completely gut the majority of the main floor, so instead of unpacking everything and letting it get covered with construction dust and dirt inside, we figured things were safer all packed up nicely in the garage.
It seemed like a good idea at the time — but as we all know, once you set something down, it’s a lot easier to leave it there than to move it.
So… our garage was pretty messy for the first year we lived here.
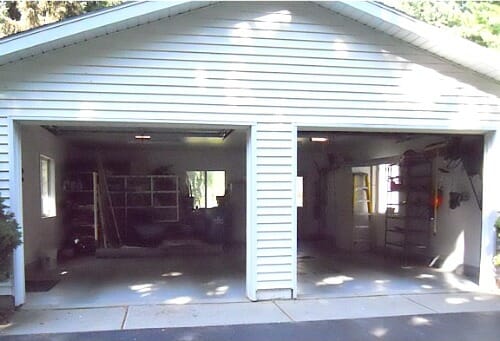
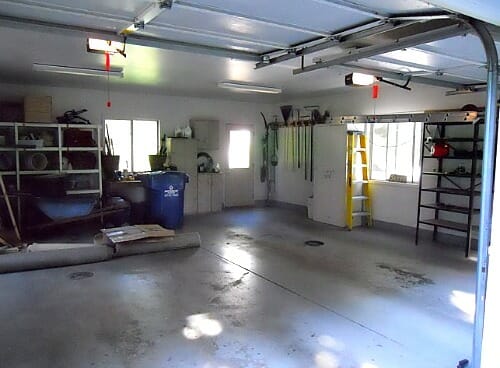
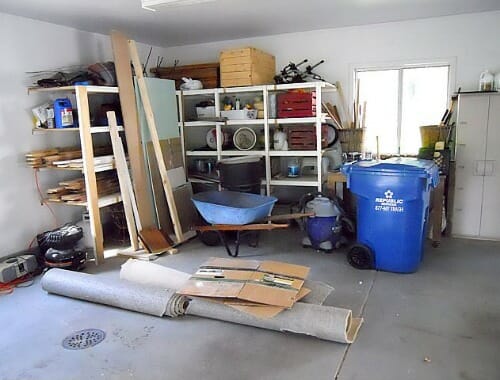
We did move most of the boxes in after the bulk of the construction was finished, so these “before” pictures really don’t depict the worst of it, but you can still see how we were just shoving and shoving more stuff onto those shelves (very few of which were even mounted into studs!)
Maybe it’s not the worst looking garage you’ve ever seen (we could almost always fit both our cars in the garage) but it was progressively getting worse and worse. .
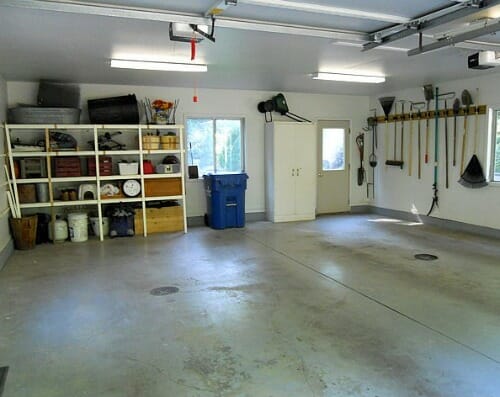
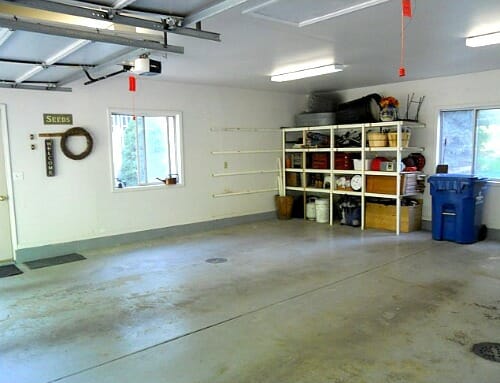
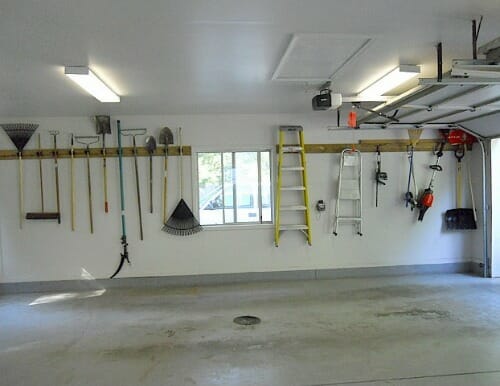
Then 2 years ago (over Labor Day weekend) we decided it was time for a mini garage makeover. Nothing serious, and absolutely no out-of-pocket expense, but it sure made a big difference in the amount of usable space we had and the degree of organization.
A pretty big improvement for 1 day of labor and a whole bunch of trash bags! .
And for the last 2 years, the garage has basically looked like this. We’ve been pretty good about maintaining it, but we’ve also always known that eventually, we’d like to “take it to the next level”.
We wanted to remove all the mis-matched freebie storage, repaint the walls and the trim, find some nice matching storage that was a bit more customized for our specific needs, and then finish it all off with a gorgeous garage floor enamel coating.
.
We figured it would be several years before we tackled the garage — just because inside projects were more pressing and important.
However, this past spring (about the same time we decided to dedicate the summer of 2013 to yard projects) I was contacted by Monkey Bars Garage Storage Systems. They asked if we’d be interested in “testing out” some of their products (a.k.a. total garage makeover) and then writing about the products and the makeover process on my blog.
Dave and I took approximately 4.2 seconds to talk it over before I excitedly responded with a big “YES!”
We figured it was perfect timing since we were already focusing our DIY efforts on exterior projects… plus, we were getting antsy to make some much-needed changes in our garage (like sanding and painting the trim and patching a TON of holes in the walls) and this was the perfect “kick in the pants” we needed to get started.
.
The first thing we did was remove everything from our garage — and I mean EVERYTHING!
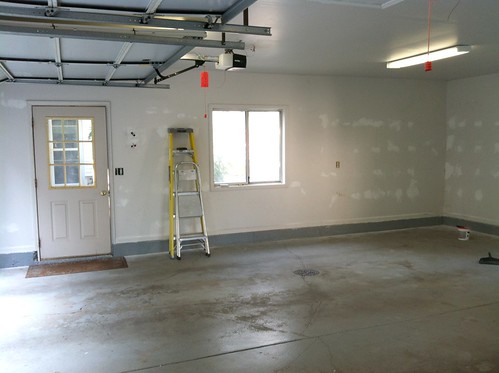
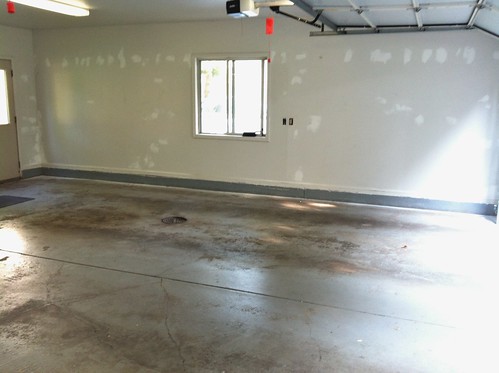
Then we (and by “we”, I really mean Dave) started the long and tedious process of scraping, filling, patching, and sanding ALL the holes in our garage wall. I kind of wish we would have counted how many holes there were (mostly from screws that missed the studs and pulled out chunks of drywall when they were removed) but I’m guessing there were well over 200 holes — ranging from screw-size to baseball-size.
We (a.k.a. Dave) used a huge tub of DAP Wallboard Joint Compound to patch all these holes — and then sanded them down smooth with a sanding pole.
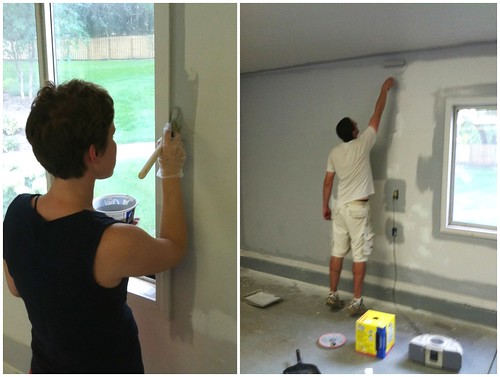
Then I wiped down all the walls, ceiling, and trim, and we started painting.
I did all the cutting in and Dave came behind me with the roller. This is usually our painting method of choice since I have a much more steady hand and Dave is really tall so he can reach the very top of our 9 ft. garage walls without the pole attachment. He did need to use the pole for the ceiling though — and informed me that painting the ceiling is not something he enjoyed.
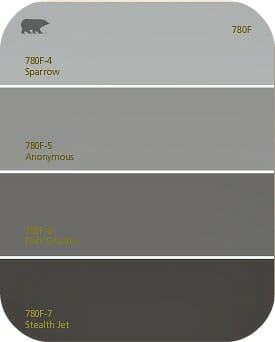
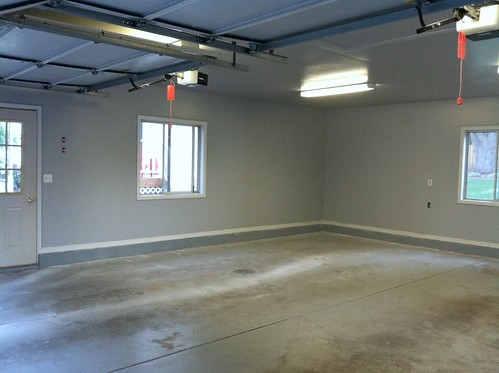
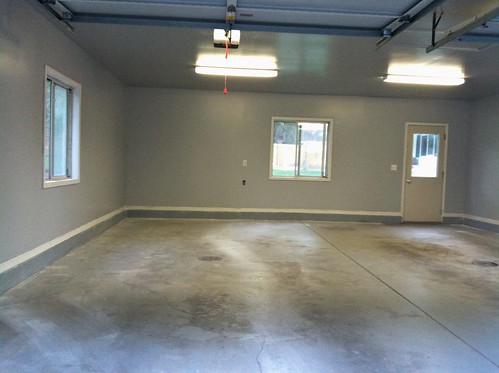
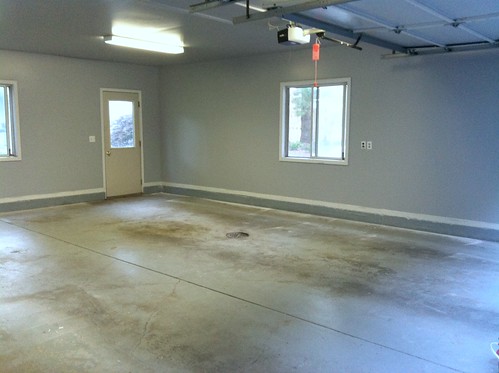
We used the color Sparrow by Behr (exterior) and are very happy with how it turned out.
I still need to paint the trim and the doors — but isn’t that a HUGE transformation already!
At first, I was a bit leery about painting the ceiling the exact same color. I thought it might make the garage seem dark and small — but I’m thrilled with the results and I actually think the garage looks larger with the same color on the ceiling.
Before I go any further and show you our new Monkey Bars storage system, I should note that we are so fortunate to start out with a structurally nice garage. After all, I don’t know many people with an extra-large two-stall garage with insulation, drywall, big bright windows, lovely white trim, floor drains, a bunch of electrical outlets, and huge over-head lights.
Our old house had a tiny plywood garage with 2 light bulbs hanging from the ceiling and 1 plug in the entire place — we know how lucky we were to start with such a nice space.
So, a big thanks to our previous homeowners for forking out some serious dough on a super nice garage 🙂
OK, are you ready to see our new garage?
That’s what I thought!
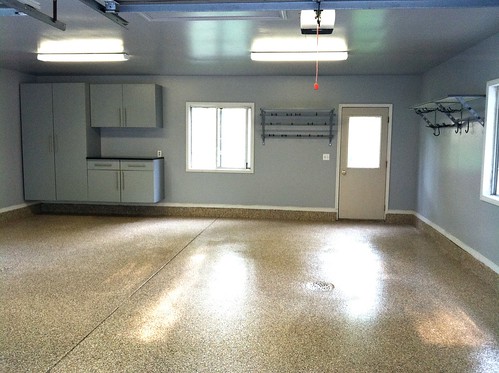
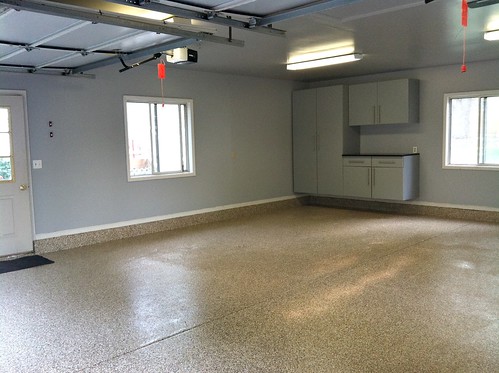
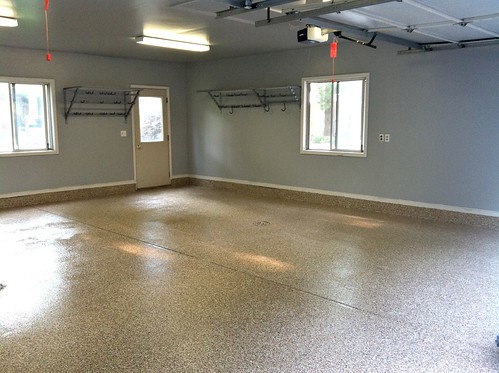
I’m sure I don’t have to go into detail about how much nicer the MonkeyBars system is than our previous storage system (if you could even call those broken down shelves a “storage system”).
I still need to paint the doors (I’m planning to go a shade darker than the walls), but other than that, we’re done with all the hard work, and we couldn’t be happier with how everything came together!
.
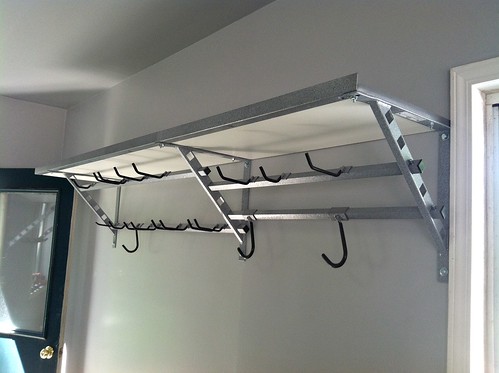
As you can probably already see, the MonkeyBars system is quite different than most garage storage systems because of the “tiered” storage bars that allow you to hang almost anything in a very small amount of space.
You can move the bars to different slots and then move the hooks anywhere along the different bars. There are a bunch of hook options to choose from, and every 4-foot section can hold a whopping 1000 pounds!
Watch the video below to quickly see how the system works — it’s pretty cool! (you may have to click through to the post if you’re reading this via email)
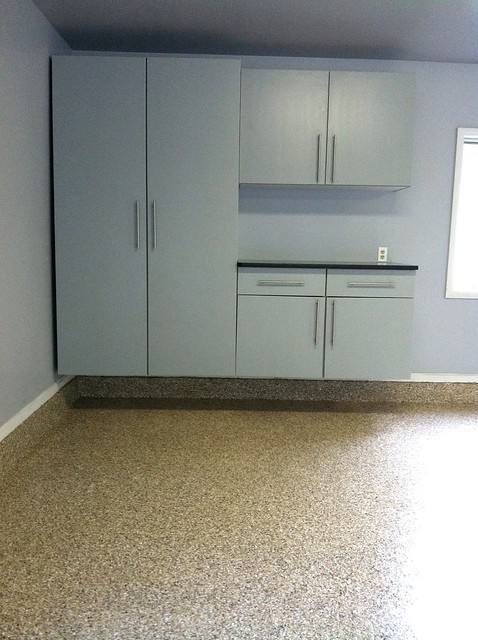
The MonkeyBars storage cabinets are HUGE — and do you notice they don’t rest on the floor?
Everything is completely wall mounted which will make sweeping out the floor extremely easy.
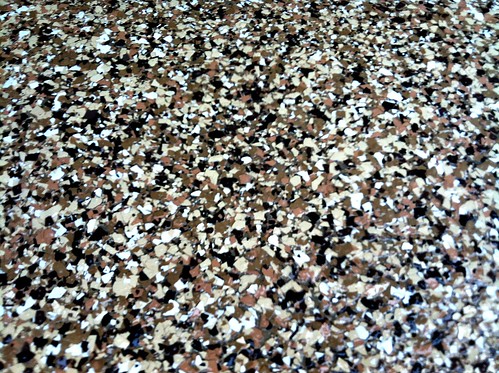
And here’s a closer look at the different colors in the floor — the pictures above make it look really tan, but it definitely has a lot of black and grey in it too.
.
I’m having so much fun figuring out the best way to organize all our things in our new space — especially since we have so much space!
We’re still waiting for a couple accessories to arrive in the mail, but once we get everything installed and organized, I’ll share how we organized all our stuff in another post (hopefully next week).
In the mean time, feel free to head over to the Monkey Bars website to drool over all the amazing before and after pictures…




Amanda says
I love the before and after pictures. It really shows the difference of your clean and organized garage. It makes me inspired to do the same, its just that I have to do something with the flooring first. 🙂 For now ours is a bit cluttered, with some mismatched plastic storage boxes around. It would definitely help if we have our own storage system like that. 🙂
Lauren says
Love the makeover! My biggest issue in the garage is storing my kids’ toys. With 3 kids I feel like we have lots of bikes, scooters, balls, bats, jump ropes, hula hoops, etc. I don’t feel like these items are clutter because my children play with them almost daily. I don’t feel like I have a better place to store them than my garage (maybe I’m not thinking creatively enough!). We can still fit our 2 cars in our garage, as well as trash cans, tools, etc. but it is a tight squeeze and doesn’t feel very convenient to access things. What do you do to organize Nora’s outdoor toys?
PW says
the garage floor looks nice and we installed the same flooring in our 2 1/2 car garage in Chicago area. I drive my car every day to work, in winter the ice/salt melt ruins the floor on my side of the garage. My husband takes train to work, rarely drives, his side of garage looks brand new. Finish lasts about 4-5 years if the salt drips off car. We have had it done 2 times, and found no way to avoid it. Did they give you any hint as to how to handle this?
Andrea says
The professionally installed products are completely different than the DIY stuff you can buy at Home Depot. The chemical make-up and “solid count” is totally different — and it basically means that the professionally applied products will last much, much longer (potentially forever).
Our floors are guaranteed for a bare minimum of 10 years with absolutely no chipping, pealing, fading, etc. If any of that does happen, they’ll fix it at no charge. Even with the snow, ice, salt, sun, etc. we were told it’s not uncommon for these floors to last the lifetime of the garage.
I’ll be talking more about the floors in another post — but I thought I’d just quickly reply to your comment now 🙂
Kelly || Old Blue Silo says
Your garage looks amazing!!
Our friends and family think we are crazy for wanting to keep our shop/garage nice. Good to know we aren’t the only ones! I think a garage should be cared for and cleaned just like you would your home. Ours is so huge (90×24) that sometimes it’s hard to keep up with. I love the Monkey Bars and I am trying to figure out where we can incorporate some of them into our shop to aid with organization. We have so much space but very little shelving.
How is your painted floor? Can you wipe up oil and spills easily? We had ours polished but it still absorbs oil. It was an expsesive procedure but I think down the road I would like to try something different. My husband works on farm machinery in our garage/shop so it’s hard to keep it spick and span!
Andrea says
Kelly, Monkey Bars also offers open shelving if that would be more appealing to you — but seriously, you can hang SO much on their hooks — it just nice to get things off the floor.
I’ll be talking more about the floor process in a future post — but yes, they are super easy to keep clean, super easy to maintain, and they look AWESOME! They shouldn’t absorb any oils or spills and are UV protected so they won’t fade in the sun.
kathy w says
Your garage looks so great, I am so jealous! You guys definitely will do a great job organizing
things too. I am so happy you were chosen to review their product to share. Thanks for all of
the great info.
Julie says
It looks awesome!!
Ann says
I LOVE that garage flooring! I drool over that kind every time I see it!
Ashley says
Garage envy!
Kim says
WOWZER!!!!!!!!!!!!!!!!!!!!!!!!!!!
Maria says
Wow! Just wow! What an amazing transformation. This looks almost too good to be a garage. Love the colors you chose and especially the flooring. This would definitely make for a great article in Good Housekeeping Magazine.
Mary says
looks fab Andrea!!! We did the epoxy flooring as well and we loved it…for about a whole 6 months. Now I just like it lol. When you drive on it, in the same spot every day twice a day, it tends to lift. But Im thinking of just spot fixing it in the future. Its still a major improvement over plain cement and wouldnt change it even with its small imperfections.
Andrea says
Thanks Mary!
We have a few friends who went the DIY route with the epoxy floor coating too. It sure looks nice, but they did mention similar “issues” as you have. The durability is one of the huge differences between the DIY kits and having it professionally installed. We’re told our floors have a 10-year warranty, but should last the life of our garage with no issues. I’ll get back to you in 10 years and let you know how they look 🙂
Ruth says
Love the makeover! – we did something to our garage last year. One thing we added and love are ceiling fans. They dry out the moisture on damp days or if we wash our cars in the garage.
Andrea says
Hmmm… we never thought about ceiling fans — although I have thought about adding ceiling fans to our covered front porch to keep it cooler in the summer 🙂
Rachel says
We have an old Victorian home with a wrap around porch. We installed a ceiling fan on the porch the first summer we lived here and absolutely love it! It provides a much needed breeze on those hot, humid summer days. LOVE the garage makeover by the way!
Julia K (Australia) says
When we renovated our home in Sydney, we had a large deep verandah ( I guess you guys call it a porch). Anyhow – it had a rather deep “wrap around” section over an outdoor dining setting so we installed a skylight over the dining area – but it was an opening skylight which worked really well – letting in the sunshine as well as fresh air. Just a thought 🙂
Amy says
What is the floor?….is it like vinyl? I’ve never seen anything like that:) Very pretty and organized!
Andrea says
it’s an epoxy coating — you can read all about it here.
Candace says
That looks amazing! Love the color of the floor too!
Lee Cockrum says
Looks great, but it also looks like the cabinet space is considerably less than the previous shelving space. Did you get rid of that much stuff?
Andrea says
The cabinets are so much more efficient (with movable shelves inside — which I realize you can’t see yet!) They are also very deep and tall — so the usable space is actually very close to the same as the shelves. It’s amazing how must LESS space you need when you use the space efficiently 🙂
Also, we did get rid of some stuff and we were also able to hang a lot of things on the Monkey Bar hooks — so believe it or not, the two smaller bottom cabinets are basically empty!
Stephanie says
Looks similar to slideloc. Their floors are amazing! Do you realize how expensive that would be? Another way you can say the blog payed you!
Andrea says
I’ve never heard of Slideloc — but yes, the floors are amazing and yes, we know how much it would cost 🙂
And for the record, I do pay taxes on the freebie products I receive on my blog — and it’s counted as part of my income! You can read this post for more info on that 🙂
Stephanie says
I should’ve added how awesome that is for you! And I am sure you legally document everything.
I actually had that post in my mind when I commented.
🙂
Andrea says
Yes, the “freebies” are definitely a BIG perk of blogging. Of course, cash is nice too, but sometimes product (and free labor) is even nicer 🙂
Jen says
It looks great! I’d never heard of Monkey Bars before, but we’ll be building our dream house next summer and I’ll definitely check them out for our new garage!
Andrea says
Definitely keep them in mind Jen — we have been super impressed with their products, service, and quality. I have absolutely no complaints 🙂
And yay for building your dream house!
Stel says
Yup, I like that! We’re planning to build next year, and although we don’t have MonkeyBars here in RSA, I definitely look back at this post for the basic principles.
Jen says
Wow! Looks amazing, what a transformation!
Debby says
Very nice. I can really appreciate this post since we need to do something with our garage also. We have a nice space but we lack the proper storage. Mismatched freebies is the perfect way to sum it up. Can’t wait to see your things in their place for an even better perspective.
LoriB says
Did you do the floor yourself? It looks so nice. I’m wondering if it would be a good choice for a basement floor.
Andrea says
Thanks Lori — we like it too!
Monkey Bars did all the installation for us (including the floors) but yes, they would be FABULOUS in a basement. If we ever renovate our basement, we will definitely consider this idea for the flooring.