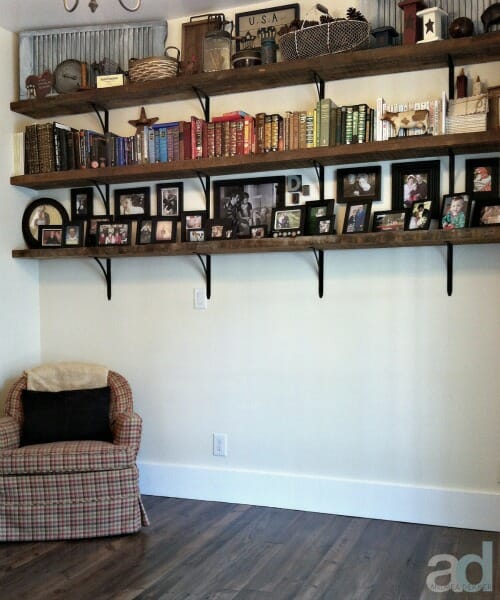
I’m over-the-moon-excited to share today’s post with you — not necessarily because it’s such an amazing project or earth-shattering before and after pictures. No, I’m excited to share this with you because it’s a project I’ve wanted to cross off my list since early November!
You see, I used to have a bunch of mis-matched frames that were different colors of white/off-white and they didn’t look all that great. Plus, most of them were chipped or scratched.
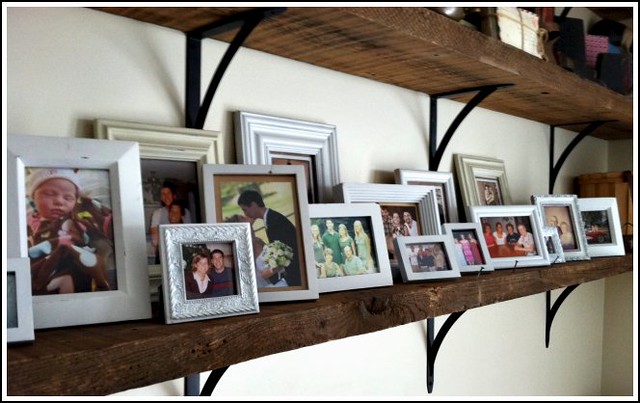
Even though I usually don’t print pictures, I still GET a lot of pictures from people who do print them — and I have a whole bunch of favorite pictures from years past. So while I liked the idea of a shelf full of frames, these grungy old white frames definitely needed a “face lift”.
I decided I would paint the frames black to match the black hardware on our rustic barnwood shelves… and the other black accents we have throughout our home… but that’s about as far into the project as I got 🙂
I wanted to finish this project by Nora’s birthday party… but as you can see, that didn’t happen.
Since I didn’t have the frames finished by the birthday party, I simply put them in a box and gave myself a new goal to paint them over Christmas break. When that didn’t happen, I gave myself the goal of Spring Break… and then I hung my head in shame when I saw my frames STILL sitting in the box on the last day of Spring Break.
Sigh… only 5 months later!
I realize there are more important things to do than paint a few picture frames, but I was so sick and tired of the empty bottom shelf in my office and I knew the project wouldn’t take more than a few minutes of hands-on time.
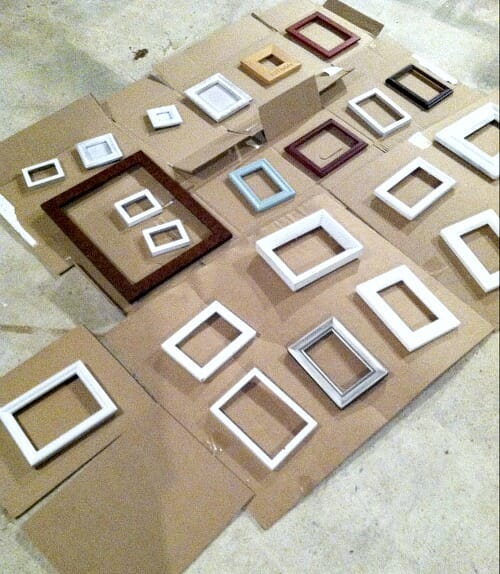
So, last weekend (at 10pm on Saturday night) I brought my box of frames downstairs and set up a little paint shop.
I cleaned the frames with denatured alcohol and then did a quick coat of gray primer (no sanding required). I was downstairs for approximately 15 minutes total, then I came upstairs, took a shower, and went to bed.
I bought 2 cans of “flat” black spray paint Monday at the grocery store (on sale with a rebate!)… and then did 2 quick coats of black paint over the gray primer (waiting about 2 hours in between coats).
After dinner on Monday, I brought the frames upstairs, put the pictures back in the frames, and arranged them on my shelf.
DONE.
FINALLY!
It took less than 2 hours “hands-on”– which included the time I spent putting the pictures in the frames and arranging them all on the shelf.
I’d say it’s worth 2 hours of effort and only about $4 out of pocket cost.
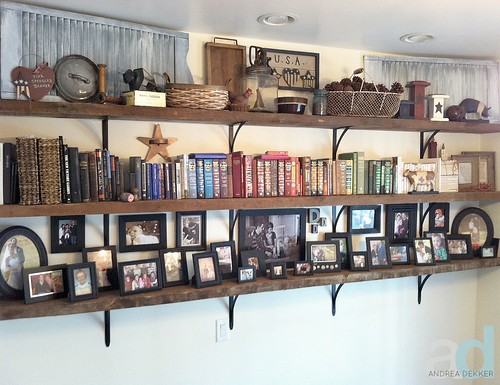
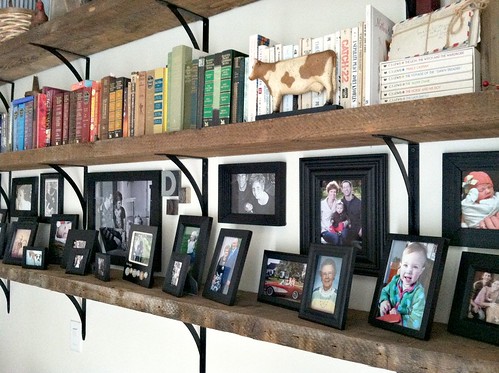
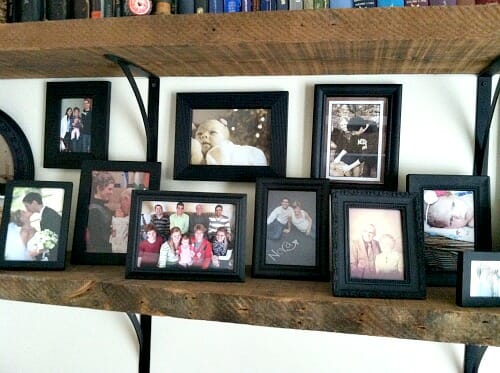
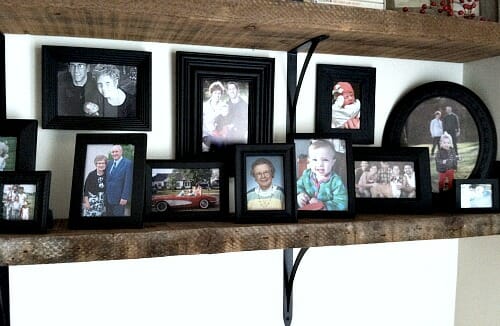
These frames are an eclectic mix of my all-time favorite photos from our wedding, Nora’s baptism, grandparents who have passed away, childhood memories, the first-ever picture of Dave and me on our first real date, lovely new family photos… and of course, Nora!
There is no rhyme or reason to the frames or the photos, I didn’t use a level or measuring tape to equally space them out, and several of the pictures are faded a bit… but it’s perfectly imperfect, and exactly what I envisioned way back in November of last year.
And I’m sure I don’t even need to tell you how much Nora loves looking at all the pictures! It’s funny to see her look at her own baby pictures. She doesn’t realize it’s her, because she just points and says “baby”.
A wall of memories, that’s for sure!
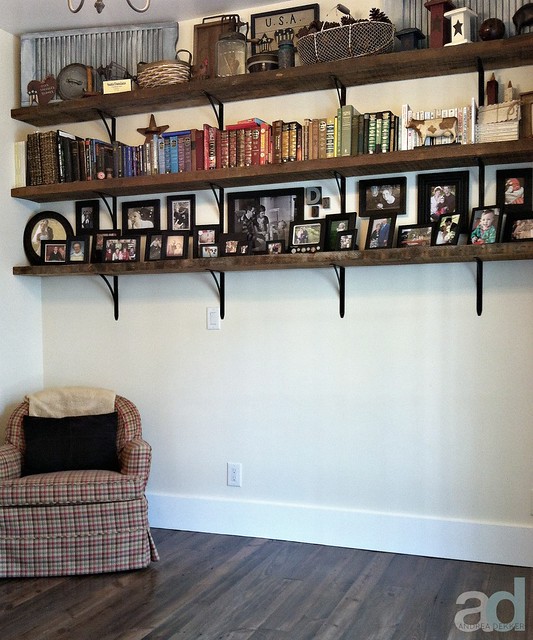
I realize some of you might be thinking this looks awful cluttery, but these shelves are the ONE place in my house where I have decorations… and I LOVE looking at my farmhouse decorations, our color-coded books, and my collage of black frames.
We have a few more projects to tackle on the main floor of our house, and once that dust and dirt settles, we’ll get a piano to fill the empty space under the shelves. Then our office will be officially complete (until I decide to change something again!)




Vondia says
Just wondering if that would work on metal and plastic
Andrea says
yes, it should work fine for metal and plastic — in fact, many of frames are metal and plastic!
Lisa says
Ok- this is a really dumb question- I guess to do this quickly you take out all the photos and the glass and then just massively pray?… you don’t leave anything in while spraying. I sort of wondered if I could keep the photos in and just tape them good but that may take more time than taking all glass and photos out. Any suggestions?
Thanks,
lisa
Andrea says
Oh no Lisa! You will save yourself SOOOO much time by just taking the photos and glass out. It would be extremely time-consuming to tape off all the openings — and if you’re anything like me, you would miss a part and it wouldn’t look great.
Definitely take all the photos and glass out — trust me on this one 🙂
Gramma CC says
If I can add my 2 cents Lisa? If concerned with matching pics to frames, you could either # back of pic & # back of frame or take pic before so you know what pics go in which frames. Hope this makes sense.
Andrea says
Good ideas!
Jackie G. says
I completely LOVE LOVE LOVE LOVE your shelves and the display of stuff and frames!!! It’s such an uber cool look and you are paying a sweet tribute to family and friends. All the different textures and shapes of the frames, married by the black paint are perfect. Did I say I really really really like this display?…. 🙂
JoDi says
That turned out beautiful!
I don’t comment often because I read posts through email, usually at work on my lunch break, and I can’t get to your site from there to comment. So I just wanted to stop in and say thanks for sharing all the great ideas and recipes. One of the best tips I’ve ever learned anywhere was the one you shared about putting the paper towel in with the greens to keep them fresh longer. I buy the 1 pound size organic spinach at a warehouse club, and it never goes bad before I use it up since I’ve been using that tip!
Andrea says
Thanks JoDi! I appreciate your kind words. I also buy the 1lb. “box” of greens and they stay fresh for weeks!
april says
Love this! You have inspired me! Now I want to do this in my house! 🙂
Tracy @thecityofmotherlylove.com says
Love fabulous! Ah, the feeling of accomplishment 🙂 I am a fiend with changing around my pictures, and repainting the frames is one of the best parts! I have a lot of different projects I’ve done with pictures on my site, thecityofmotherlylove.com
Stel says
Love the black frames! I got tired of all the smallish photographs cluttering surfaces throughout the house, and spent a day hanging them all on wall wall in the hallway, where it actually looks much better now. But it’s time for another improvement, and black might be the way to go. We do similar in our little beach house, where we have picture of us on beaches wherever we travel, in white frames, and that also makes a nice focus in the beach house.
Kalyn Brooke says
I don’t think it looks cluttery, but I wouldn’t want to dust them! 🙂
Michele says
Love the “perfectly imperfect” look! And love how you called it that. 🙂
Janet says
Looks great!! Black is definitely better in that location. Nice arranging; I like random. My photos are not up at all. They came down at least a year ago for the walls to be painted. Still not done, so no pics. 🙁
Janet
Five4FiveMeals says
I display my photos using your super cute yard stick and clothespin idea! They are so easy to make and make great baby shower gifts too!
Andrea says
Yes, the yardstick photo collages are super simple — and frugal 🙂
Christina says
Gorgeous! I did this same thing with ‘extra large’ old frames we accumulated. I did them all black (skipped primer, however I did do 2 coats to cover) and hung them in the large play area downstairs. We have about 15 of them hung over a very large recreation area and each have a ‘work of art’ from one of the four girls hung in them. The frames are perhaps 20 x 30 and we put 12 x 12 or even 8 x 10 pictures inside. They are just hung on poster putty to be remove and replaced at random. It really took care of the big space, the empty walls and it helped hang favorite art in one place.
I also have surrounding my office just cheap 8x 10 or 5 x 7 Walmart frames, black again and accumulated over several years, with black and white photos only. It looks gorgeous and I am surrounded by those I love most while I work!
Andrea says
Sounds lovely Christina! I like the idea of including artwork in the frames. I’ll have to try this in another year or two, when Nora finally starts drawing!
Anna says
Looks great! I’ve been planning to do this too! Is it absolutely necessary to do the primer AND two coats of black paint? I live in an apartment and I’m not sure how I would find the space and time to do three separate coats…
Andrea says
No, it’s not “absolutely necessary” to follow any of my instructions exactly 🙂 I already had the primer in the house so I figure I might as well use it up. Plus, I had some mettal frames and wanted to make sure the paint really stuck. The main reason I did two coats of spray paint is because I don’t want to have to repaint them any time soon!
Te says
I love this idea. I’m in the process of redecorating my office at the moment it’s enough to drive someone with OCD crazy
Verity says
Cute! I love the idea!
Amanda says
I’m glad you posted this! This very project is on my list as we speak. I had a variety of colors of frames that used to hang on a wall in my (then our) apt. They’ve been in a bin in our office closet since we moved, and I’ve always had the intention to do a photo wall in our stairwell. Well, just last week, I pulled out all of the black frames and updated the photos to reflect our current state of life (less friends, including our wedding and our son, including old family photos that we’ve gotten scanned from our parents, etc). The rest of the non-black frames are sitting in a pile waiting for me to get black paint! The weather this week is supposed to be fantastic, so I think this is going to be a great naptime project I can do outside!
I’m looking forward to getting them all hung and have our wall complete!
Andrea says
Yay! Good luck with your project. And one tip (just because I learned the hard way) you might want to paint ALL your frames — including the ones that are already black — because there’s a pretty good chance your current black frames and the painted black frames will look different when you’re finished and they are all grouped together. I had a few frames that were already black but they looked SO bad next to all the painted frames so I ended up repainting them black over black and everything looked much better 🙂
M says
Actually, I was thinking it looked like purposeful clutter. The way your shelves are decorated gives the area a lived-in, homey feeling.
Georgia Gal says
Sorry my comment went through to soon! I love spray painting picture frames. I find them super cheap at garage sales and then paint them the color I need. I have also spray painted barn stars, baskets, candlesticks, flower pots, bikes, and more. Hope you have a great day~
Lauren @ Rustic Honey says
Gotta love spray paint! The frames look good as new! Nice work! I totally understand half the battle is making these little projects priority. Oh how I also have the daunting “list.” 🙂
Ashley says
I LOVE the final product! Looks great 🙂
Karen @ Abundance on a Dime says
Andrea, I have plans to do the same thing for a photo display in our front hall – paint all the frames black (at the moment I have a lot that are way more mismatched than what you started with). My dh is planning to build “photo shelves” for the front hall (these are very narrow, almost like a plate rail), that way we can easily switch out photos without putting any nails in the wall 🙂
I hope mine turns out looking as great as yours does!
Andrea says
Love this idea Karen! I hate putting nails in our old plater walls — and thats the main reason I wanted to do pictures on shelves. I usually hang anything I can with the command velcro strips so I don’t have to put holes int he walls. Good luck with your project. I’m sure it will look fabulous!
Chris says
Are you always supposed to prime before using spray paint? Maybe that’s why I had trouble – because I didn’t?
Andrea says
I’m not sure Chris. Priming is never a BAD idea, so I usually do it — especially with spray paint because it only takes a few extra minutes.
Melissa says
I went the opposite route. I took down my wall of pictures and selected a very very special few to leave displayed. It cleared up a wall and really really cleared up the room they were all in. I love your grouping of black frames. I don’t think its cluttered since they’re all the same color, they seem like one item, not a bunch. If I ever do groupings like that again I will be sure to make it a cohesive group as well.
http://jibberblog.blogspot.com/2012/09/goodbye-guilty-clutter.html
Andrea says
Melissa, I did this on the wall above our couch — just 3 of my FAVORITE pictures for a more streamlined, simple look. I guess I love both looks 🙂
Organize 365 says
I love it! So often I wait and wait for “enough” time. I am amazed how quickly I can get things done when I JUST DO IT!
🙂
Lisa
Tammy @SkipperClan says
Love this and looove that you hung some instead of just sitting them all on the shelf. That makes all the difference!
Andrea says
Thanks Tammy! I do think the “hung” pictures make the whole project look SO much nicer. I was trying to cram all the pictures onto the shelves, and then some were completely hidden and everything looked too crowded. I’m really happy with how everything looks!
Jen says
That looks fantastic. I almost never bother printing and framing photos (no matter how much I want to) because I run into the problem of finding frames that look good with the few I already have. I think I’m going to take a cue and just paint all mine! Either all black, like yours, or a couple of different bright colors that coordinate. Thanks!
Jennifer P says
I did the same thing a few years ago with all of my family photos. I have them hanging in our hallway next to our stairs. I repainted the frames black and have 2 or 3 that are a brushed metalic color. There are also some little framed art pieces and some little mirrors all in black frames. I really wanted to hang them on the wall along our stairs but I was afraid they would get bumped off.
It turn out great, just as I hoped it would.