After showing pictures of our new garage makeover last week, I got an insane number of questions about the garage floor coating. I totally understand why — Dave and I are thrilled with the results.
So even after 2 full posts about our Monkey Bar garage makeover (read them here and here) sharing all the nitty-gritty organizational details that I love so much, I felt there was a need to do a post about the flooring — mainly to answer ALL your many questions.
And since the Monkey Bars rep. professionally installed our Epoxy Garage Flooring, I decided to send some of your questions directly to their expert.
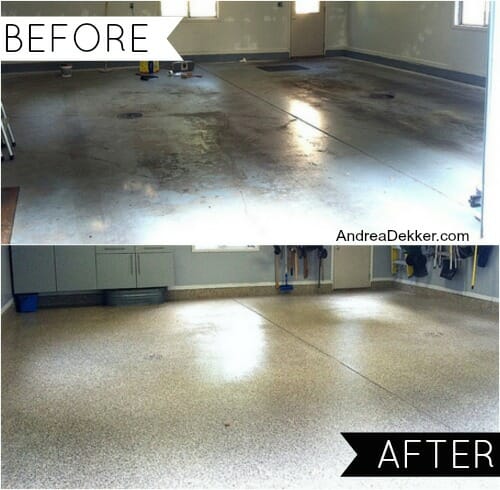
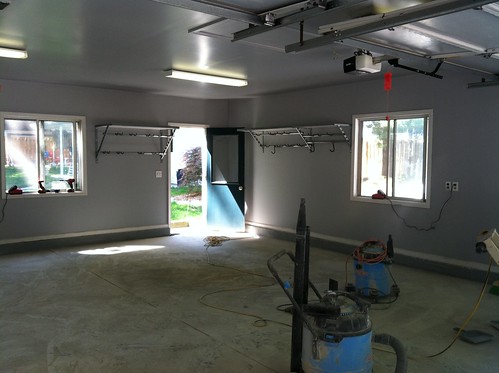
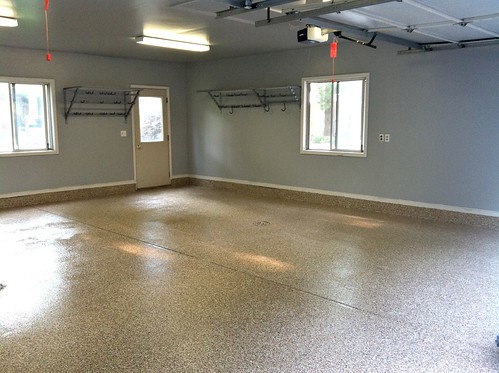
These are his answers mixed with my comments and photos — starting with an amazing before and after picture.
What exactly is the floor coating?
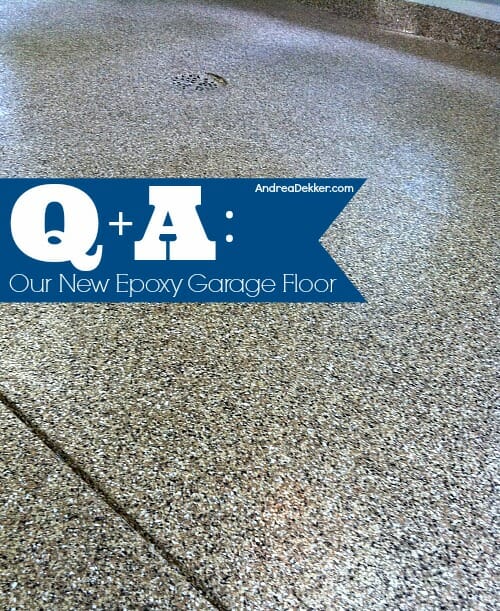
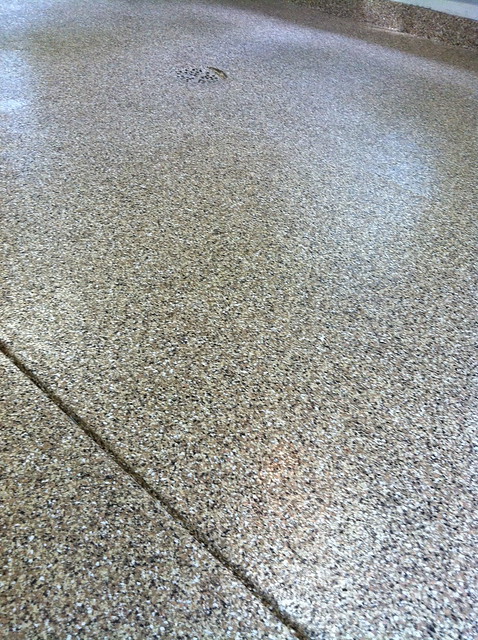
The garage floor coating is an epoxy based base paint, lots of colored chips or flakes, and then a clear epoxy top coat.
What is the process for applying the floor coating?
Our flooring was all professionally installed by people who have done this for years. We had a team of 4 guys working on our floor — so this process is definitely not a DIY job for beginners! That said, here is the process they used on our floors.
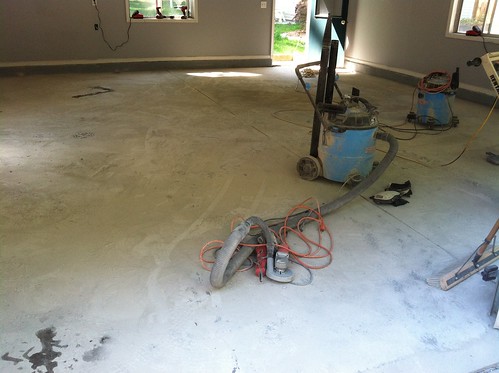
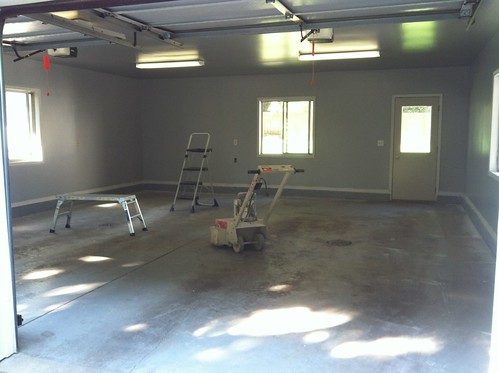
1. Grind the floor to profile and open up pores for excellent adhesion — they use a diamond bit grinder to do this.
2. Fill any cracks or crumbling areas with special filler, wait for it to dry, and then resand.
3. Collect and remove any excess dust.
4. Roll out polyurea/epoxy base coat over the floor and broadcast colored chips (flakes).
5. Wait for base coat to dry (usually about 2 hours).
6. Use a blower to blow excess chips in to the corner and collect them.
7. Come back and scrape chips with a floor scraper to insure all chips are laying flat.
8. Sweep and vacuum up any remaining loose chips.
9. Squeegee out and roll a clear top coat over the chips.
10. Wait for everything to dry (you can walk on it after 2 hours and drive on it after 48 hours) it’s NOT slippery at all.
The pictures below are of the sanding, grinding, and cleaning process — I didn’t want to get in the way when they were doing the more intense work of applying the base coat and top coat.
What are the benefits of using this type of garage flooring?
Honestly, both Dave and I could go on and on about how amazing this floor coating is. We’ve both been drooling over specialty garage floor coatings for years (pretty much since we purchased our first house) so we knew what a huge improvement it would make on our garage.
We were not let down with the finished product, and I can already attest to how much easier the flooring is to keep clean. Here are a few of the many other benefits.
1. It seals and protects concrete.
2. It prevents spalling or additional cracking for water penetration and freeze-thaw
3. Aesthetically pleasing. (Virtually any color combination to match any color desired for a floor.)
4. Easy to clean — oil and other chemicals do not penetrate, making them much easier to clean up than if they were spilled on concrete.
5. Makes your garage feel bigger.
6. Strengthens concrete.
7. Seals and totally hides any cracks or crumbling.
8. Controls joints that collect dirt and debris and makes these areas much easier to clean.
9. Hides dust and dirt for a much cleaner looking floor in between sweeping.
10. Creates a non-slip surface that’s much safer to walk on than other “painted” concrete.
How long does something like this floor coating last?
The Monkey Bars floor coatings have a full 10-year warranty. However if you take care of it, it should last much longer.
What type of maintenance is involved in keeping it looking nice?
Simply sweeping or pressure washing the garage floor can make it look practically new.
The floor can become a little dull after years of use (especially in the high traffic areas); if you choose, you can put an additional top coat on to return it to it’s new state.
To avoid additional wear and tear, always try and carry things across the floor instead of dragging or pushing them.
What makes Monkey Bars flooring so much better than DIY kits?
For the record, this was the #1 most common question I got from you guys. There were many people who stated that they had purchased DIY kits from Home Depot or Lowes and were not happy with the results — or they were happy with the initial results, but not with the durability of the floors a year or so down the road.
We’ve been assured by the folks at Monkey Bars that their floors are completely different than the DIY kits — and here’s why (straight from the Monkey Bars expert).
The difference comes in the methods of prepping the concrete and the materials used to coat the concrete.
We grind the floor to ensure good adhesion, DIY kits usually come with an acid wash or an acid etching chemical that does not do the job grinding does. This allows us to get a really good bond for year and years.
DIY kits are made for DIY people, not professionals. Therefore the materials they can buy at Home Depot are suited to help with the installation of these materials, they try and prolong the work time for someone who may not be as fast as a professional. By doing this they basically ‘water down’ the materials by adding solvents to prolong the work time of their epoxies and make the products more DIY friendly.
In the world of floor coatings, this is referred to as the “percentage of solids”. The less solids you have, the less strong your floor coating is going to be. So by adding solvents (watering the product down) you have a material that has a lower percentage of solids and a weaker floor coating that may peal up or break down in a couple of years.
The Monkey Bar products are high-solids materials that make it tricky to install but result in a floor that is going to be strong and last for years and years. This means our products are more resistant to chemicals and abrasion.
Along with the strength of our materials comes some other factors that you won’t find in DIY products, such as UV stability. Most DIY products are not completely UV stable and therefore will fade or yellow when in contact with the sun. In most garages, they will fade in the front where sun hits it and remain good in the back making the floor two different colors. Our products can be used indoors and outdoors without any fading or yellowing.
Finally, the Monkey Bars floor coating comes with a full layer of chips (full broadcast). Most DIY just have enough chips to add a few sprinkles, ours is a full layer which gives even more protection. With that full layer of chips there are an unlimited amount of colors that can be chosen and even customized for your garage.
What was the cost?
UPDATE: this post went live 30 minutes ago and I’ve already gotten a handful of questions via email and in the comments — ALL asking how much it cost.
Since the garage project was sponsored by Monkey Bars, we didn’t actually pay anything for it — I also haven’t priced out the DIY kits in several years.
All I know is the DIY kits were going to cost us several hundreds of dollars for the garage at our old house (which was much smaller than our current garage). I was also told that a rough estimate for the work done on our garage floor might have been around $2500 (but we have a really big garage and it needed a ton of sanding and patch work before painting).
OK, so those where the questions I received most often — and I think Monkey Bars did an excellent job of explaining them in “lay-man’s terms” (at least it all made sense to me! )
And since I’m sure you’d like to know what Dave and I think after using our floors for about 3 weeks now, here’s our opinion.
WE LOVE IT!
We’ve been thinking about doing the DIY kits for years now, but we’ve never been 100% impressed with the results we’ve seen. And since the price of the DIY kits isn’t exactly super cheap, we figured there had to be a better way.
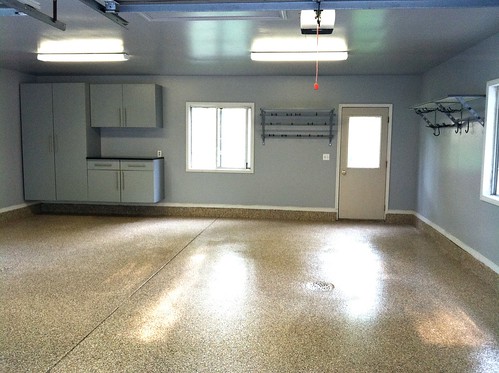
Well, now that it’s finished, Dave and I would both attest to the fact that the Monkey Bars garage floor coating is heads and tails above any DIY kit installation we’ve ever seen — and seriously, they aren’t lying when they say they offer FULL COVERAGE with the chips. They used multiple 5-gallon buckets full of chips for our 2-stall garage floor — so many chips that you almost can’t even see the base coat color I picked out (I’m OK with that as I love the chips).
With the pros at work, they were able to install all the Monkey Bar cabinets, shelves, and hooks, AND did the entire floor in one long day of work.
Pretty impressive, huh?
So did I answer your questions or do you still have more?
Ask them in the comments and I’ll do my best to answer them or ask the folks at Monkey Bars to chime in.


Ms. Floor says
Nice! Epoxy flooring is a certain technique to lessen damage to your car’s tires and any other equipment stored on its surface in a garage or parking area. https://seattleepoxyflooringwa.com/
Mary says
How does the monkey bar epoxy resin floor hold up to snow melt from winter road treatment from cars?
Andrea says
HI Mary, THe epoxy coating on our floor is not the “monkey bar” brand — that’s just the brand of the storage cabinets and garage organizing tools we had installed.
I’m honestly not sure if the floor coating has a brand! The same company did the floor coating for us, but I know it wasn’t under the Monkey Bar brand.
That said, the floor coating holds up AMAZINGLY well! We’ve had it for 6 winters now (in West MI with tons of ice, snow, salt, etc.) and it still looks brand new whenever we hose it down. We are beyond pleased with the floor (and the entire garage!)
Mary says
What is the name of the color you went with?
Andrea says
I honestly have no idea — it’s one of the grey/tan/neutral colors. You really can’t go wrong with a neutral 🙂
Steven Coach says
It is a terrific detailed coverage of the topic. Thanks! I have only one question: How in the world did you manage to talk a professional company into doing $2,500.00 worth of work for free? That is a talent! Thanks.
Christophor Gibson says
Last month I got similar service from a company called Proseal flooring. They helped a lot on transforming my slippery garage floors to non slippery epoxy floors. They removed the old finishing material and used some machinery to make the surface porous. Then they applied epoxy coating and told me to wait 7 days to make the material cure. But the surface become cured after 5 days and the finishing was really superb. There was no bad smell of chemicals and requires only a minimal cleaning. I guarantee that epoxy is the best for industrial concrete floor coatings.
Francine says
I’m just wondering, how difficult was it to do the sides of your garage? Did they do that part first, and just throw the chips against the side and hope they stuck or did they have to actually press the chips into the sides?I would love to have this flooring inside a house as well as in a garage.Looks great!
Sandy says
Can this be used outside too, or just inside? I have a stained concrete driveway that needs a new something, and I LOVE this look!
Andrea says
Yes Sandy, I believe so. It’s UV protected so it won’t fade in the sun — but you can always contact their customer server to verify or ask any additional questions. in**@**************ge.com
Stephanie says
Another flooring company like this is slide-lok. But they use a different material than epoxy. My sister has it in her laundry room in her basement and loves it. Super easy to keep clean, waterproof, pretty, and definitely not slippery. It is very very expensive though. I would love some in my basement and garage but it isn’t in our budget at this time.
Hey, maybe monkey bars will read this and think about a giveaway or discount to your readers. 🙂
Jordon says
How is it when it gets wet? I love the look but am concerned it would be extremely slippery when wet?
Andrea says
totally not slippery at all. before we got this floor coating done, our garage floor was super slippery, now it’s not at all 🙂
Suzanne says
I too am curious about the cost, and whether this can be done on garage floors that have cement floors but those floors have pitting and some cracks.
Andrea says
Hey Suzanne, I just added some information about pricing to the post — and as you might be able to tell from the “before” pictures, our floors had TONS of huge cracks and pitting. That was all part of the process and you can’t see any of the cracks or pitting now. It looks like a perfectly smooth floor.
Brianne says
Thank you for sharing all the information! Just wondering what the cost difference is between a kit from Lowes VS. having a company like Monkey Bars install the floor?! We are definitely interested in having this done to our garage floor, but I didn’t realize how labor instensive the process is and now am doubting us doing it on our own!
Andrea says
I’ve never actually priced out the kits from Lowes — and when we did price out some kits from Home Depot, it was many years ago in our old house (with a much smaller garage). It would have still been several hundreds of dollars to DIY (plus all the stress and inferior results). From what I’ve learned from others who have done the DIY kits, they are usually better in places that don’t get really wet (like basements) not necessarily garage floors. I’ve been told that the DIY kits don’t hold up well with cars driving on them, snow melting, etc.
Kelly says
If you get the kit, don’t get the ones from HD or Lowes. go to Sherwin Williams and get their kit with an extra bottle of flakes.