Over the past 10 years, I have painted countless walls, ceilings, doors, windows, baseboards, cabinets, shelves, dressers, armoires, tables, chairs, beds, cribs, picture frames, and other various pieces of furniture and decorative items. (In case you’re wondering, here are my favorite paint colors!)
I have used over 100 gallons of paint and countless other painting supplies — and although painting is a relatively frugal way to revamp a space, it’s not necessarily “cheap”.
The cost of paint and painting supplies has gone up a lot over the past 10 years — I was shocked to see how expensive my favorite paint brushes were the last time I was at the hardware store.
So, since we’re ramping up for another spring and summer of house projects in the Dekker home, I thought it was a good time to share a few simple ways I try to extend the life of my paint brushes.
1. Limit the dip.
I try not to dip the bristles into more than 1 inch of paint — especially if I’m only painting a small area. This makes clean up so much easier and I have better control over the paint.
This probably won’t be possible if you are painting directly from the can — which is why I recommend pouring your paint into a smaller container first (I like to use Cool Whip or Sour Cream containers!
2. Keep them covered.
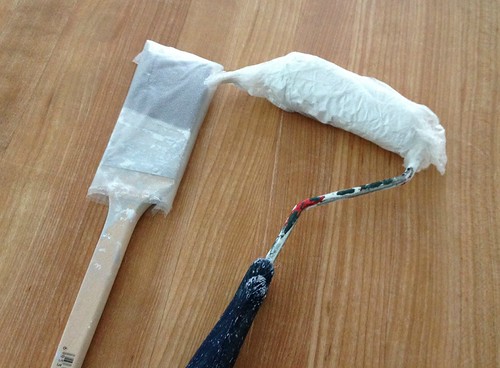
I always wrap my brushes in Glad Press ‘n Seal wrap while I’m in the middle of a project to assure they don’t dry out. I’ll do this with a project that needs to dry overnight, and also when I need to stop for even just a few minutes to grab lunch, go to the bathroom, or get something for one of the kids.
It’s amazing how quickly paint can dry on your brush, and when little bits of paint around the edges of the brush start to dry out, they start to collect more paint — and then that paint starts to dry out. Eventually, you’ll end up with a really gloppy brush with all sorts of dried paint chunks on it (and you’ll have to throw it out).
3. Clean them immediately.
When I’m fully finished with a painting project, I wash my brushes immediately with hot, soapy water (or paint thinner for oil-based paints).
I usually let them soak in the hot water for a few minutes, but I try not to let the wooden handle get in the water as it can warp if it’s wet for too long.
Also, sometimes I do clean out my brushes in the middle of longer projects if I feel like there is too much extra paint on the bristles.
4. Let them fully dry.
It’s best if your brushes can hang to dry with the bristles facing DOWN. However, you can also lay them on a double layer of towels to soak up extra moisture. I also like to “comb” my brushes to make sure the bristles don’t get matted or tangled
Then, once they are totally try, I wrap them in plastic wrap again to keep the bristles from hardening up.
5. Store them properly.
Again, it’s great if you can hang your brush so they don’t get smashed or broken. However, if that’s not possible, simply lay them flat or put them back in the cardboard container they came in.
Of course, you will eventually need to toss your brush (especially after using very dark paints for prolonged periods) but hopefully, these tips will help to extend the life of your paint brushes!


Russ says
Some great tips that I never thought of. I’ve been too wasteful with my paint brushes but no more!
BTW, I have another good use for Glad Press ‘n Seal wrap when painting. I.e. use it to wrap around awkward objects you do NOT want to be painted. The best example of this is the toilet when painting around it. Wrap the toilet in Glad Press ‘n Seal wrap and it will remain spotless as you paint around it.
Lois says
Great tip! Someone gave me a tip years ago on another way to preserve the brushes and I have used it ever since I wash thoroughly and than wrap them in a most paper towel and than wrap them in aluminum foil (yes! they are not dry…but moist from the paper towel) and than store. Works every time and I do not have to buy expensive brushes with each project! Also have to add just taking a nail and quickly hammering around rim of the paint can will a present a series of small holes for the paint to drip back into the can as you are pulling the paint out with the brush.
Those retired painters at Home Depot/Lowes know all the tricks! Pick their brains.. Love your posts!
Andrea says
Thanks for the tip Lois!
Debbie says
I just saw this dandy paint brush and roller cleaner on youtube. What a great invention if we can figure out where to get it.
https://www.youtube.com/watch?v=76LnCKYrfLs
Andrea says
Thanks for passing the video link along 🙂
Katie says
A perfectly timed post as I’m currently right in the middle of painting our kitchen cabinets. A huge task! I already do most of these things; except letting them hang to dry. I will have to try it!
Andrea says
Oh the kitchen cabinets! We painted ALL our cabinets at our old house (it took 4 layers!)
Good luck with the painting — I know you’ll love it when you’re finished!
wilma says
one thing that i’ve been using for the last few years, that REALLY has made cleaning paint brushes so much easier, is this: http://www.rona.ca/en/paint-brush-cleaner-p02715311. i would highly recommend it.
Andrea says
wow — that looks great! Thanks for the recommendation Wilma — we might have to purchase one of those 🙂
Chris says
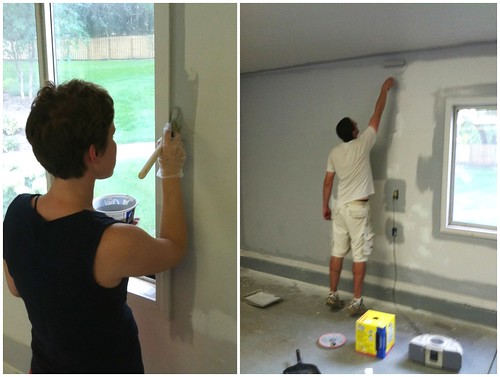
Hhhmmmm. And here I am trying to figure out what room you’re painting that has a window like that. lol
Andrea says
haha — it’s our garage 🙂
Summer says
I totally laughed when I saw your photos of you guys painting… as this is exactly the way we paint! I do the trim work and my Hubs rolls the rest. We are in the middle of paining the cabinets in our garage. Floor to ceiling cabinets were already installed when we moved in and painted off white. It looks beaaaaautiful, again, but it has been many hours!
Thanks for the tips!
Andrea says
yes, Dave will be the first to admit that he’s not a great painter… but he IS willing to help!
Yay for painting the garage cabinets! We just power washed our floors and decluttered the garage after a long cold winter. It looks so clean and fresh again!