Yay — I’m so excited to finally share the full tour of Nora’s brand new bedroom!!
It’s a REALLY long post, but that’s because there’s so much to share…
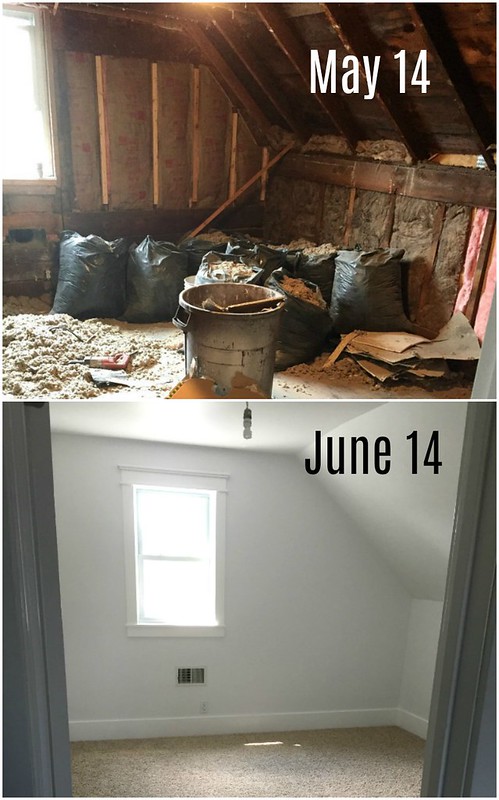
This room was a labor of love. It was such a huge project that started with a 100% complete gut job — new electrical, new heat ducts, new insulation, new drywall, new doors and windows, new… EVERYTHING!
And thanks to my dad and ALLLLL his help, we were able to finish this project in about 6 weeks — including ripping up the floor to install can lighting in our living room below, and completely raising the super low ceiling of the bedroom almost 14 inches!
The higher bedroom ceiling makes the room feel SO much bigger and brighter; plus we can now have a ceiling fan to help keep this 2nd-floor room nice and cool in the summer heat.
Dave and I (and Nora) are all so thrilled with how this bedroom turned out… I honestly can’t think of anything I wish we would have done differently.
It’s the perfect room for our 5 1/2 year old girly-girl… it’s neutral enough that we can easily change colors if we want, it has loads of empty storage space, and it has plenty of room to grow with our family (a.k.a. little sister can eventually share this room with Nora!)
I wasn’t really sure of the best way to accurately share this room renovation with you, so I simply took a bunch of pictures and included a small caption BEFORE the photos.
I share the cost breakdown (as well as where I found everything) after the photos — and then a few before and after photos way at the end 🙂
.
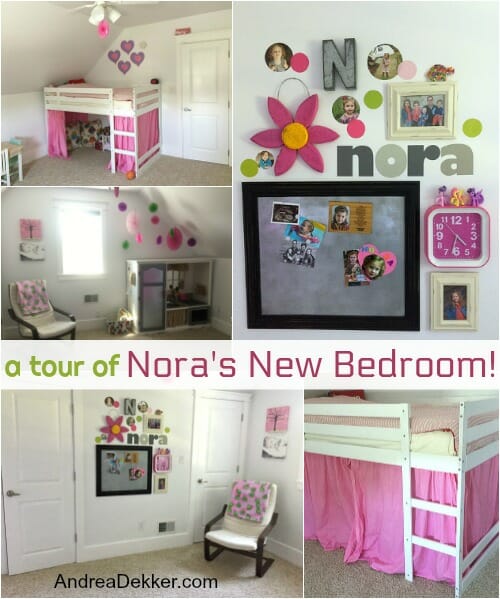
A Tour of Nora’s New Bedroom!
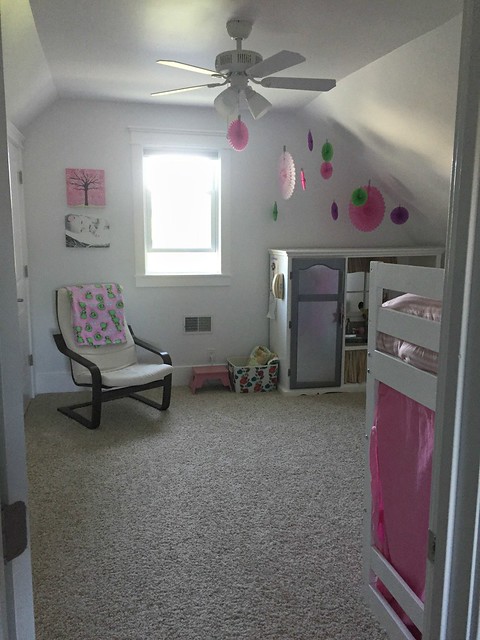
This is the view from the door to Nora’s new bedroom — looking towards the front wall of the house.
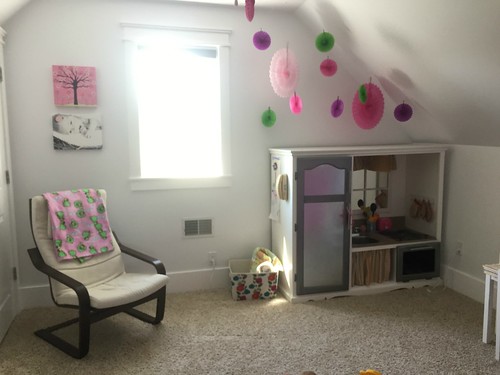
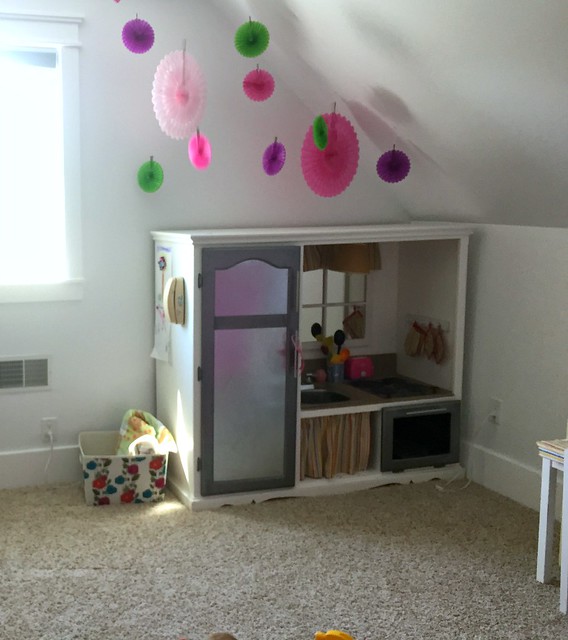
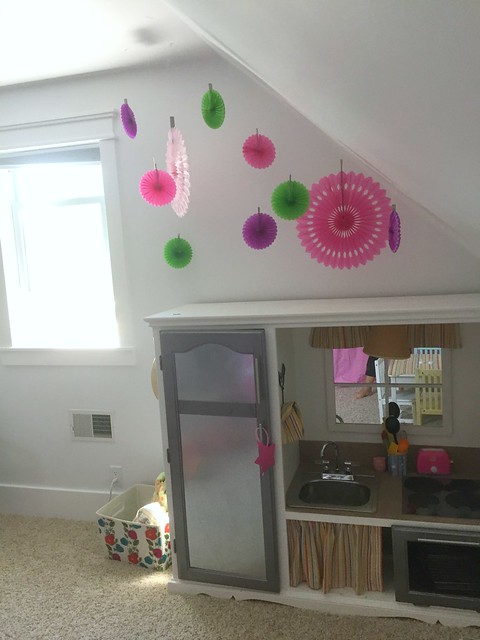
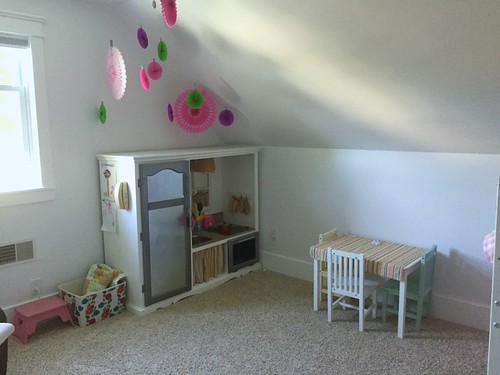
We already had the chair (IKEA Poäng chair) and we moved the play kitchen set into her bedroom.
I found the colorful paper “flower” decorations at the dollar store and hung them with fishing wire and push pins. Nora LOVES them!
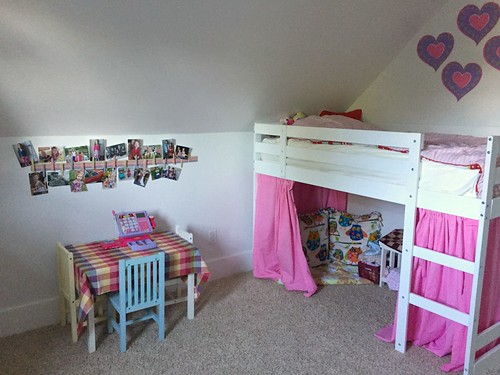
We already had this little table and chair set too — it fits perfectly in Nora’s room and is a great “companion” to the kitchen set. We do have a 4th chair for the table too (which we’ll need eventually!)
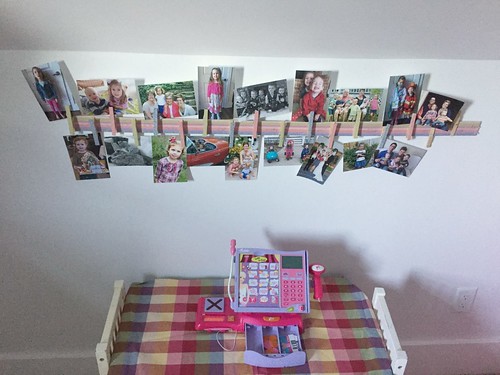
I added a simple yardstick photo collage to the wall above her table after I had already taken a few pictures for this post.
It’s the perfect size for that space… and since we simply moved it over from her previous bedroom, it was FREE!! (Here’s the tutorial on how I made the collage).
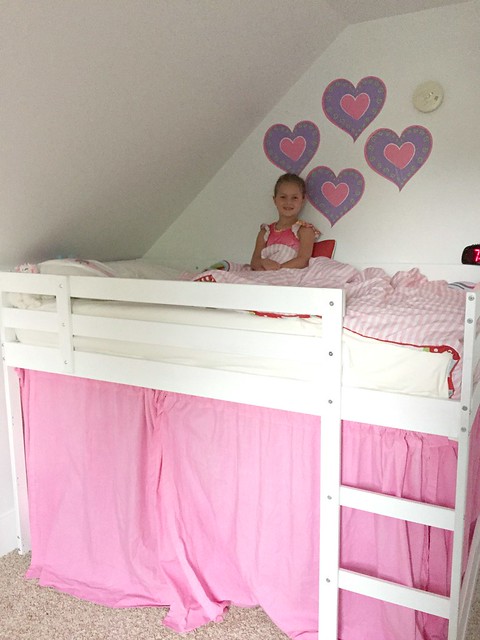
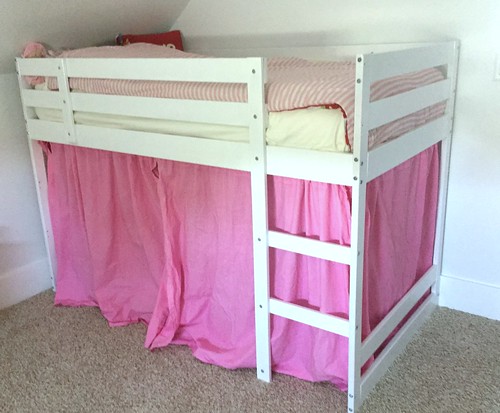
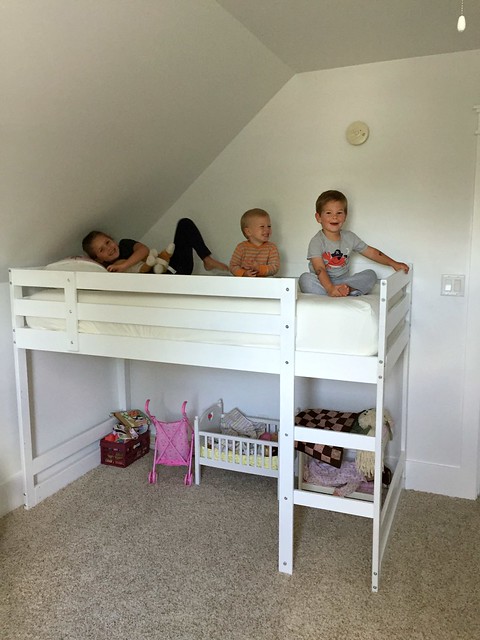
Also, I found the EXACT bed we wanted on Craigslist — SO exciting!
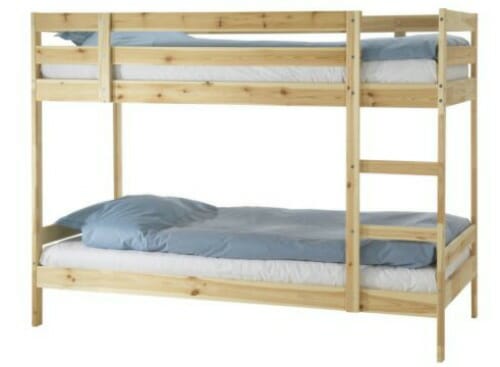
It’s the MYDAL bed from IKEA.
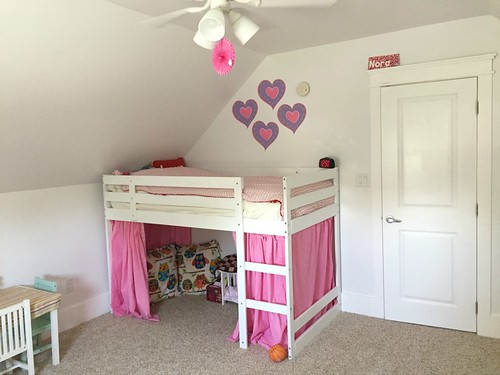
As you might notice, we painted it white — it looks SO much nicer! We also cut the legs off so the ladder rests on the ground.
This bunk bed is already a lower bunk bed, and by cutting the legs off, we were able to make it fit in Nora’s room with sloped ceilings.
If/when we eventually want to use the bottom bunk, the frame would simply rest on the ground, but the mattress would still be elevated off the frame and everything else would function normally.
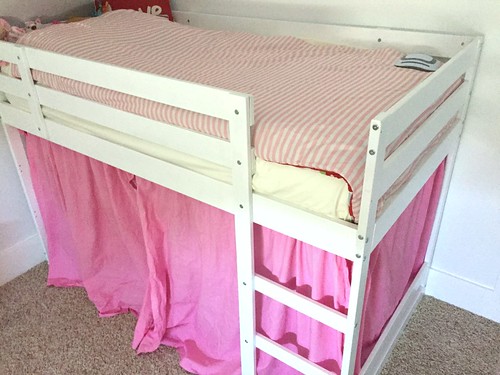
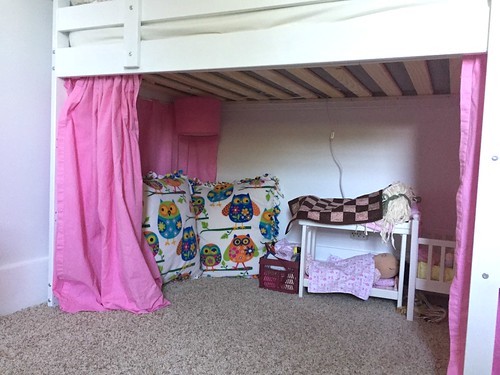
We purposely left the front board of the bottom bed rail off so we can use this bed as a “mini loft” with storage for all Nora’s doll things underneath.
I took old curtains from our living room, cut and sewed them to fit this bed, and we dyed them pink to match her room! We installed the curtains with 3 tension rods.
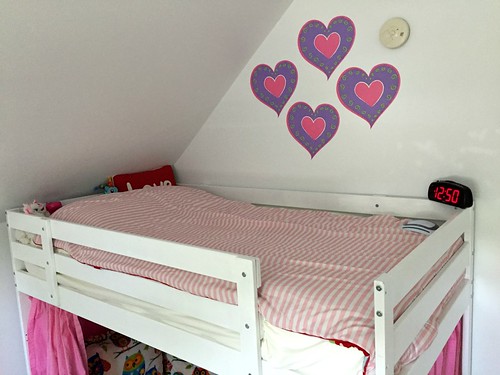
We used all Nora’s old bedding — and I ingeniously used her full-size comforter to make 2 matching bunk-bed size comforters that don’t hang over the edge or flop all over the place.
We also reversed the comforter so the pink striped side showed — versus the red, pink, and blue side.
Here’s what the other side of the comforter looks like…
Now I have 2 matching smaller bunk-bed size comforters that we can use whenever Nora’s new little sister eventually comes up to share this bedroom!
We found these heart wall decals at our local thrift store, and although hanging 4 of something wouldn’t have been my preference, the set was only $0.50 total and Nora just loves them. She stuck them up there all by herself and was very proud of her decorating skills!
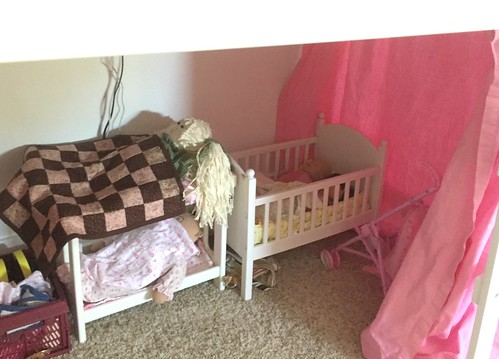
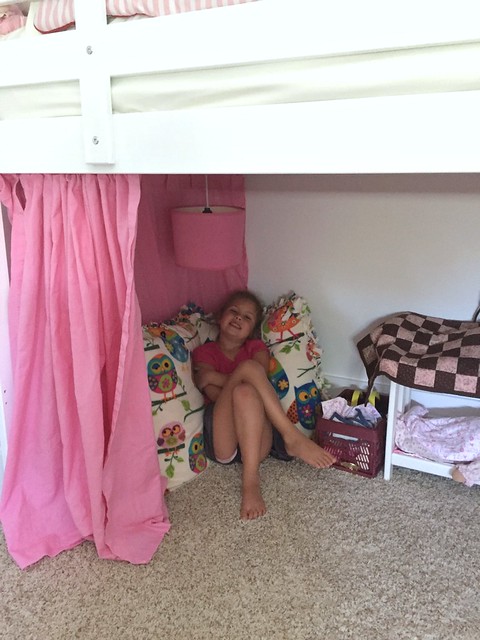
Like I mentioned above, we are using the area below her bed for all her doll items — changing table, crib, stroller, blankets, etc. etc.
It’s like her own little hideaway under there and, so far, she has really enjoyed playing in here (so have Simon and James!)
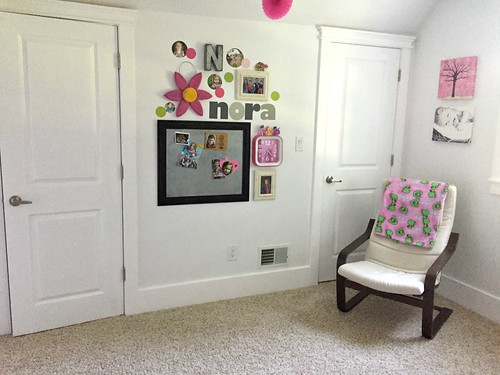
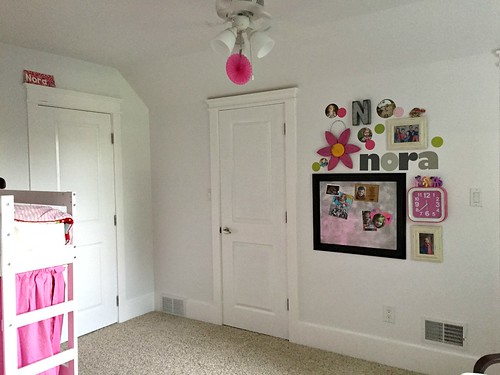
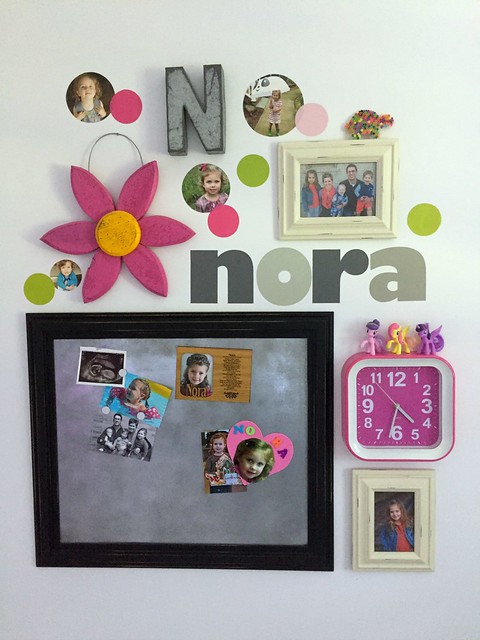
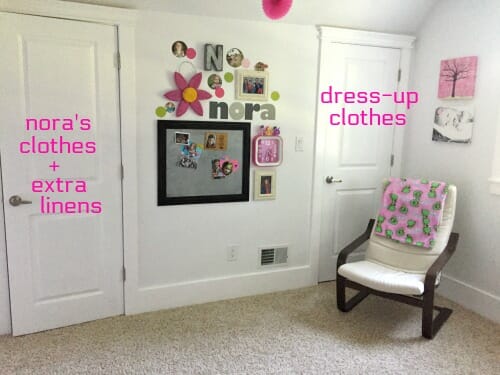
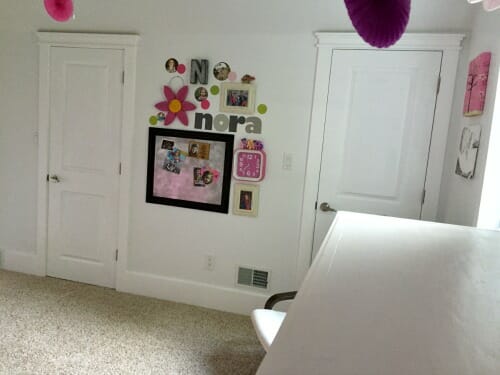
The last wall of the bedroom has both closet doors with a fun “gallery wall” in between. This wall was REALLY fun for me to put together!
We had everything in the house except the metal letter “N” and the clock — both of which were inexpensive finds and really cute additions to our wall!
So that’s her entire bedroom — here’s a look inside both the closets.
.
A Tour of Nora’s Closets:
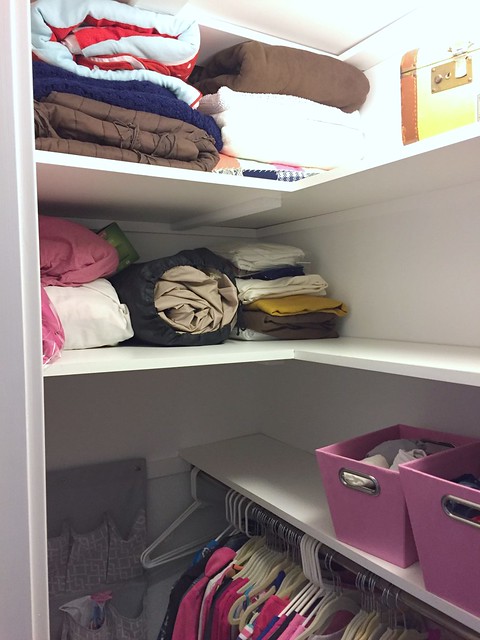
The closet on the left is a very large walk-in closet that holds all Nora’s clothing, as well as extra bedding for the rest of our house. We currently do not have any sort of linen closet, and although we don’t have many extra “linens”, we do have some extra bedding that needed a home.
We put our air mattress and air mattress bedding on one of the top shelves, as well as a handful of extra blankets we use for all our beds in the winter. It’s the perfect way to use ALL the extra top shelves in Nora’s closest (ones she can’t reach anyway).
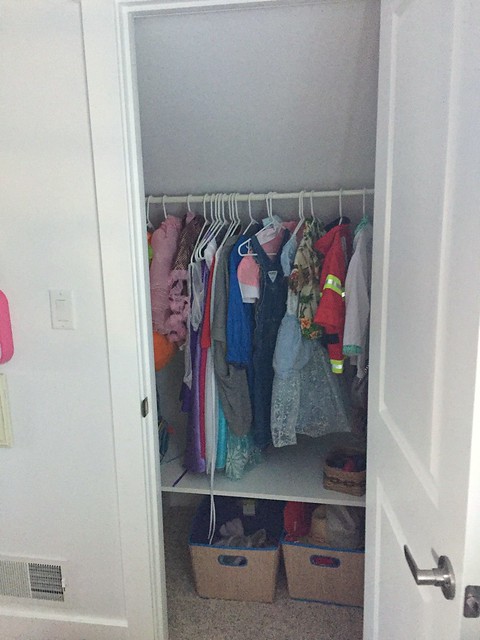
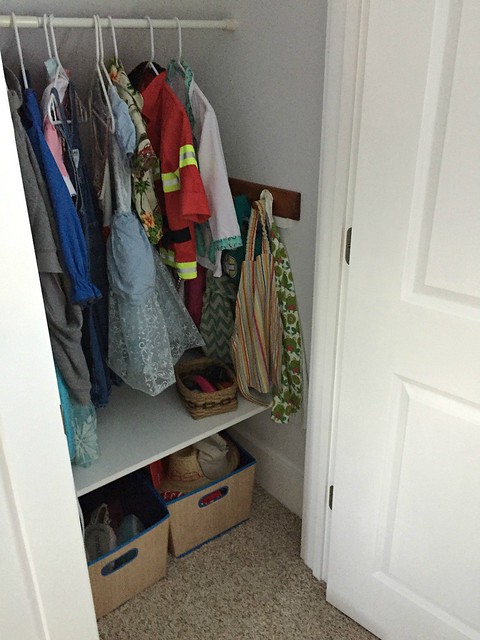
The closet on the right was an added closet, using otherwise wasted space. We currently have it set up as a storage space for all our dress-up clothes.
In general, both closets in her room are very awkward and were VERY under-utilized before. They have sloped ceilings, weird angles, and made it somewhat challenging for me to decide how I could best-utilize the space.
So far, I’m happy with what I came up with — and we are really enjoying all the extra storage space!
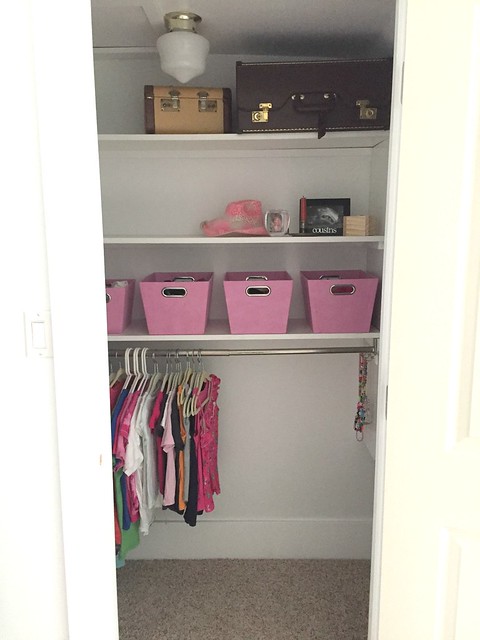
Here’s a look inside the clothes closet.
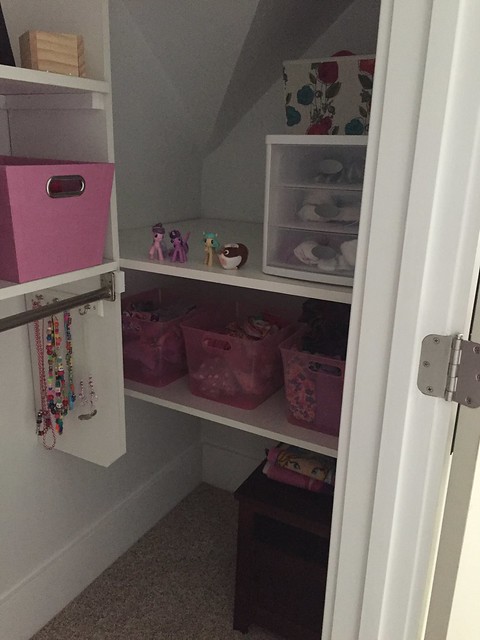
The decorative trunks store some of her memorabilia, the middle shelf will be for decorations and pictures.
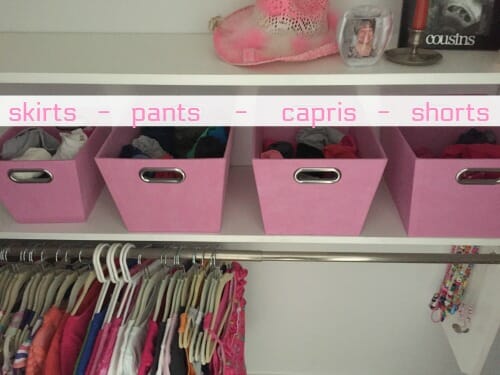
I didn’t want Nora to have a dresser in her bedroom because she doesn’t fold things nicely, so when we found these pink bins on clearance at a local home store, I knew they would be perfect for her closet.
Now she can just shove her bottoms into the appropriate bin and hang up all her tops (she’s good at hanging, just not folding)!
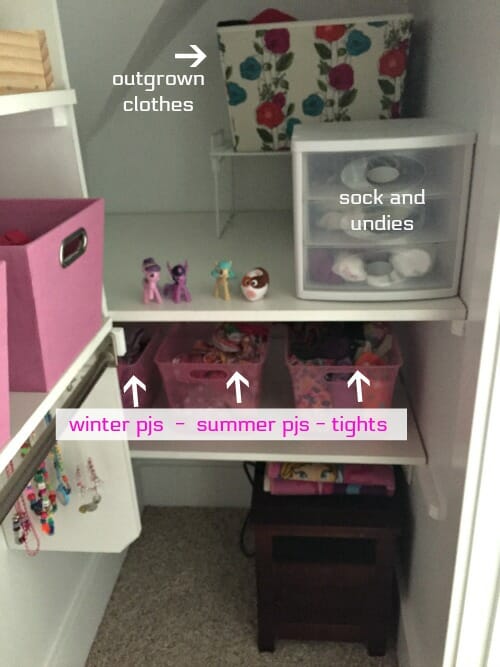
There’s lots more storage to the right — we have SO much extra “room to grow” in this closet, it’s crazy!
I also love that we were able to hang her necklace hooks inside her closet too.
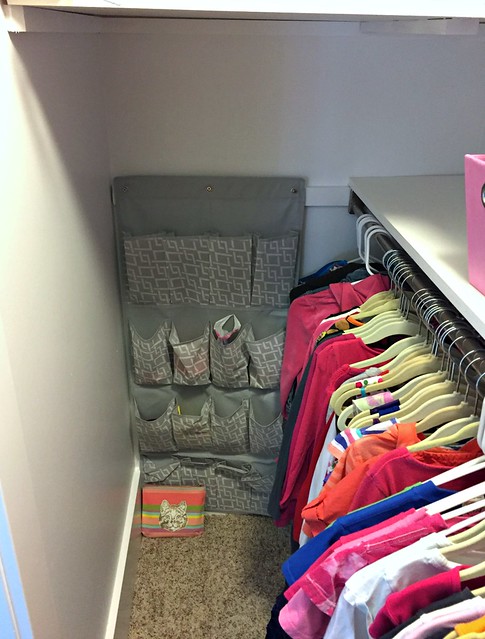
I hung a small shoe organizer on the side wall of her closet — she uses this for all her small “toys” like Little Ponies, Shopkins, Trolls, other little figurines, her wallet, her coin purse, etc. etc.
She loves small things and always left them sitting out everywhere. Now she has a place for everything!
And you can see the extra linen storage on the upper shelves (again, we still have SOOOO much unused space!)
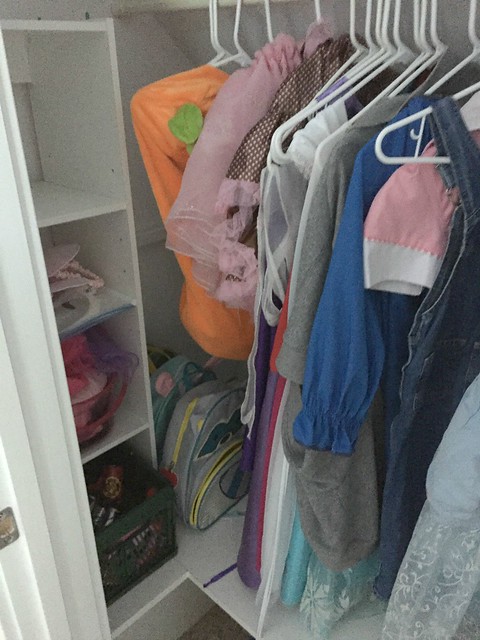
Here’s a look at the dressup closet:
As you’ll see by the before/after pictures at the end of the post, this closet didn’t exists before — it was just an awkward attic cut-out the previous owners used as a desk area. It offered no storage, and since Nora doesn’t need a tiny desk area right now, we enclosed it and afforded ourselves a huge amount of extra storage space!
Right now, this seems like the perfect place for all our dress-up clothes — but we do have more shelves for this closet, so we can eventually turn it into storage for toys, games, or pretty much anything else we need/want storage for.
It’s SO nice having 2 closets in this room!
Here’s the Cost Breakdown:
Bunk bed turned Loft Bed: $70 (On Craigslist, originally this bed from IKEA)
Curtains for doll area = $5 (For the pink dye.)
Pink organizing bins for closet = $22 for all 7 bins!
All other closet organizing supplies = $0 (Things we already had in the house)
Pink clock = $7 from Amazon (It’s a non-ticking clock)
Decorations = $12 (We had almost everything. We purchased the “N” for $5 from an antique store, the hanging paper flowers for $5 from the dollar store, the pink canvas tree print for $1 from a thrift store, and the heart wall decals for $0.50 from a thrift store.)
Wall Decals = $0 We had them for Nora’s previous bedroom, but this is where they are from.
Everything else = $0 (We had the kitchen set, the table and chair, the rocking chair, the bedding, all the doll items, and any other “extras” you see in the pictures!)
GRAND TOTAL = $116
Pretty good if you ask me 🙂
.
Of course, this does NOT include the thousands we spent on demolition, lumber, insulation, drywall, windows, doors, trim, paint, carpet, light fixtures, electrical work, HVAC work, labor, delivery, etc. etc. etc.
As I’ve mentioned before, this bedroom was a HUUUUGE project, one we’ve been putting off and putting off since we first moved into our farmhouse. Dave and I have both dreaded this bedroom project for years because we knew just how messy and expensive it would be.
Needless to say, we are SO glad to finally cross this project off our list and have a fabulous new space for our kids to play and sleep!
.
And finally… the before and after photos!!
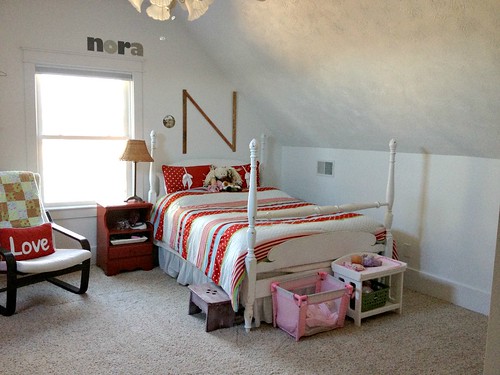
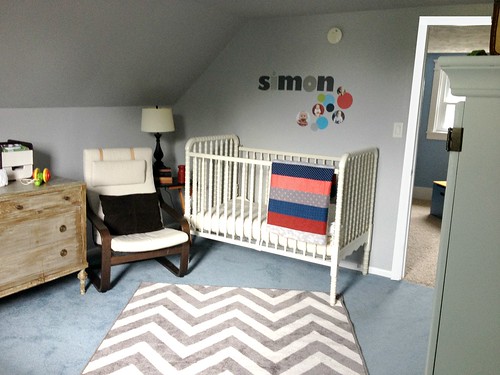
This bedroom originally started out as a guest bedroom, then it was a bedroom for one of our international students, then we did a mini-makeover 2 years ago when we moved Simon into this room before James was born, and most recently, it served as a fabulous play room.
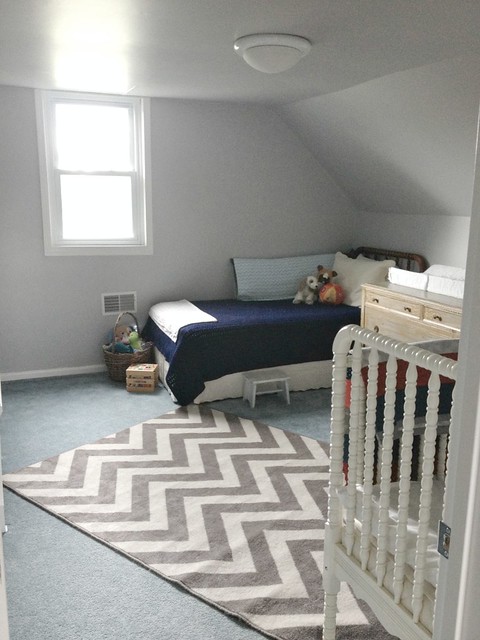
Below I’ve included a few “Before” pictures, then pictures of what it looked like when we did the mini makeover for Simon, and finally the current “After” photos!
.
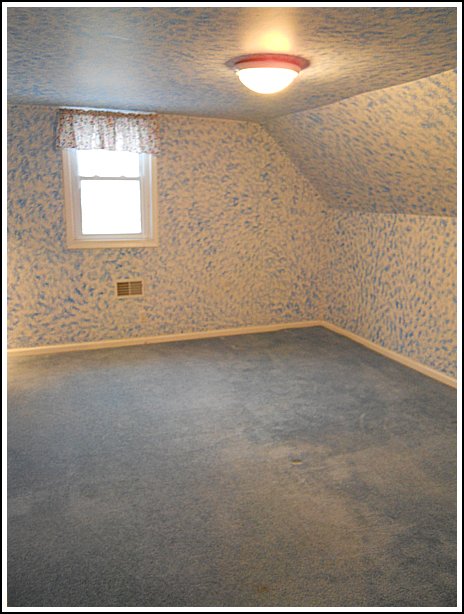
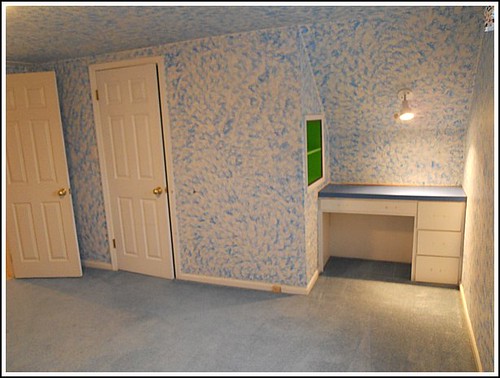
This is what the room looked like the day we moved in… we have affectionately called it “The Blue Bedroom” ever since. It has been hard to break that habit now that the room is no longer blue!
This view is looking out towards the front wall of the house.
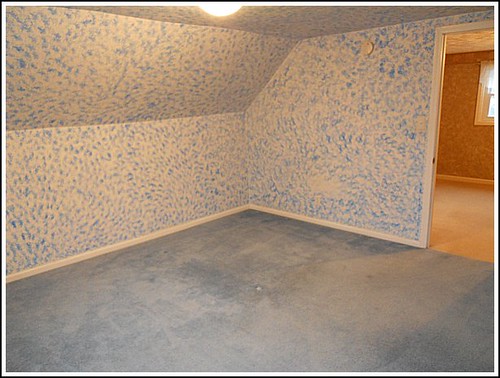
Here’s the opposite wall, looking back into the area at the top of the stairs.
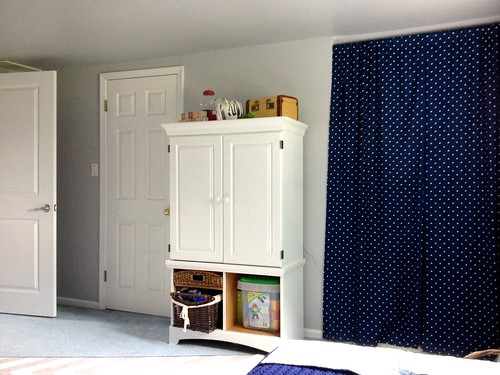
And this is the side wall with the closet and awkward desk cubby.
We removed the desk and hung curtains to make that alcove into some usable toy storage when Simon moved into this room.
But the extra closed closet space is SO much better!
.
OK, so that’s it — the full tour!
I’m sure we’ll continue to tweak things in her room (just like I do in all my rooms) but for now, we are all super happy with how this bedroom renovation turned out!
I’ll be back in a couple more weeks to share Simon and James’ new shared boys bedroom “refresh”!

Francie says
I love Nora’s new room! http://www.supersimpleways.com
Dawn says
The room turned out so cute! I love your blog and look forward to every email. I know you’re not Bob Vila but I’m curious how you hung your little decorations (and how you handle big ones too!) We have NOTHING on our walls, except a couple small things in our daughter’s room, because we’re too chicken to put jokes on the wall, or that the heavier ones will fall, if not placed correctly! Thanks! 😉
Andrea says
haha — your comment made me laugh!
I literally put holes in my walls all the time, and when I want to move something, I just patch them with a tiny bit of spackling, sand, and touch up with paint — no big deal 🙂
So yes, I just use the smallest nail or screw I can for the item. Also, I do use the Command poster hanging velcro tabs if I don’t want to make a hole and the item is fairly lightweight.
if you’re super worried about something heavy, just go buy a stud finder and make sure your nails and screws are all going into studs — if that’s the case, I’m almost positive your item will not fall off the wall!
Grondwerken says
Loved it! the bedroom renovation turned out really well and looks very pretty.
Michael says
Where did you get the owl pillows?
Andrea says
I made them 🙂
DeeDee says
Andrea,
What a beautiful room!!! I absolutely love it. Your lucky you get to use some pink colors. Since I’m the only “girl” in the house, there isn’t much pink to be found! I love your reuse of items you already had or got at a great price. I recently just featured on my blog the reuse of a Pottery Barn Kid’s bookcase to use in a formal living room. I love it. You’ve inspired me to be on the lookout at thrift stores and Craigslist too! Great job
Andrea says
yeah, pink is fun — but I’m also loving how Simon and James’ red, blue and grey room turned out 🙂
Also, Craigslist is the best!!
Linda says
I love it! You did a great job! I love the colors and how you made it all work together. The wall between the closets is my favorite but also the bed painted white. Good job!
I think it is so nice your dad uses his talents to help you. That was a huge project.
Andrea says
yes, my dad was a big help!
Sara says
What type of paint did you use to paint the bunk bed? Thx
Andrea says
the same paint I used for the trim — Behr semi-gloss
Tonya says
Ugh! I just sold that exact same bed because I did not like it in our daughter’s room. I WISH I would have saw this first. Your idea would have been great in her room too.
Andrea says
bummer 🙁
Karen says
It looks great! Can you share how you made the comforters that fit the bunk bed? Did you and I just missed it?
Andrea says
I just literally cut the full-size comforter in half and sewed the raw edges. Apparently half of our full-size comforter is exactly the size of the top of a twin mattress. It doesn’t look perfect, but I didn’t want the comforter hanging over the edge if she was going to have a play area under the bed.
Shan says
Andrea, Wow, what a huge project!! Congratulations to you and Dave and your Dad on a job well done! Nora is one lucky girl 🙂
Andrea says
Thanks Shan! Nora loves the room!
shan says
Andrea, I scrolled through all the pictures you shared of Nora’s room again and admired how your arrangement of everything just helps her put things away nicely. For example, you went with what’s she’s good at (hanging up tops) and provided bins for what she’s not good at yet (folding bottoms). Not being naturally organized, I think that approach may very well work for me – be consistently organized in my home and life where I can, and look for ways to handle the rest in reasonably acceptable ways. Thank you so much for sharing your ideas and what you all did for Nora is indeed a labor of love!!
Andrea says
Thanks Shan — and yes, I’ve found that if I make it easier for my kids to get and stay organized, I have less work in the long run!
Edie S. says
Raising the ceiling made such a HUGE difference! The whole room turned out great, and having that reno done has to feel amazing!
Andrea says
yes, the ceiling was HUGE — and honestly not something we thought we’d even be able to do. We are SO glad it worked out!
Kim says
It is just lovely! Not to mention the higher ceiling, the clean sheet rock, the importance of all that insulation, the second closet, etc!
Excellent job. Yeah for Dads with remodeling talent.
Can’t wait to see the brothers’ room, too.
Lori says
Love it! Once again, total redecorate, almost no dollars!
Andrea says
Yeah, the reDECORATE was very frugal — but the room as a whole was still pretty price! Worth every penny though 🙂
Debbie says
It must feel great to have the project completed and better than you imagined, raised ceiling and canned ceiling lights for your living room. Awesome job! Would it be too personal to share how much such a project would cost?