Before Nora was born, I swore I would never have one of those plastic, flashy, light-up mobiles hanging above her lovely Jenny Lind crib in her lovely (and very non flashy) farmhouse nursery. I didn’t like the look of them, I didn’t like the flashiness or the music, I really didn’t like plastic things or toys (I still don’t love them), and they all seemed pretty expensive for my taste.
So we never got one.
However, as the months went by and Nora got increasingly worse and worse at sleeping in her crib, I often wondered if a mobile would help.
It didn’t matter in the long run because she literally hated her crib so much that she would cry until she threw-up if we put her in it. She was out of her crib at 6 months old (sleeping in her car seat) and into a big-girl bed by 10 months old, so I never got a chance to test my mobile theory… but I did decide that whenever we had another child, I wanted to hang a mobile above the crib.
As we started to make plans for re-decorating the nursery, I started to think about potential mobiles that I would actually like (a.k.a. nothing plastic or flashy!)
I looked on Amazon.com and Etsy.com and found some AMAZINGLY cute wooden mobiles that were just my style… but they came with some pretty hefty prices tags. Some of them were literally close to $100 — and while I understand there was probably a lot of work and creativity involved in making them, I simply can NOT justify spending that much money on a baby mobile.
However, those pricey mobiles did give me some inspiration, and the courage to try my hand at a little craft project — even though I’m totally NOT crafty!
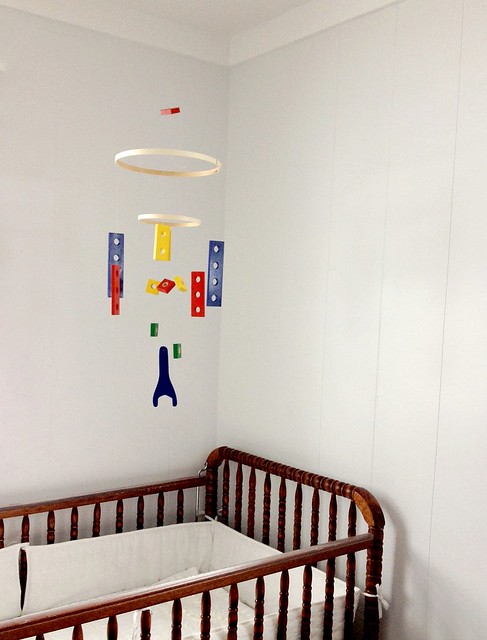
The whole mobile-making project took me less than 45 minutes from the time I came home with the necessary supplies to the time it was hanging above our crib — and the total out-of-pocket cost was less than $3.00!!!
There were a few frustrated sighs as my non-crafty fingers fumbled to put everything together… but overall, I would give this project an A+ for quickness, easiness, cuteness, and cheapness 🙂
Here’s how I made the mobile.
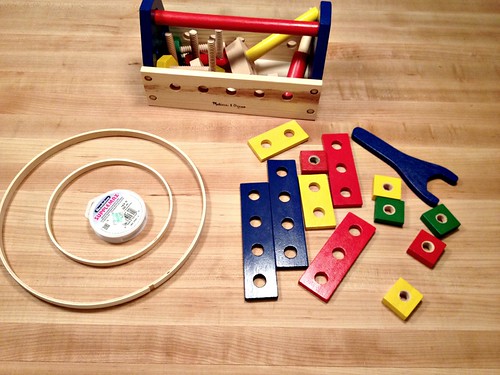
1. I gathered the supplies I already had on hand.
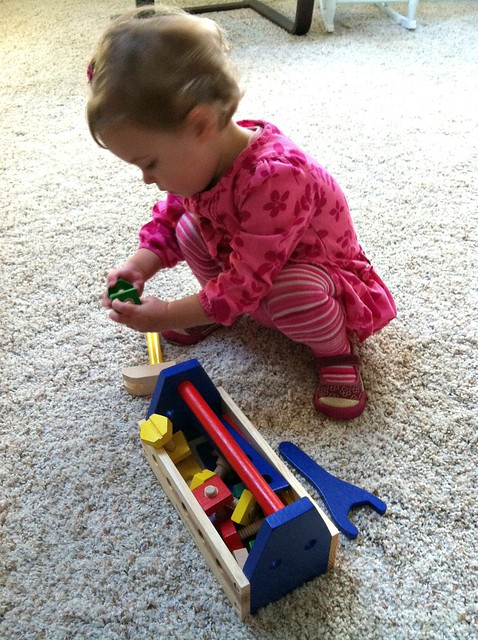
You might remember that just 2 months ago, we gave Nora a Melissa and Doug tool kit for her birthday. However, outside of carrying the empty tool box around, she really hasn’t played with it at all. It’s actually the first (and only) Melissa and Doug toy that I’ve been pretty disappointed in. Yes it’s cute, and yes I got it for free, but it’s really difficult for little hands to work and would probably be better suited for a 4 or 5 year old with more patience.
Anyway, the contents of the tool box have just been sitting unused for 2 months now… and since they are brightly colored wooden pieces with convenient holes to tie strings through, I figured they might just make the perfect baby boy mobile.
So, I confiscated Nora’s birthday gift and left her with her lovely tool box to tote around to her heart’s content. I figure, we already gave her the play kitchen for her birthday — she won’t miss the tool kit 🙂
2. I purchased the 3 items I needed from a local craft store.
I needed two wooden “hoops” and some clear plastic string — which I easily found at Hobby Lobby for a grand total of $2.86 (everything I needed was 1/2 off!)
For the record, one of the hoops is 10″ in diameter, the other hoop is 6″ in diameter, and they were found in the quilting section. The plastic string was found in the jewelry-making section.
3. I assembled the pieces.
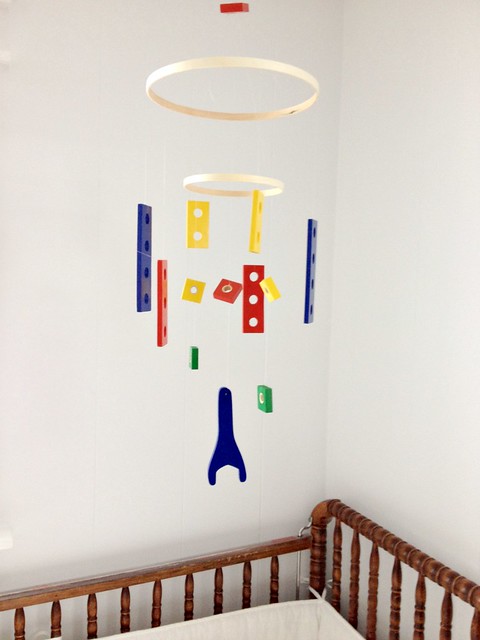
I honestly didn’t plan anything out ahead of time — but rather, just started tying string to each wooden piece and then holding the string up to the hoop to see where the most logical placement would be.
I did consciously try to make it symmetrical for balancing purposes — but I didn’t measure anything and I certainly didn’t spend a lot of time agonizing over where each piece would go.
I tied a double knot each time — and now that I’m positive I like the look of it, I’m planning to go back and put a tiny dab of super glue on each knot, just to assure the knots don’t come loose and drop wooden blocks on my little babe.
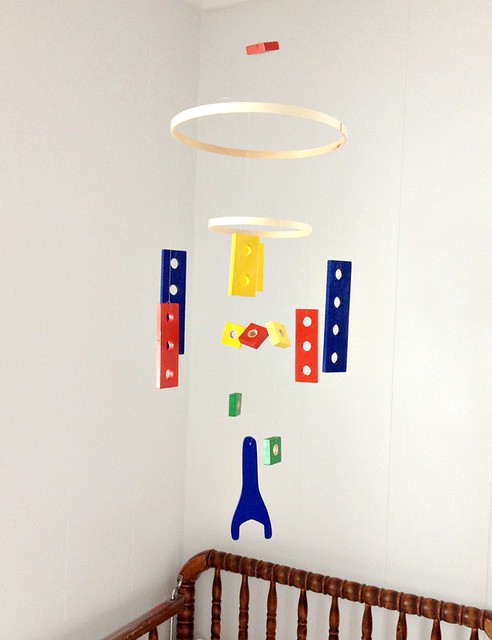
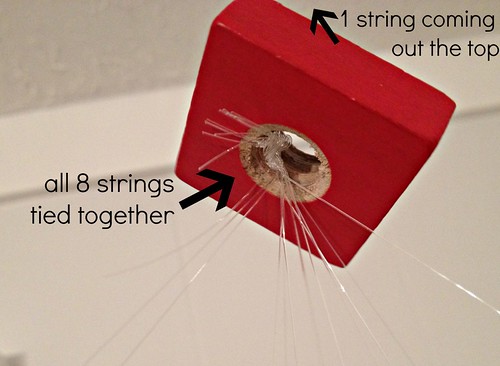
Since the string is clear, it was basically impossible to take helpful photos of exactly how I assembled the mobile (sorry). But basically, once I had all the wooden pieces hanging in a spot I thought looked good, I tied 4 additional lengths of string to each hoop and then tied all 8 strings together (where the red block is above the larger hoop).
Then I tied one last string to the knot of 8 strings and used that to hang the mobile from the ceiling (see #4 below).
4. I hung the mobile above the crib.
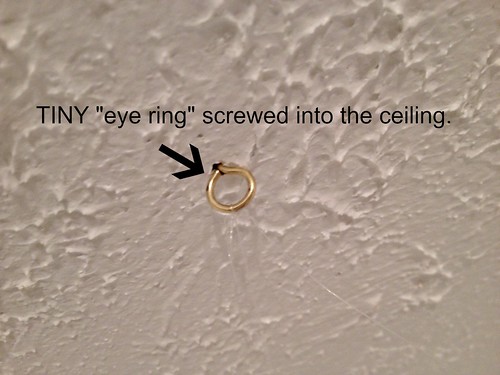
This was actually the most difficult part for me (and included a few choice words) because the crib was already set up — so even with a taller step-stool, I couldn’t get a great angle to screw the tiny “eye ring” into the ceiling. I kept dropping the teeny, tiny eye ring and then having to get down, find it, and climb back up.
Then, once the eye was actually screwed into the ceiling, I had to thread the nearly invisible clear plastic string through the eye — which also proved to be somewhat difficult for my fumbly fingers.
But after a few minutes, it was up and ready to go!
5. I marveled at my handiwork and how much money I saved!
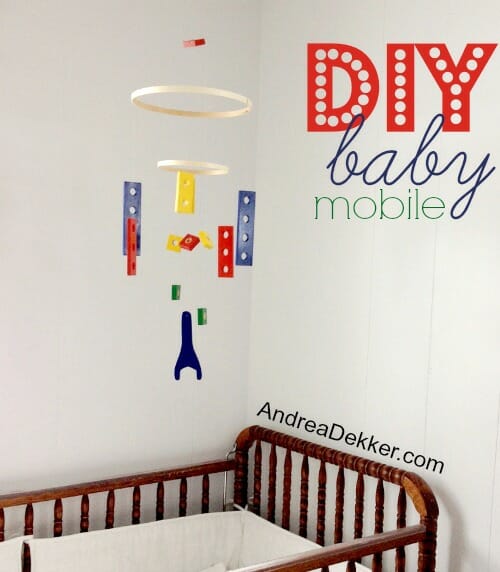
Doesn’t it look cute — and for less than $3!!
Most people assume that I’m naturally “crafty” just because I enjoy making digital photo books, play kitchens, and painting various furniture… but that is SO not the case. Yes, I enjoy a good project but those projects usually involve the computer, drywall, paint, wood flooring, and other large tools… not small craft supplies.
So I was pretty pleased with myself for coming up with the design idea all by myself AND actually having the patience to implement it. If I can do this, you totally can too 🙂
I’ll be sharing the rest of the nursery makeover in a couple weeks, but I just couldn’t wait to share this super simple, super frugal DIY baby mobile with you!

Homevironment says
I too do not like the mobiles, so did not buy it for the littlle one! But simply loved the baby mobile you made!! And the price is tempting too!!! I made a wall clock some time back and that cost me less than $5. That project is dear to me!!
http://homevironment.blogspot.in/2014/01/diy-photo-wall-clock.html
Andrea says
Wow — your clock is so cute. I’ve actually been looking for a small clock for the nursery — maybe I could take on another craft project 🙂
Julieanna Scott says
I love it!!! I’m totally doing something like this for my next baby!
judy says
Nice and bright and I love the fact that you are re purposing things that you already have! What does it look like from the baby’s point of view, lying flat on his back? Perhaps turning one or two of the brightly colored pieces so that they are horizontal might even buy you a few more minutes of sleepy time! Sibs can be so different. I had one that didn’t like to sleep, one that could go either way, and a boy that would actually climb INTO his bed, suck his thumb and fall asleep ON HIS OWN!! He’s 22 now and I still tell him he was my favorite 😉
Judy
Stephanie says
I hate mobiles, too…. but I found it works wonders when attached to the changing table! 🙂
Andrea says
we actually thought about hanging it over the changing table — but then decided on the crib. We might move it once he gets older though 🙂
Melanie G says
I love it! When my sister had her baby, they decorated the nursery with a lovely beachy/under the sea theme (my sister is from the coast, and living in the middle of the country now, misses the ocean terribly).
A year or two previously, my aunt had given each of us (my sister, my mom and me) a set of very lightweight, carved wood Christmas ornaments – one a blue dolphin and the other an orange seahorse. I knew as soon as I heard the nursery theme that my niece needed a mobile made of these ornaments!
We did something very similar to your design – I used wire wrapped in raffia, fishing line and tiny black fishing lure clips. We were all so tickled with the design, and I think it probably cost us about $5 🙂
Verity says
This is brilliant!! We have this same tool kit, and it’s missing some pieces. If our next baby is a boy, I’m going to do this!!
Andrea says
Thanks Verity! Definitely do this if you already have some pieces missing… it was SO easy! I’m also thinking of adding some of the screws to the mobile but not quite sure how that would work yet 🙂
Sarah says
I love it Andrea-and I really really love your Jenny Lind crib.
Katy says
Very creative idea…one suggestion, if you run into any issues with the jewelry cord, fishing line would be another good option. Some fishing line is made to hold very large fish, so it would be very sturdy. My husband is an avid fisherman…so fishing line has become our go-to household helper 🙂
Amy says
I agree…you’re a-lookin’ pretty crafty to me! Nice work:) Can’t wait to see the rest! Maybe I should have tried a mobile. Oh the sleep deprivation…..
Amy O says
It is adorable! Very cute and such a clever idea.
But just a little word of caution – I was surprised when my baby completely tore her mobile down one day (I didn’t think she could reach it.) Can’t remember how old she was but definitely less than a year. Since the smaller parts look like they could be choking hazard size, just remember to take it down when your baby gets mobile.
All three of my babies loved mobiles and it bought me a few more minutes of crib time and also sometimes helped them to get to sleep!
Kristy Farrow says
You seem to be pretty crafty to me. The mobile turned out awesome. Love the picture project you did in you living room and the play kitchen. Better yet, you were able to use things you already had!!
Andrea says
Thanks Kristy — and just believe me when I say I’m honestly not crafty 🙂 I have random spurts when a certain craft project inspires me (like the wood wall above the couch) but normally, I don’t do any crafts!
And I think the main reason why I don’t do crafts is because I don’t like buying and storing all the supplies. So you’re right, the few crafts that I have done and shared on the blog were all using supplies I already had around the house 🙂
Catherine says
I’m like you, I really don’t like the plastic baby mobiles…
I really like what you did instead! Easy, cheap and super cute!!
Kim says
Looks great! You give me, the non-crafty type, hope that maybe one day I can create something like this too! Can’t wait to see the nursery makeover.
Andrea says
Thanks Kim — and yes, you could totally do this project (as long as you can tie knots in string!)
Katie says
Super-cute! I love it! We need to get started on our nursery for baby #2 due in May – but not knowing the gender, I’ll have to save most of the decorating and potential craftiness until after s/he arrives.
Andrea says
Congrats to you katie 🙂 As I mentioned in this post, I’ll be sharing the full nursery tour in a couple weeks, and although it looks COMPLETELY different than it did when it was Nora’s nursery, we’re basically using all the same things — just with a few variations to make it look more “boyish”. I’d definitely recommend using neutral colors on the walls and with the furniture and you’ll be amazed how “boyish” or “girlish” you can make it look with just a few inexpensive accessories. Even I was impressed with how quickly and cheaply we transformed our girl nursery into a boy nursery 🙂