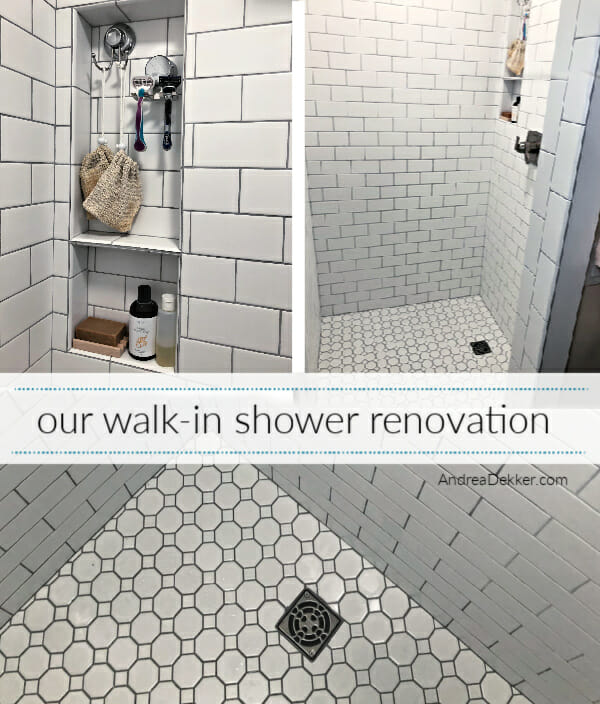
I shared a bit about our new master bathroom walk-in shower renovation on Instagram Stories and in my email newsletters… but it’s time this project officially made it to the blog!
Yes, we renovated our walk-in shower… AGAIN.
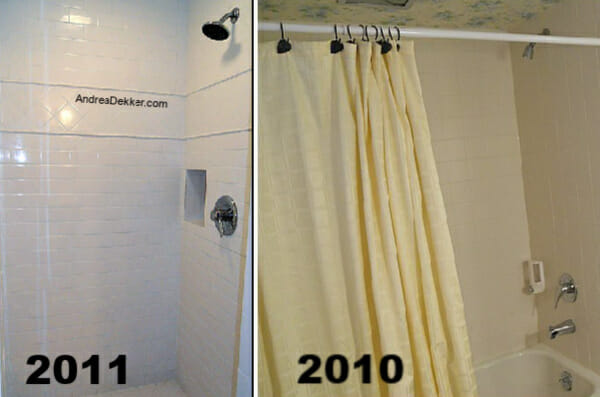
Yes, this is the same shower we completely gutted and renovated back in 2011.
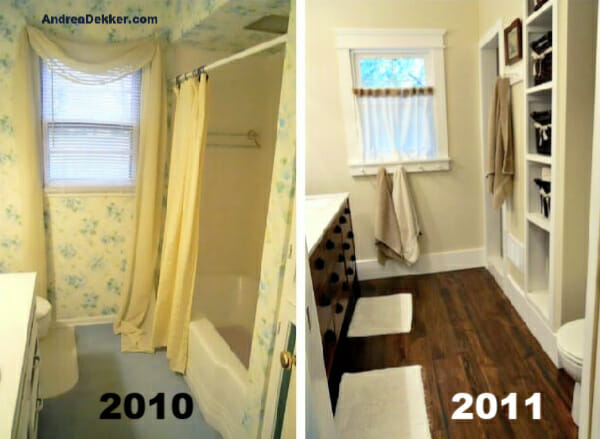
It was such a pretty shower! And a HUGE upgrade from the floral wallpaper, blue carpet, rusty-water situation we had going on when we first moved in.
So WHY, might you ask, did we completely gut that walk-in shower and retile it again just a few years later?
Sigh… it’s such a long story.
I will share the 2-minute ultra-condensed version here on the blog…
The first time we had our shower tiled, there was an issue with the grout. We still don’t know exactly what happened, but the grout set up too quickly and the person doing our tile could NOT get the grout completely off.
Despite a HUGE amount of effort on his part, we were left with chunks of hardened grout on our tiles, in the corners and crevices, and even some cracked and chipped tiles due to his rigorous efforts to remove the dried-on grout.
It was sad and disappointing (yes, we got a good deal) but still significantly better than what we had before. And at the time, we had WAY too many other projects on our list that needed to be finished before Nora was born just a few months later.
So… we lived with this shower for almost 9 years, with the intention of re-tiling it once we finished all our other house projects.
Aside from the laundry room project we’ve been debating about for over a year now, we finished all other MAJOR house projects this past summer (there are always little things)… which meant it was time to tackle the shower.
FINALLY!
We decided to hire every aspect of this shower renovation out to a professional – yay!
Everything from the demo to the clean-up — we were willing to pay (a lot) more for zero stress and minimal inconvenience.
And that’s exactly what we did.
We hired a local tile guy to start on this shower renovation in mid-January. In just 8 days, he had the old shower completely gutted and every last speck of dust cleaned up from our new shower.
It was almost a surreal experience to start and finish such a huge project with virtually zero effort on our part!
No late nights trying to work quietly while the kids are sleeping.
No mile-long project to-do list.
No last-minute trips to the hardware store.
No watching YouTube videos and hoping we’re doing something correctly.
Yup, we might be hiring out more projects in the future! 😉
Especially since we are SO happy with the finished results!
What do you think about our little walk-in shower?
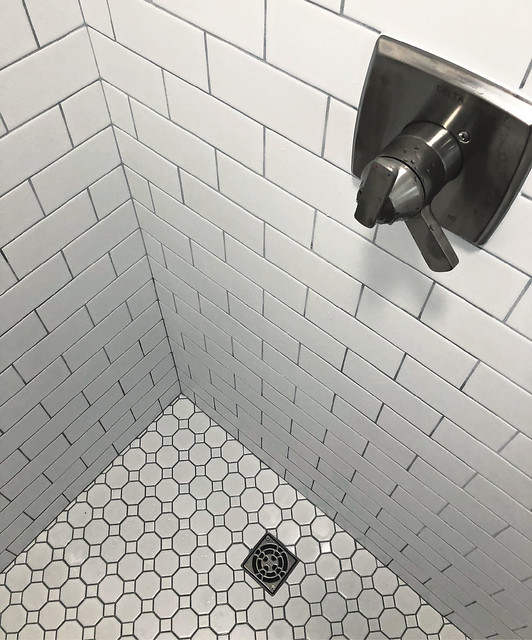
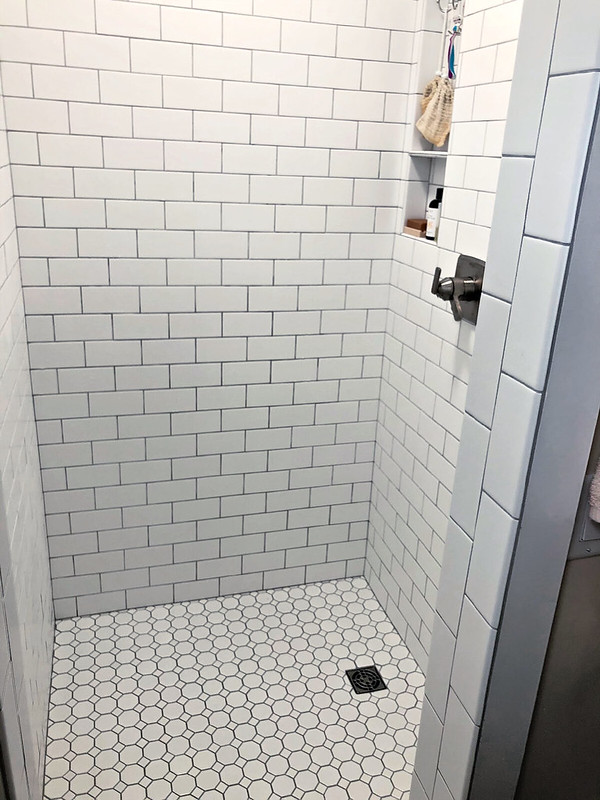
We LOVE the white tile + grey grout combo!
NOTE: I link to all our product sources below.
While grey grout is a bit of a trend right now, the white subway tile is about as classic as it gets, so I think we’re “safe” with this combo in our 130-year-old farmhouse!
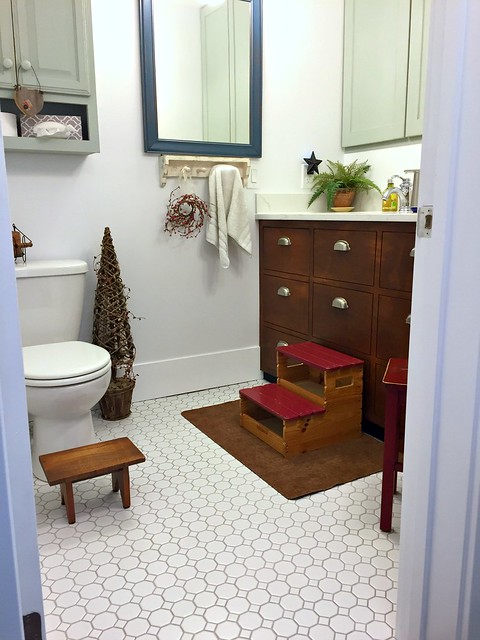
Some of you might remember we did the same white tile + grey grout for the flooring in our half bathroom. We liked that look so much that we wanted to try it again. We also plan to do the same flooring in our laundry room — whenever we get around to that!
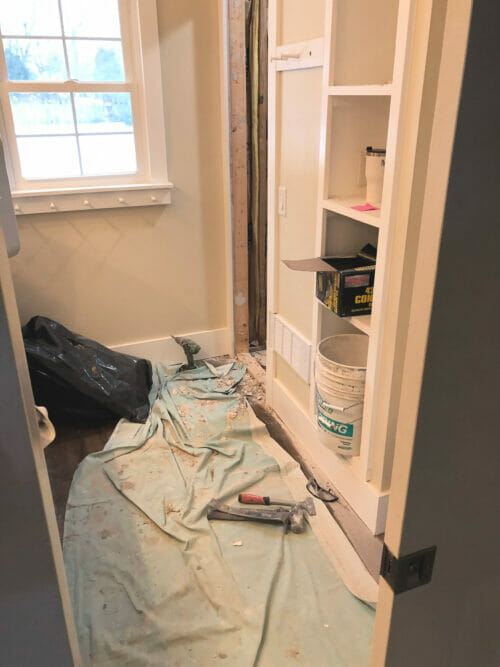
Of course, the process to get to our new beautiful shower was pretty messy!
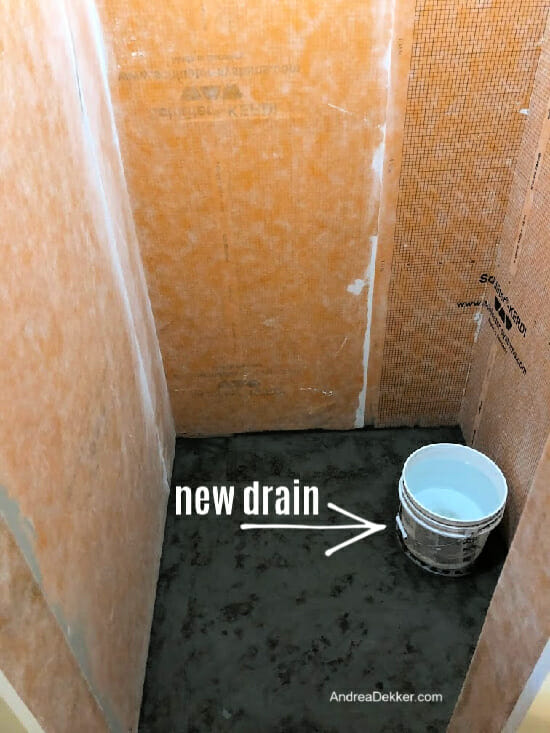
As you can see by the pictures below, EVERYTHING needed to be ripped out — even the cement board, drywall, and insulation.
Apparently we had mold growing behind the tiles as a result of the bad grout job. AND, although we didn’t realize it until we tore the shower apart, the waterproofing was done incorrectly 8 years ago (YIKES! )
Yup, it was a huge mess for a few days, and I’m so glad Dave and I didn’t have to deal with any of it (minus sweeping and vacuuming every night after the tile guy left!)
.
While we had the shower area completely gutted and torn apart, we took the opportunity to make a few other changes as well…
We Moved the Drain Off-Center.
Our shower drain was smack in the middle of our shower (an obvious placement). However, once we actually used our shower, we realized that a drain in the middle of the shower meant that we stood directly on it during our showers.
Thankfully, we were able to move the drain about 1 foot closer to the wall, and it’s now out of the way of our feet (this has been such a positive change!)
We Installed a Bigger “Niche”.
One of my favorite features of our old walk-in shower was the built-in little storage cubbie (or “niche”) for shampoo, soap, shavers, etc.
Since we’re a family of 6 (and some of the kids use our shower) we decided to put in a bigger niche — and I’m thrilled with how well it turned out!
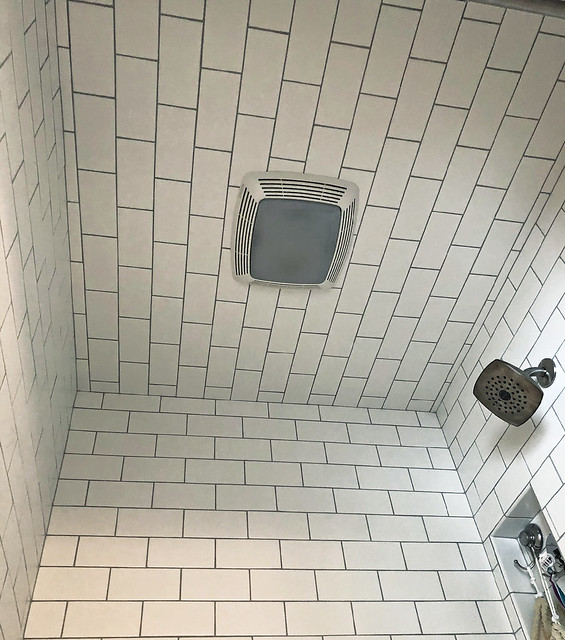
We Tiled The Ceiling
When we tiled the kids’ bathroom upstairs, our tile guy recommended tiling the ceiling.
We really like how it looks (and how easy it is to keep clean), so we had him tile the ceiling of our shower too.
Tiling the ceiling was an additional expense, but it provides a little extra water-proofing. Now we don’t need to worry about any moisture from the ceiling seeping down behind the walls.
.
What About A Shower “Door”?
Several of you commented on the fact that we don’t have a door for our shower.
We thought about putting a glass door on the shower. However, that costs about $1500 and we feel like it could “trap” the moisture in the shower all day.
Instead, we use a simple fabric shower curtain that we shove behind the shower wall when not in use. (I buy the 71″ by 84″ extra long curtain and cut it in half. We get 2 curtains for the price of one and I can swap them out when one needs to be washed).
The curtain keeps the heat (and water) IN while we’re taking a shower and it lets air circulate when we’re not.
Plus, it only cost $15 instead of $1500! SCORE!
Our Shower Sources:
Click on the links below to buy the products we used for our shower renovation!
- Wall tile = 3″ x 6″ subway tiles (white matte ceramic tile)
- Floor tile = 12″ x 12″ sheets of 2″ octagon mosaic tile (white matte ceramic tile)
- Grout = custom grey color from a local tile supply store
- Shower Fixture = Delta 1700 series Stainless Steel
- Suction Shaver Holder
- Suction Loofah Hooks
- Extra-Long Fabric Shower Curtain (we need an 84″ long curtain)
- Stainless Steel Tention Rod
Our All-Natural Shower Products:
Read more about why we’ve switched over to all-natural products in this post.
- Castile soap (this is my FAVORITE variety pack)
- Bars of goats milk soap from Bend Soap Company
- All-natural loofah bags (to hold the bars of soap)
- Wooden soap dish
- Oil-cleaning face wash (read more about it in this post)
- My Favorite Venus Razor
Related Shower & Bathroom Posts:
Apparently we’ve done many bathroom projects in this house already!
- A mini-tour of our first shower
- All before/after pictures of our “master” bathroom
- More recent pictures of our “master” bathroom after a big purge a year or so ago
- Why we opted not to have a traditional “master” bathroom due to the layout of our house
- A tutorial on how I built the shaker peg towel hooks
- A tutorial on how I made the curtains for our bathroom
Whew! We made it!
We plan to have another laundry room / bathroom renovation post to share with you later this summer or fall.
In the meantime, we hopefully won’t need to touch any of our bathrooms for a LONG time!









Kirsten says
Love this shower! We are planning a bathroom remodel in an older home and space is an issue. Would you mind sharing the dimensions of the shower and of the walk in opening?
Andrea says
Hi Kristen, our shower is roughly 46″ x 46″ and the opening is about 21″. Good luck!
Liane says
We are having to re-do both showers ourselves. The master has very expensive cultured onyx so we hope to replace the bad valve without damaging it. The hall bath has a very cheap and flimsy three piece fiberglass kit. We knew it needed done 20 yrs ago but now we are selling and forced to replace it.
On another note, I got a little envious and nostalgic seeing razors in the shower. In California after 7 yrs of drought, I had to stop shaving in the shower with the water running. It’s just too cold to turn the water off, so it use a little wash tub (those hideous pink ones you get in the hospital) and I sit on the edge of the tub to shave my shins. I’ll admit, one nice thing about menopause is, at least for me, I have no underarm or thigh hair — just a few coarse ones on my shins!
Our solution for shower scum is to use absolutely no bar soap in the shower. I use either Briogeo or Alterna shampoo and my shampoo doubles as a body wash. I got the idea from using Philosophy brand — it is a combo body wash plus shampoo. So I figured why not go the other way. Works for me.
Laurie Schepers says
You mentioned a rusty water situation when you moved in. We have orange-y stains in our tub and shower inserts, despite using iron out water softener salt and taking the rods out of our hot water heater. How did your first tile attempt at subway tile hold up? Was there discoloration from rusty water? Hoping for a tile shower in a future reno if the water is not a staining issue.
Andrea says
The problem was NOT our water — but the pipes!
When we purchased our home, we had to re-do all the plumbing because they used metal pipes instead of copper and PVC — so the water was literally picking up rust from the inside of the pipes. GROSE!
Now, we have no issues with our water (thankfully!)
That said, I’m not sure I would buy white tile if we actually had rusty water — it sounds too high-maintenance from a cleaning standpoint!
Sarah says
Hi Laurie – There is a type of orange bacteria that is common in showers – it can range from pale peach to bright orange. Do you think you could have this and not rust? I thought I had rust stains but turns out it was this. I learned a good way to get rid of it – fill up a glass sprayer bottle with half blue dawn dish soap and half white vinegar (don’t fill up all the way). Heat the bottle for 30 seconds or so in the microwave (without the sprayer part, let it cool for a bit if the glass is too hot after heating). Put the sprayer back in and shake the bottle to mix. Spray on the orange areas. Let sit 20 minutes or so. Spray again and then wipe off with a rag. For rough areas, repeat as needed. Heating the mixture up a little really seems to help loosen it, so you don’t have to use a lot of elbow grease to get quick results. This also works wonders on old soap scum that won’t come off otherwise. Good luck, I hope this helps 🙂
Andrea says
Yes Laurie — I believe Sarah is referring (almost verbatim) to my recipe for homemade shower cleaner!
Dawn says
That looks amazing! Would you be able to share the person who installed the tile? I live in GR and have a shower that needs to be replaced as well. 🙂
Andrea says
Sure — His name is Nate Lubbers. He doesn’t have a website, but you can search him on Facebook 🙂
Leigh says
We love the white tile/grey grout in our new house. We copied it from the 1910 reno on our old 1897 house, so totally appropriate to an old farm house.
Andrea says
awesome — thanks for sharing Leigh! I felt like the white tile + grey grout looked “old”. It definitely seems to fit with our house!
Anne says
Yes! There are some projects that you are better off leaving to the professionals. We did a complete master bath gut this past spring/summer , and initially we thought maybe my husband would have a coworker come over and they would tile the shower (my husband builds and manages renovations and new builds for a living) BUT he insisted he wanted a professional for the extensive wall and ceiling shower tile . It’s expensive ! AND worth every penny to have it done right ! I’m so glad he put his foot down with my money saving way of thinking because it turned out beautiful and it’s done right . We also really love the look of professional paint rather then trying to do it ourselves . The budget is not everything and spending more in some areas is worth it. Also like you said it takes off so much stress to have someone come in and handle it! The tile guy was half way done by the time we returned from vacation. This was a professional we knew personally so he was able to let himself in and out of the house while we sat on the beach two hours away
Andrea says
exactly — we are frugal in many areas so we can splurge on things like plumbing and tile that we don’t have skill to do on our own!
It was totally worth the expense this time around — I still can’t believe how quickly our tile guy worked and how great the results look!
Marisa says
Yay! It looks great!
Three years ago we came home from an extended visit with in-laws to find our plumbing had sprung a leak in the shower wall and everything was soggy and moldy. We had to gut & redo the entire bathroom–the only bathroom in our house. We were so worried about future problems that we replaced the shower with a clawfoot tub so we could keep an eye on all the plumbing and nothing would be hiding in the wall!
Andrea says
oh my — you don’t know how many people I know who had some sort of water troubles while on vacation 🙁
We usually turn ou water off if we’ll be gone for a more than a day — but that’s hard in the summertime as we want our irrigation to run outside.
I LOOOOVE the look of a clawfoot tub — I’m sure your bathroom looks amazing now!
Kim says
It looks wonderful! I love your tile and grout selections!
Andrea says
Thanks kim!
Marva says
Too bad you had to spend money to re-do that shower, but it looks spectacular! Love the tiled ceiling!
Andrea says
yes, it was a bit of a financial bummer — but now that’s all in the past and we can move forward!
and yes, we love the tiled ceiling too!
Kim says
This looks beautiful, classic and clean.
We just had our 36 year old bathtub resurfaced. I need tips on how to really clean the tiles and the grout. It seems ridiculous for me to be tempted to go to the expense of replacing all that tile b/c I cannot get the grout clean. I thank you in advance.
Ellen says
Bar Keeper’s Friend, a toothbrush and some elbow grease is the only way I’ve found to get the stubborn stains out. Or you can buy grout paint/pens that will make it look like new. Then seal it all to save doing the job again in a year’s time 🙂
Andrea says
Thanks for the tips! I used the grout paint pens on grout before and they really work well!
Andrea says
Thank you Kim!
Yeah, I hear you about cleaning the grout — that’s one reason we went with a grey grout instead!
As for cleaning, you could try a steamer (They make them specifically for grout and they do a great job). Also, any type of bleach cleaner should do the trick (not great to use all the time, but for an occasional deep-clean, I’m all for using bleach!)
Rebecca says
We removed our shower door and added a curtain because it is soooooo much easier to clean. I could never get down in all the groves of the sliding door. So you definitely made the right decision with the curtain!
Andrea says
oh good! I’m glad to hear this!
The cleaning aspect was one I was worried about with a really nice glass door — I feel like it would always have water spots on it!
I love that I can just throw the curtain in the wash and have it totally clean again! (And of course, the money-savings was nice too!)