Learn everything you ever wanted to know about how to install and set up an above ground Costco pool before you head to the store to buy!
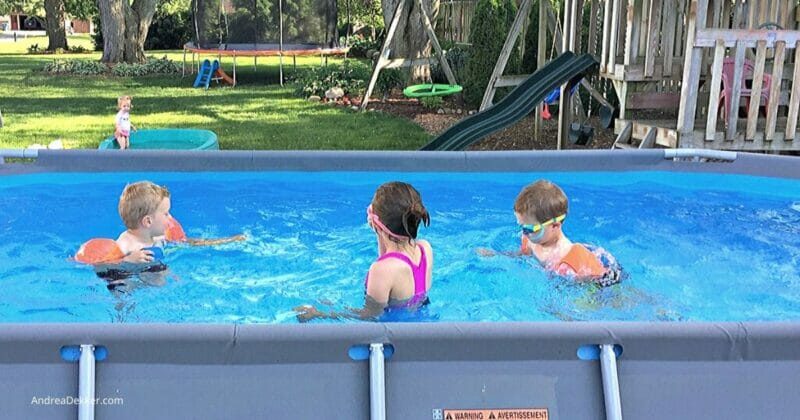
If you’re in search of frugal at-home summer fun for your family, an inexpensive above-ground pool is totally the way to go!
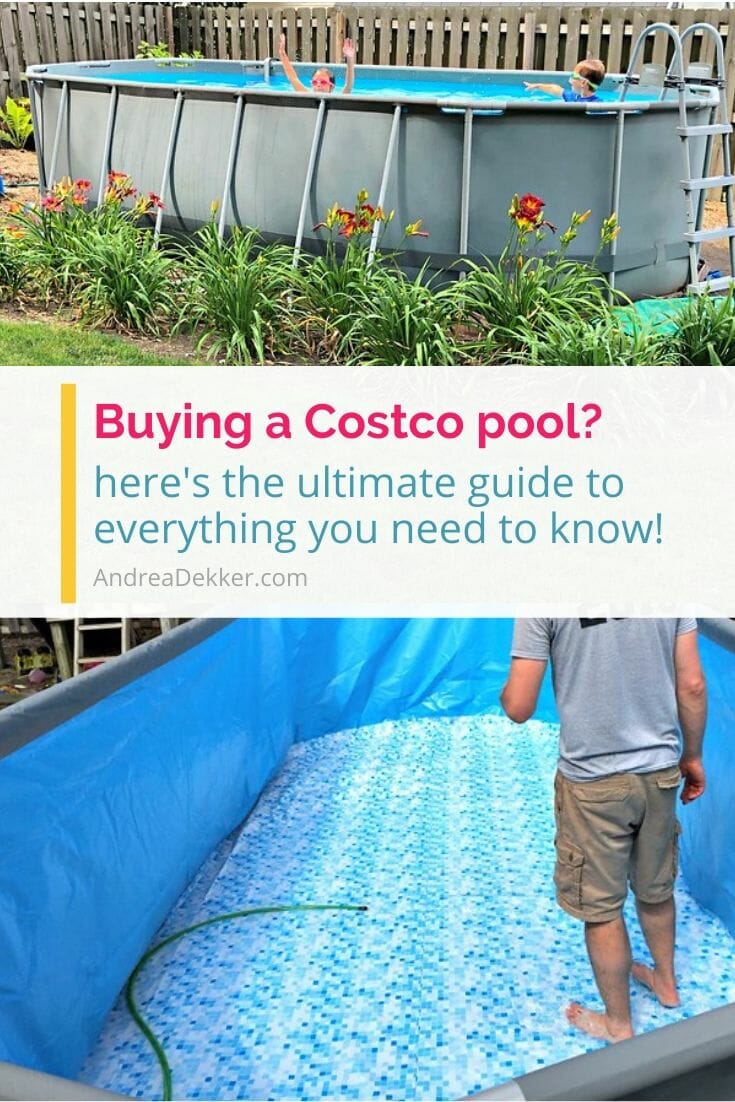
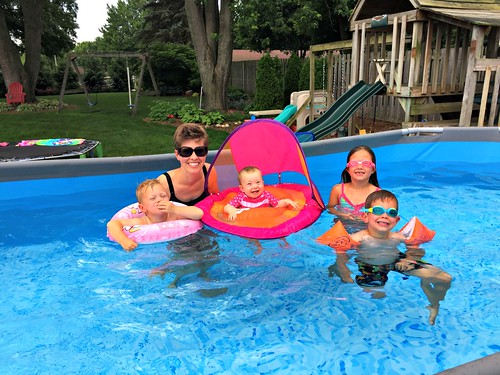
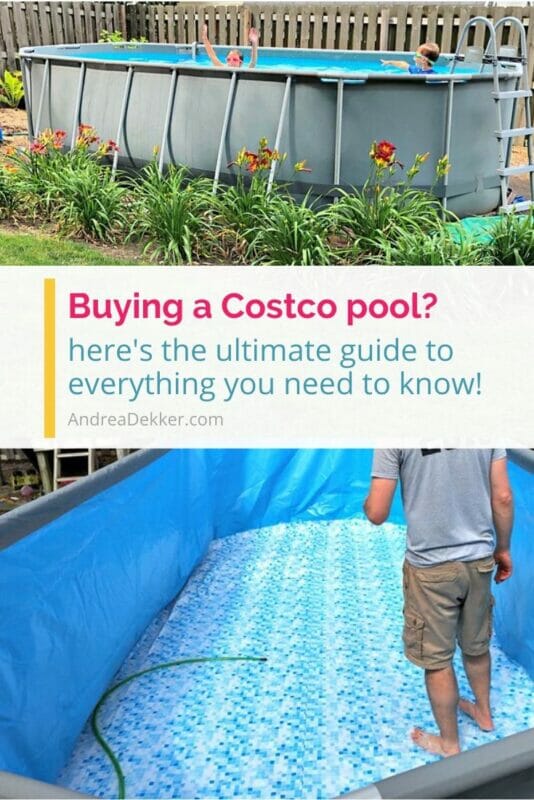
We purchased a steel-frame 9′ x 18′ oval Bestway brand pool from Costco in 2018 (we call it our “Costco pool”). At roughly $500, it was a fantastic investment for our 4 young children!
Who am I kidding — Dave and I enjoy our tiny pool quite a bit as well!
A few things to consider if you’re planning to buy an above ground pool like our Costco pool:
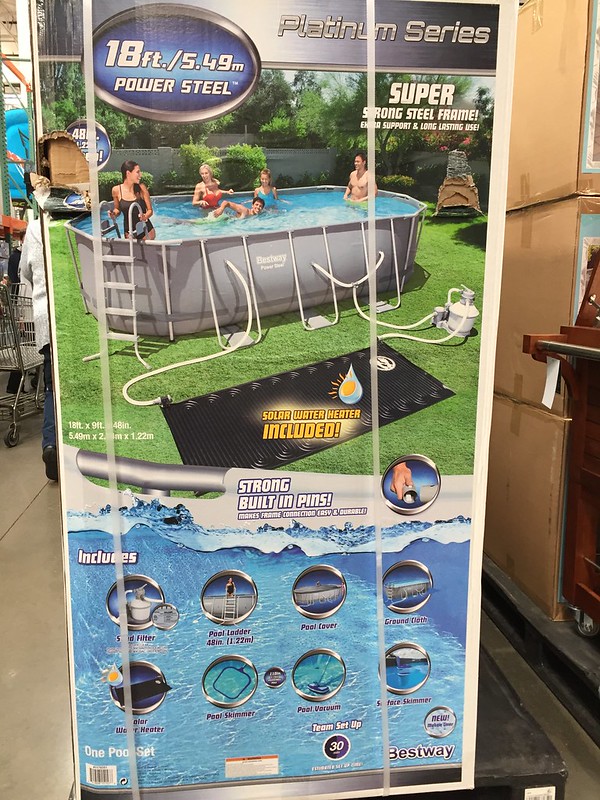
1. The box is HUUUGE!
It’s almost as tall as me (5’7″) and it’s at least 3′ wide on all sides.
We needed to fold down all the seats in our van and have someone at Costco help us load it.
2. The disassembled pool will take up a large amount of space in your garage (or wherever you plan to store it in the winter).
We know people who leave their pool up all winter (totally doable if you live in a mild climate), but we always take it down. And yes, the disassembled pool takes up a decent amount of floor space, even when it’s folded up.
We store it in our extra garage, so if you don’t have a large amount of extra garage or shed space to store this pool, you might choose to leave your pool up all year long (invest in a good tarp or cover to keep it clean).
3. Check your city ordinances and codes to make sure you’re putting the pool in an appropriate location.
We had restrictions as to how close our swimming pool could be to another structure and to our lot-line (we almost put it too close the first year). Definitely check into this before you spend time preparing the ground.
4. Plan to invest in a few extras.
Our Costco pool came with everything we needed for installation (see complete list below the next pictures).
However, we have purchased a few hundred dollars worth of ‘extras’ over the years — plus all the chemicals (also listed below the pictures).
5. Think twice before buying used.
I’m almost always a fan of buying used versus new. However, I highly caution you against buying a used Bestway pool from Costco (or a similar-style above-ground pool).
For starters, these inexpensive pools really aren’t made to last all that long — 3-5 years at the most. The pumps just don’t last.
Also, there’s a really good chance the pool liner could have a small rip or hole in it — which you wouldn’t realize until AFTER you filled it with water.
And it would be almost impossible to verify you had all the correct parts and pieces if they aren’t all nicely packaged in a box from the store.
6. Realize you get what you pay for.
I honestly don’t want to discredit this pool at all — we truly are SO happy with our little Costco swimming pool.
However, if you buy it with unrealistic expectations of it being a resort-like pool, you will be disappointed.
We have thoroughly enjoyed this inexpensive above-ground pool for a couple of years now… but it’s inexpensive for a reason!
What’s Included With This Costco Pool Model:
- instructions (they honestly aren’t great, but you’ll still want to use them)
- 1 large ground cloth
- LOTS of clearly labeled pipes and pieces to assemble the steel frame
- 9′ x 18′ heavy-duty pool liner (this essentially IS the pool)
- pool cover (ours never fit and the Bestway Pool company didn’t respond to our questions)
- 1 ladder
- a solar water heater mat (not a solar cover)
- a 1000-gallon sand filter pool pump (we may purchase a larger pump)
- 1 pool skimmer
- 1 pool vacuum kit (it’s not the greatest but it works well enough)
What’s NOT Included:
- optional tarp for additional protection under the pool
- sand for the filter
- a solar cover (not necessary, but ideal)
- water test strips
- chemicals (we use the HTH brand chlorine, shock, and algaecide)
- floating chemical dispenser (this simplifies the process so much)
- thermometer
- pool brush
- ladder lock (a great safety measure if you have young children)
- mini sub-pump (needed eventually to pump water out of the pool)
- garden hose (to fill, and eventually drain)
- wooden boards to put under leg supports (I explain below)
- water 🙂
The Specs:
Item #: 179351 (in case you’re looking for the EXACT same Costco pool we have)
Assembled Pool Dimensions (top):
18 ft. x 9 ft. x 48 inches tall
[5.49 m x 2.74 m x 1.22 m]
Assembled Pool Dimensions (bottom):
The base of an oval or rectangular pool is always wider than the top since the support posts flare out.
18 ft. x 11.2 ft. x 48 in.
[5.49 m x 3.41 m x 1.22 m]
Pool Water Capacity:
3,548 gal (13,430 L)
NOTE: this is filling it roughly 90% full (which is the recommended amount). It took us a full day to fill it with our garden hose.
10 Quick Tips to Assemble Your Costco Swimming Pool:
1. Read ALL instructions and make sure you have all pieces before getting started.
Honestly, Dave and I were very unimpressed and frustrated with the instructions that came with this Bestway Pool — but they were still valuable because they listed all the parts and pieces, so we could make sure we weren’t missing anything before we started.
We simply searched YouTube for our exact pool model and learned how to install it that way.
We used this video to help us set up the pool. It’s the EXACT same Bestway pool we have, and it was published the same week we initially set up our pool!
Here’s another Costco pool set-up video showing a newer version of our swimming pool (the video is much longer and super detailed)!
2. Take your time on the set-up — and maybe recruit some helpers!
The first time we set up our pool, my brother-in-law and his brother both came to help. They had experience with pool set-ups so it was very nice to have them around.
The second time we set it up the pool, Dave and I did it ourselves in less than an hour.
Either way, just take your time and don’t rush the process. It’s fairly simple… but if you mess up, you might need to drain the water and start over again!
3. Make sure your ground is very level.
You MUST make sure the ground under your pool is VERY LEVEL — otherwise, the legs won’t be as strongly supported and your pool will lean in.
A little bit of leaning is OK, but if the pool is very unlevel, it puts extra strain on one side and could cause the pool liner to stretch and actually break (I’ve been in another pool when this happened!)
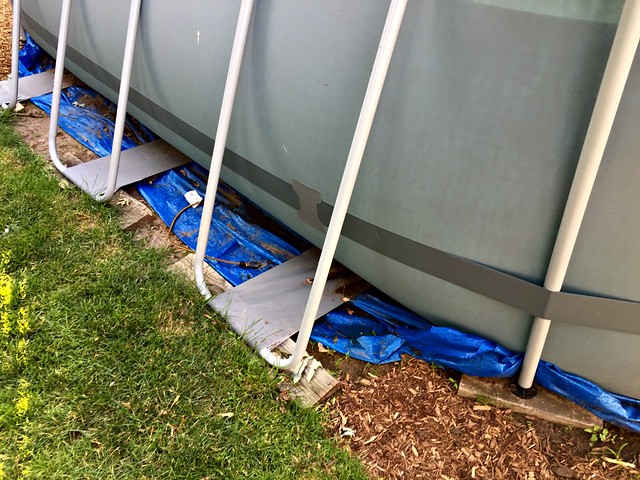
NOTE: you might also consider putting wooden 2″ x 6″ chunks of wood under the legs for more stability (and so they don’t sink down into the ground).
4. Realize that the assembled pool’s “footprint” will be larger than advertised on the box.
Our pool notes that it’s 18′ x 9′ (and the TOP of the pool is). However, the legs stick out quite a bit, so the full size of the assembled pool’s footprint is actually closer to 18′ long by 12′ wide.
As a general “rule of thumb” I’d suggest adding 2 to 4 feet to each measurement (width and length) when planning your ground space.
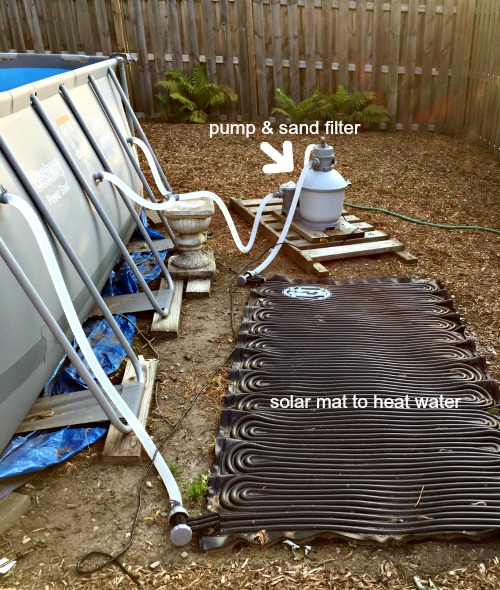
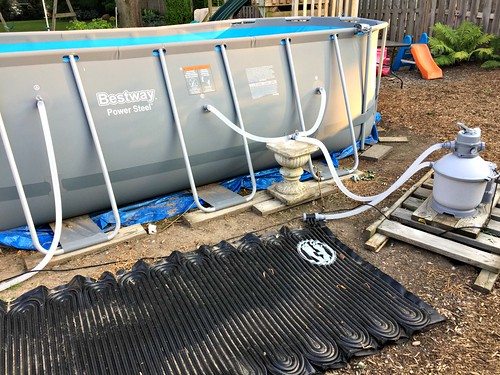
5. Take note of where the pump will sit and position that on the “back” side.
You most likely won’t buy an inexpensive Costco pool for “looks”, however, it will be more attractive if you position the pump and filter in the back.
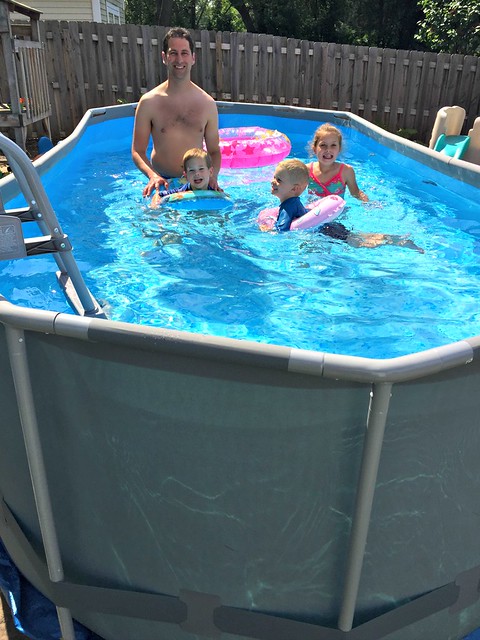
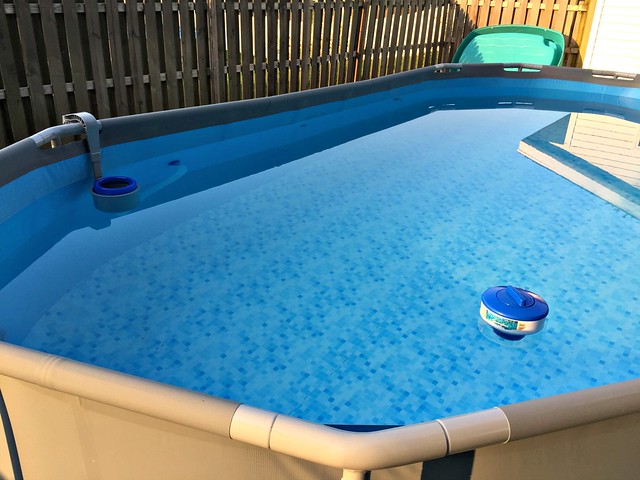
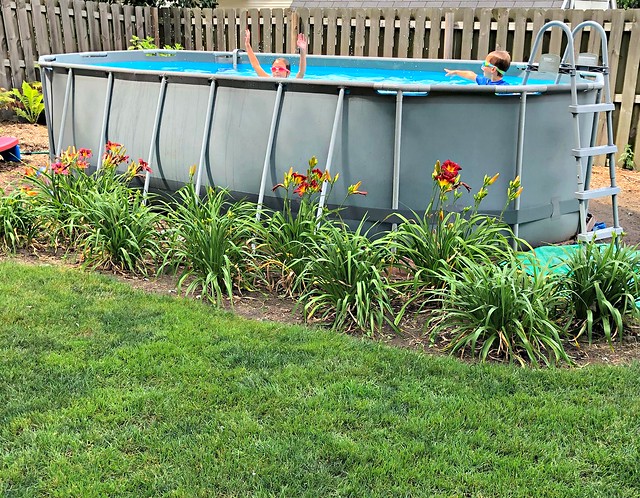
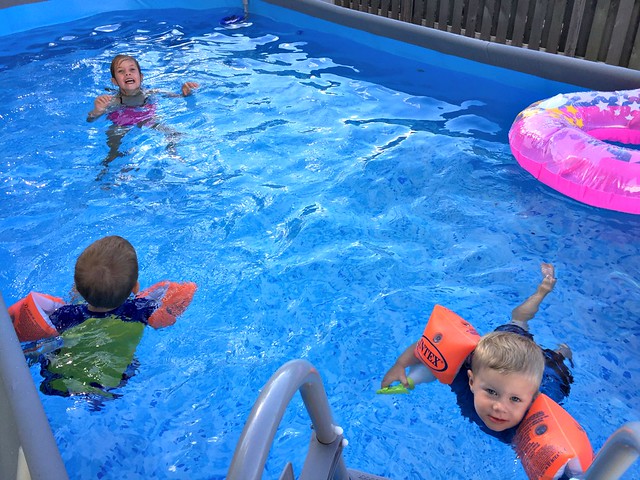
See how much nicer the front of our pool looks (1st photo) versus the back (2nd photo)?
7. Use some type of lubricant on the “rim” poles so they don’t stick to the liner.
I share more about this below (in the disassemble section) but our liner basically melted to the steel frame (around the top rim) and we can’t get it apart anymore!
Since we have plenty of storage space in our extra garage, we left the long poles (on the 18′ sides) attached (we were able to get the shorter end poles out after a little finagling).
If we were to do this again, we would put some type of lubricant on the poles FIRST, to make it easier to take the pool down in the fall.
8. Monitor the pool regularly as you fill it with water — especially the first time!
You’ll want to check back every 30 minutes or so to look for leaks and to make sure the sides aren’t caving in or bowing out too badly.
Again, it’s NOT a complicated process, but filling your pool is not something you should do if you plan to be gone all day.
NOTE: It took a full day for us to fill up our 9′ x 18′ pool with a traditional garden hose.
9. Make fast friends with a local pool company!
We have 2 local pool companies that are both SO willing to help us when we have questions.
The staff helped Dave get our pool up and running and then helped us figure out what we needed for chemicals to make sure the water stays nice all summer long (see #9 below).
10. Get chemicals in the water ASAP.
As I mentioned above, we had the water tested to figure out what chemicals we needed the day after we filled it with water.
The chemicals you need will be different based on your area, your general climate, the type of water you have, etc. so it’s definitely wise to have a professional give you some expert advice (at least in the beginning).
Once the chemicals were in, we waited 24 hours and then let the kids jump in (yes, it was freezing!)
General Maintenance Tips for Above-Ground Pools:
1. Be prepared for DAILY Maintenance
Dave does almost all the pool maintenance — which I thank him for regularly. It’s not a difficult job, but it DOES require diligently checking on things every day in order to keep the water clean.
He adds chlorine EVERY day — usually right away in the morning when he “opens” the pool.
He also adds a stabilizer to the water when we open the pool in the spring. Then he shocks the water.
From then on, he shocks the pool every other week and uses an algaecide on opposite weeks.
We use our pool skimmer every time we swim (which is almost every day) and Dave vacuums the pool roughly once a week.
NOTE: if you plan to be gone a lot over the summer, you may want to think twice before setting up a Costco pool. The pumps are small, and without daily care, you might just come home to a nasty green pool!
2. Test the Water Regularly:
Dave uses water test strips to test the water each day.
They’re not perfect but they give a pretty good idea of the water quality.
Dave also brings water to a local pool store for testing once a week. They do it for free and tell him exactly what he needs to do to the water.
3. Monitor Your Pump (and run it daily)
You will need to run your pump with the filter regularly — this is important for the health of the water.
That said, you should also monitor your pump each day so you know what your pump can handle.
Our pump seems a little cheap, but Dave has figured out a way to make it work… he typically runs the pump with the filter for 2 hours in the morning. After 2 hours, the pressure often rises, so he switches the pump to “circulate” during the late morning/early afternoon hours. This way, the water is still running through the solar heater (but bypasses the filter). Eventually, he turns the pump off.
He then runs the pump WITH the filter again for a couple of hours in the evening and turns it off before we go to bed.
4. Get a Solar Cover and/or Solar Heater
The main reason we decided to purchase this specific Bestway pool from Costco was because it came with a solar water heater (the black tubing mat behind the pool).
We were initially a bit skeptical as to if the solar heater would actually work… but it DOES! However, it puts more pressure on the pump because the water is being forced through ALL that tubing. This is one reason we regularly monitor the pressure on our pump (see #3 above).
We also use this solar cover (we cut it to fit our specific pool size). We put it on EVERY night (it’s a 2-person job) and it works really well to keep the heat IN and the junk OUT.
5. Skim and “brush down” the pool every day.
I can’t stress enough how important it is to stay on top of all the maintenance for these little pools (especially once the water gets super warm!)
It’s not unusual for our pool to get to 90º by July… and when it gets THAT warm, the algae starts to grow really quickly.
We manage this by skimming the pool and scrubbing down the sides and bottom of the pool on a daily basis. It only takes 5 minutes and keeps our pool really clean!
We like this pool brush (but anything similar should work just fine).
6. USE YOUR POOL REGULARLY!
This is probably my most important tip!
If you aren’t swimming in the pool on a near-daily basis, the water will get green much faster!
How to Disassemble and Winterize an Above-Ground Pool:
We know people who leave their steel-frame pools assembled all winter, but as I mentioned above, we have always chosen to take ours down.
Here’s how we “winterize” our pool:
1. Let the Chlorine Evaporate
When we’re finished with the pool for the year (usually around Labor Day), we let the water sit for 7-10 days so the chlorine evaporates. Yes, it will turn green!
2. Drain as much water as you can with a hose.
Simply connect a garden hose to the drain to get most of the water out into the street (or wherever you plan to drain it).
3. Use a SubPump to get all the water out.
Once the water was below the drain hole, we used a mini sub-pump (only $10) to get the rest of the water out.
4. Clean the inside of the liner.
We clean our pool liner it with vinegar spray and our deck scrub brush (it didn’t take long at all).
5. Suck up any last bits of water or debris.
We used our shop vac to get any last little bits of water out and then let it sit in the sunshine for a few hours to TOTALLY DRY.
6. Disassemble the pool frame:
Once the liner was completely clean and dry, we disassembled the pool.
In full disclosure, we had a really hard time getting the steel frame apart — specifically removing the steel poles from the pool perimeter (the vinyl sides sort of “melted” to the polls).
After a lengthy struggle with this, we decided to keep the long sides of the pool liner connected to the frame, and just took the curved ends and the legs off.
If we were to assemble a pool like this again, we probably would rub Vaseline or another type of “lubricant” over the poles before attaching the liner.
Since we had plenty of storage space in our extra garage, we fold up the pool as well as we can (hotdog style) and put it on the ground in our extra garage all winter. It’s not ideal, but it works for now.
7. Bring the pump inside.
Whether you disassemble the pool or not, make sure you bring the pump into a climate-controlled environment over the winter so it doesn’t freeze and/or break.
Before you bring the pump inside, you’ll need to drain it, empty the sand, and clean it up a bit. This is very easy (and pretty self-explanatory once you see the pump). It should only take a few minutes.
Additional Pool Product Quick Links:
- All Bestway Pools on Amazon
- Chemicals (we like the HTH brand chlorine, shock, and algaecide)
- Floating Chemical Dispenser (this simplifies the process so much)
- Sand for Pump Filter
- Our solar cover (it’s big and you can cut it to size)
- Water test strips
- Thermometer
- Pool brush
- Ladder Lock (a great safety measure if you have young children)
- Mini sub-pump
- Shopvac
- Kids’ goggles (these are our FAVORITES)
NOTE: Visit my Amazon Store for lots more family-friendly favorites!
Related Reading:
Family Friendly Frugal Summer Fun
Frugal Fun for Younger Children
DIY Driveway Chalk Paint
My Simple Long-Torso Swimwear Solution
My Favorite Perennials for Sun and Shade
Overall, we are EXTREMELY happy with our little Bestway Costco Pool and would definitely recommend this frugal option for anyone with little kids who love to swim!
We hope this pool lasts a few more summers; at which point we want to install an underground pool.
Yay!
Pin this post for later.











Marissa says
This pool looks different from the pool with the deck built around it. I’ve searched your blog and read several posts but can’t find any… have you shared details about it? We’re looking to do an above-ground pool with a deck and are trying to find some real-life reviews.
Andrea says
Yes Marissa, The Costco pool was one we used for 3 summer when our kids were very small.
Then we “upgraded” to an above-ground pool with a deck — purchased and installed by a local pool company.
You can see pictures of that pool in this post (I’ve never done a full post about our new pool and deck — sorry!).
John Lorince says
Hi Andrea,
Great blog and post.
Just curious if you think it makes more sense to just go with the pool company first and foremost? The users of the pool would be my kids that are 5, 5, 11 and my wife and I.
I always did envision building a deck around a pool. Was that even possible if you left your Costco pool up over the winter? Or is that not even an issue?
And lastly for what reason did you upgrade to a more permanent solution?
Thank you
John
Andrea says
Hi John,
For your kids, I’d go with the permanent pool and have a company install it.
We went with the Costco pool simply because our kids were SO little (4 kids 6 and under) and we didn’t want them to have any access to the pool unless we were right there. We took the ladder out every time and there was no way they could have gotten into the pool (it was almost 5 feet tall).
Our goal was always to get a permanent pool once the kids were older (they were 10, 8,7, and almost 5 when we got our pool)
There would not be a great way to build any type of deck aroudn the Costco pool b/c it would need to be taken down every winter.
Hopefully this helps.
Sarah says
Great post! Curios if you used an extension cord for your pump or were you able to plug straight into an outdoor power outlet?
Andrea says
HI Sarah — we used an extension cord to reach our outlet — the cord that came with our pump wasn’t very long at all 🙂
Natalie says
Did you find it necessary to buy a pad under the pool ladder to protect the bottom liner from tearing?
Andrea says
we put a large tarp, folded in half, under our pool — just a little extra protection from anything sharp the could poke through the bottom of the pool.
Dawson Rambo says
Thank you so much! My wife and I are considering purchasing a pool exactly like this for our backyard so our granddaughters can swim all summer long! One of the best links of this type I’ve ever read! Thank you again.
Andrea says
you’re welcome — happy to help!
Iris Windom says
Thank you so much. This was extremely helpful.
Alvin says
Thanks for this page. Can we use salt instead of chlorine and is there a safety gate we can purchase if we don’t have a proper fence. I think our region requires one in case a child wanders in our backyard
Andrea says
no, you can’t use salt unless you have the correct pump/filter (which it would indicate on the box).
Carmen Maldonado says
I completely agree with all your comments and as your family did we also enjoyed our pool. We bought it on April 2019 on Cotsco but… the liner is not the best for a tropical weather. We live Puerto and is summer all the year. Also the ladder and the poles (frame) got rusted. So sadly our pool broke because the liner teared up and it almost flooded my house. Even with this event last Monday we think it is a great pool.
Toni says
I want the pool for winter use. Do you recommend it for October thru May use?
Andrea says
well I live in Michigan, so I don’t recommend it for use in the winter 🙂
ashley eichler says
Hi there! This was a great blog. We got a Bestway pool from Costco this year. First time pool owner! The set up went well, but I am really questioning our pump. I have taken it apart and re-done it several times in the last 2 months. I do not feel suction from the B side, nor do I feel push out from the A side. I do feel like you should be able to tell the pump is doing SOMETHING. Can you feel that on your pool when you are near the suction or push out areas? I am wondering if it is just not working at all and if thats the case, I will have to reach out to Costco or Bestway but there is not alot of information online about the pumps. Just looking for advice. We have all the chemicals, vacuum, etc. I am out there daily takin care of it, but if nothing is circulating I just dont think its ever going to be enough. Thank you for your time!
Fiona Stade says
We had this same problem because in very fine print they tell you to use baby powder on the polls which we missed. Well the pool cost quite a bit so I called Bestway and they replaced the liner and poles for free for the inconvenience. Iff its still the first year I would call. It’s covered by the warranty.
Kay says
This was very detailed and helpful, thank you. We’ve had a handful of round pools, yet currently installing our very first oval pool. With the ground level and all legs straight, we attempted to fill. Halfway filled we noticed both bottom sides bowing out and both top side rails caving in. We drained the pool, placed pavers under the legs and started filling it again but have the same effect therefore we stopped filling at 20” of water. It measures 8 ft wide (should be 10ft)
Also at both start ups we made certain all of the bottom liner touched the ground, yet upon filling with water, the bottom center sides are raised. My question is, Will the top side rails push out as the water fills? Part of me thinks as the water fills the walls it will push the rails out, yet another part of me doesn’t think it will push them out by 2ft and the pool will burst at the seams. Willing to start over if need be. We reside in Florida, a pool is a must! And I’d like it to last a while. And and all suggestions are greatly appreciated. Thank you, Kay
Andrea says
Hi Kay,
Our pool did “cave in a bit” as we filled it up but it did eventually straighten out. Also, the bottom will always bulge out more than the top.
One thought — I wonder if your pavers are too high? If the legs are too high, they will naturally bend in as the pool fills up with water. You could try removing the pavers or digging them down.
Hope this is helpful! Enjoy the cool water!
Jody says
We take our Costco pool down every year. We advise Vaseline on the pipes before you thread them to support the pool. It makes removing them at the end of the season a whole lot easier.
Andrea says
great tip –we should have used vaseline!
Teresa Cass says
Hi my hoses cracked over the winter and I have called at least 15 Bestway stores and they will not answer the phone and you cannot leave a message because the answering machine is full! I am so upset do you know where I can order spare parts? I would appreciate it so much if you could let me know. Thansks
Tasha says
Hi there. Could you please tell me if you can run the skimmer at the same time with having the solar mat hooked up as well. I am not getting any suction through skimmer now that I hooked up the mat. Or do you have to use that without solar mat? If not, do I have to unhook solar mat each time to use the skimmer and put the hose from the mat back to the sand filter to do so? Hopefully that makes sense. Thank you
Andrea says
are you talking about the skimmer or the vacuum? you can skim the pool whenever as it’s not attached to any suction, but when you vacuum, you’ll need to change the suction/air flow from the pool to the vacuum. You won’t need to unhook the solar mat, but there won’t be any water flowing through the solar mat while you are vacuuming.
Amanda says
Good morning- thanks you for writing all this. Do you use a pool vacuum? What kind please?
Andrea says
our vacuum came with the pool — is the same brand and specifically designed to go with the pool.
Sarah Springer says
You said that yours came with a vacuum . I have the same pool and it didn’t come with the skimmer or vacuum and struggling to find a decent one. There are many best ways ones . Just want to know one that works . Which do you have ?
Rebecca C says
Yes i have help my family put up bestway pool my concern is the sides of the pool are they supposed to lean a little inward ?
Andrea says
the sides of our pool leaned in a bit too — I wouldn’t be concerned about that!
Alyse Frisbie says
I agree with you
Wakena Carr says
We got this exact pool. My only issue is we have had a few parts need replaced and can’t find any. And bestway and Costco are no help. How do you get replacement parts?
Andrea says
sorry for the issues. We always contacted Bestway directly when we had issues. It did take a while to get in contact with them, but we eventually got the part we needed (for free)
Rod says
Hi! Your blog is definitely helpful so thank you for that! Did you guys have any issues with the suction of the pump? I attach the skimmer to the intake valve and it doesn’t really seem to work. Best way warned me that it won’t be too powerful but should work but our pump doesn’t seem to have enough power to suck anything up!
Debra MacLean says
I want to thank you for all of the time and effort that you put into creating this post. I imagine it took quite a while to write it, not to mention all of the trial and error you (and your husband) did with your own pool. Your post has provided my husband and me with a significant amount of invaluable information that will be tremendously helpful. The fact that you took the time to collate these tips for people you don’t even know – and for free – shows that you are a truly kind and thoughtful person. THANK YOU SO MUCH!!
Andrea says
You’re very welcome Debra! Glad this post was helpful for you!
Enjoy that pool 🙂
Steve says
Hello Andrea,
Do you know if we can put the pump and the solar mat near top or bottom inside of towards the side of the pool?
Thanks!
Charlene says
I saw everything but the price. I need to know how much it is please
Cassy says
Hi,
Your page was a life saver with set up. Thank you for taking the time to post. I need your input on how to empty the strainer basket without water shooting everywhere. I cut off the filter and set the valve to close. I closed the connection valve where the water returns to the pool. I slowly opened the strainer lid and out pours water. Help! What step did I leave out? Thank you in advance for taking the time to respond.
Bruno says
A trick I found is to place a plastic bag or saran wrap over both “B” filter heads leading to the pump, and tie them with velcro or am elastic band to hold them in place. That blocks most water flow and allows access to the “filter basket” with very little water loss. It beats removing the “B” heads all the time to put in plugs.
Sharon S says
Hello!
We got our 12×22 oval pool up. Still filling but not optimistic the cover will work for us and even if it does, going to be a struggle each time. So curious – our old pool I used a bubble cover but every time I removed it, any “stuff” that was on the top just fell into the pool, any secrets or tips to avoid that?
I can find 12×24 covers but not 22, I may just have to make that work unless you have any suggestions.
Nervous about this filter, our old Intex one was mindless. Did your husband take awhile to get the hang of it?
Thanks for all of your tips, I have referenced this page MANY times while getting things prepped and set up.
Andrea says
Hi Sharon, our cover NEVER fit — we had 4 adults trying to squeeze it on but it didn’t work.
We ended up just buying a large solar cover and cutting it to size (I believe I linked to it in the post).
Hope this helps!
L flowers says
Hi! Thank you for all the great information. We have the 2020 Costco pool and I am wondering if you can swim with the pump running? Does it need to be unplugged while we are in the pool? Maybe a weird question but just want to make sure we are safe.
Andrea says
yes, you can DEFINITELY swim while the pump is running — in fact, that’s probably the BEST way to keep your pool clean (lots of swimming to stir up any “junk” and then the pump and filter will suck up the junk!)
Jacob Luxenburg says
Hi Andrea-Thanks for your blog! We just finished setting up our 18x9x48 Bestway pool from Walmart. Our pump is a bit different than yours. Can you let me know what chemicals you are using to maintain your pool? I find there is an ocean of information online and not sure exactly what to use. Thanks!
Andrea says
Hi Jacob,
I mentioned this in the post — but maybe you missed it. We use the HTH brand of products (chlorine, shock, and algicide)
Sohel Hasan says
Wow! Such an awesome blog.
I had the same experience last year in my country and some of my friends were really enjoyed it.
Keep up the good posting.
Jon says
Hi – first thank you for your post. very informative. i just ordered similar pool from same co and costco – 24feet by 12.
anyway, my backyard slants down a bit. maybe 6 – 8 inches throughout the 24 feet length. the company wont call me back via their site. do you think this is a total – No? you mention some pool structure issues with a slant. would love your 2 cents. thanks!
Andrea says
Hi Jon,
You’re welcome 🙂
In my opinion, that’s too big of a slope — you’ll want to level it out a bit before setting up your pool.
Susie says
Very helpful!!!
Thank you so much .
Jill says
Your blog was helpful as we set up the 2020 model of this Costco pool – thank you! We were finally able to start using it today, and I have two questions for you.
1. Is it normal for the side wall to sway a lot as the water splashes around? The metal U-frames seems to be staying in place, but the pool side walls have a lot of movement as waves crash against it.
2. How high do you fill your pool? We have it about 2.5 inches below the grey area, and I wonder if we should drain some before any rain storms to prevent overfilling.
Thanks so much for your insight!
Andrea says
HI Jill, yay for getting the pool up!
I think that’s pretty normal to have the sides sway. We tell our kids they can’t hang on the sides or push off from the sides.
As for filling it, the worst that could happen is that it would overflow (which really isn’t that big of a deal). It’s more important that you have enough water so the “blowers” are fully covered with water
Jill Deitering says
Thank you for your reply! It’s been almost a week, and the pool is still standing, so things are looking good. I do have another question, if you don’t mind. What is the pressure reading on your pump? The manual says it should be around .45 bar/6.5 PSI but ours is usually around .54 bar/8 PSI. We have backwashed, rinsed, and checked the filter basket. I am not super confident in the manual’s recommendations. Any thoughts on this?
Andrea says
yay!! I sort of explained the pressure thing in the post, but Dave regularly turns the pump on and off throughout the day to avoid the pressure getting too high. Ours would easily get close to 8 if we didn’t turn it off periodically.
I’m sure the pump isn’t top-of-the-line, but it’s good enough for hot summer days at home!
Jill Deitering says
Thanks for the reply! We are turning it off often (1-2 hours) because of the “issue”, so I don’t think that’s it. It’s starting at about 7. 5 right away now. We will keep troubleshooting. Thank you!
Andrea says
sorry I can’t be of more help. The pump has been the most frustrating part for us too!
Jill says
Update: We decided to take the pump off and open it up. The issue is the curse of Cottonwood! We have Cottonwood trees blowing and there were a lot of seeds (not sure that’s the right word) stuck in the gray portion (sits on top of tank) of the filter. It’s a bit of a pain to clean, but we are so glad we figured out the issue, and now we just need to stay on top of it until the Cottonwood trees are done doing their business. 🙂
Andrea says
yay — glad you figured it out!
LINDA says
Did you find a compatible pool vacuum?
Andrea says
HI Linda, our pool came with a vacuum that was specifically made for this pool. That said, I’m guessing you could buy one on Amazon — I’m just not sure what one to recommend??
Eden Dales says
hi thanks for your help! I got this pool but it is still freezing cold. Any suggestions for a heater I can get for this pool?
thanks! also do I need a different filter??
Andrea says
yes, it will take a bit to warm up. If you use the heating pad and solar cover I mentioned in the post, that should help!
As for the filter, if you’re using the pump that came with the pool, you should not need an additional filter!
Sarah says
What do you recommend for cleaning the exterior of this exact pool? Ours is quite dirty and would like to try to clean up the sides and bottom but can’t find much advice online about the best products to use, thanks!
Andrea says
Hi Sarah,
We just use any household cleaner (often just vinegar spray) to clean the inside and outside of the pool before we set it up and when we’re ready to take it down.
You could also use a garden hose with a “jet” nozzle to give a little more pressure on the spray — but I wouldn’t use a power washer as that might be too powerful!
Detra Cotton says
Thank you for this my pool from Costco is 18by22 and I don’t know how to put the pump on and while I was filling it the sides started to lean in a bit….is this normal and who do I contact to show me about the pump…. I cannot figure out how to do it….
Andrea says
Hi Detra — yes, it is normal for the sides to lean in a bit — but not a ton. Our first year, the side were “caving in” a bit, but we fixed it the second year. It might just be that the legs aren’t totally straight.
As for the pump, I think if you watch the YouTube video I linked to in the post, that should show you how.
diana says
Hey! I was wondering if there are costco pools on sale right now. I’m waiting to find any good pools around costo wholesale and please tell me if there are some right now. I can not go due to the Corona Virus but please tell me if there are some right now. The reason why I need a pool atm is because it is my daughters birthday and we are trying to find a pool so her friends and her can swim please help me find a pool or tell me if there are some.
Gary says
Hello Andrea,
Thank you for this wonderful post, it has all the details one should be aware of before starting .
How did you fix the sides from leaning and how much of it leaning is Ok ?
My slant side poles cant go outward any further .
Also though my backyard looks flat, how can we be sure ?
Thanks!
Andrea says
I think the sides will always lean in a little bit… they usually straighten up again once the pool fills to the top. We removed our grass and leveled out the dirt with a long 2″x4″. It wasn’t perfect, but pretty accurate!